TL;DR:
- Proper paint curing requires chemical reactions, not just surface drying, to ensure durability.
- The MEK rub test is an effective field method to verify full paint cure before asset service.
- Inadequate surface prep, incorrect mixing, and environmental factors are main causes of curing failures.
A freshly painted surface can look perfect, pass a visual inspection, and still fail within weeks. That’s the hidden danger of misunderstanding paint curing. For facility managers and procurement officers overseeing municipal water tanks, pipelines, or industrial structures across Central Florida, confusing “dry to the touch” with “fully cured” is a costly mistake. This article breaks down exactly what paint curing means, how it works, what causes it to go wrong, and how you can verify it in the field before putting any asset back into service. Getting this right protects your investment and prevents expensive rework.
Table of Contents
- What is paint curing and why does it matter?
- The stages and methods of paint curing
- Common curing failures and how to prevent them
- How to test and verify paint curing in the field
- Why paint curing failures are more common than you think
- Partner with expert coating professionals for reliable curing
- Frequently asked questions
Key Takeaways
| Point | Details |
|---|---|
| Curing vs. drying | Paint must fully cure—not just dry—to provide true protection and durability. |
| Prevention is key | Over 60% of curing failures are caused by poor preparation, making prep the most critical step. |
| Field verification matters | Testing with a MEK rub ensures coatings have reached full cure before returning to service. |
| Method choice impacts results | Selecting the right curing method affects project schedules and long-term asset performance. |
What is paint curing and why does it matter?
Paint curing and paint drying are two completely different events. Most people treat them as the same thing, and that misunderstanding causes real infrastructure failures.
Drying happens when the solvent or water in a coating evaporates, leaving the surface feeling firm or tack-free. You can often walk on a floor or lean a ladder against a wall without leaving a mark. It sounds like the job is done. It isn’t.
Curing is the chemical process that follows. The coating must undergo internal molecular changes that build its true strength, hardness, and resistance to chemicals, abrasion, and environmental stress. Paint may appear dry but not be fully cured, causing failures if put into service prematurely. For a water treatment facility, a fuel storage tank, or a bridge structure in Central Florida’s harsh humidity and heat, that distinction can mean the difference between a 20-year asset and one that needs recoating within two years.
The chemistry behind curing
Three primary processes drive paint curing:
- Evaporation: Solvents leave the film. This is largely what produces the “dry” feeling. Faster in warm, dry conditions. Slower when humidity is high.
- Polymerization: Molecules in the binder link together into long chains, building mechanical strength. This is critical for epoxy and urethane coatings common on industrial structures.
- Oxidation: Relevant mainly to alkyd coatings. Oxygen from the air reacts with the binder to harden the film. Slower in humid environments, which is a factor in Florida conditions.
The table below shows how these processes relate to coating types commonly used on municipal infrastructure:
| Coating type | Primary cure mechanism | Typical cure time | Common application |
|---|---|---|---|
| Epoxy | Polymerization (two-part) | 24 to 72 hours | Water tanks, pipelines |
| Polyurethane | Moisture/polymerization | 12 to 48 hours | Steel structures, bridges |
| Alkyd | Oxidation | 48 to 96 hours | General metal, equipment |
| Zinc-rich primer | Chemical/moisture | 1 to 24 hours | Structural steel primer |
Why curing matters for Central Florida infrastructure
Central Florida’s climate adds unique pressure to every coating project. High ambient humidity, intense UV exposure, and frequent rain events can all interfere with proper curing. A coating applied during afternoon humidity spikes on a summer day may cure slower, blush (a whitening defect), or fail to reach full hardness before the next rainfall.
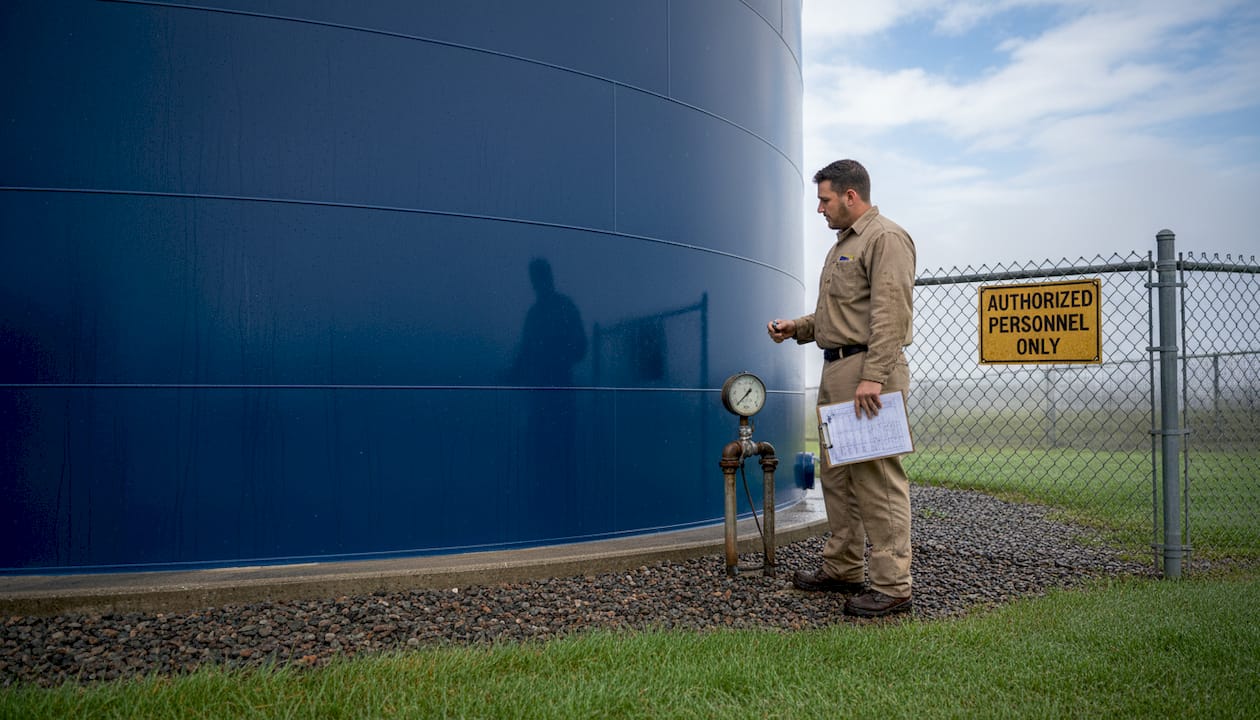
For assets like municipal water tanks, airports, or industrial pipelines, the stakes are high. A coating that isn’t fully cured offers compromised adhesion, reduced chemical resistance, and shorter service life. Facility managers responsible for painting for durability know that shortcuts during the curing window translate directly into higher long-term maintenance costs. Getting curing right the first time is not just a best practice. It is a financial decision.
The stages and methods of paint curing
Understanding what curing is leads naturally to the specifics: how curing actually takes place and what options you have for achieving it on your projects.
The three stages of a coating’s life
Every coating goes through predictable stages from application to full service readiness:
- Application: The coating is mixed and applied. For two-component systems like epoxy, the pot life (the window before the mixed product becomes unworkable) begins the moment you combine the components.
- Dry to touch / surface dry: Solvent evaporation produces a firm surface. This stage can occur within minutes or hours depending on the product and conditions. It is not cure.
- Full cure: The coating has reached its designed mechanical and chemical performance. This may take hours, days, or even weeks depending on product type, thickness applied, and environmental conditions.
Skipping ahead in this sequence, for example putting a coated pipe back into chemical service while it’s still in stage two, almost always results in early failure.
Primary cure methods and when each is used
| Cure method | How it works | Best used for | Project timeline impact |
|---|---|---|---|
| Air cure | Ambient temperature and airflow drive evaporation and crosslinking | General structural steel, equipment | Longer, weather-dependent |
| Thermal cure | Elevated heat accelerates crosslinking | Coil coatings, factory-applied finishes | Fast, controlled environment |
| Chemical cure | Catalyst or hardener drives reaction | Epoxies, polyurethanes, two-part coatings | Consistent, product-specific |
| UV cure | Ultraviolet light triggers polymerization | Specialty floors, transparent finishes | Very fast with proper equipment |
For most municipal and industrial projects in Central Florida, chemical cure systems dominate. Two-component epoxies and polyurethanes offer the best balance of chemical resistance and mechanical toughness for structures exposed to water, fuel, or aggressive environments.
Improper mix ratios or environmental conditions cause incomplete curing, resulting in failures like tackiness or poor adhesion. This is one of the most common errors on job sites, particularly when workers mix product by eye rather than by weight or volume using a calibrated system.
Pro Tip: Always weigh two-component coatings using a calibrated digital scale rather than relying on volume estimates. Even small deviations from the specified mix ratio can dramatically alter the curing chemistry and final film performance. For large-scale projects, this single practice change can prevent thousands of dollars in rework.
Facility managers reviewing project specifications for their sites should insist that industrial painting best practices are part of any contractor’s documented quality control process. This includes not just product selection but mixing verification records and environmental monitoring logs.
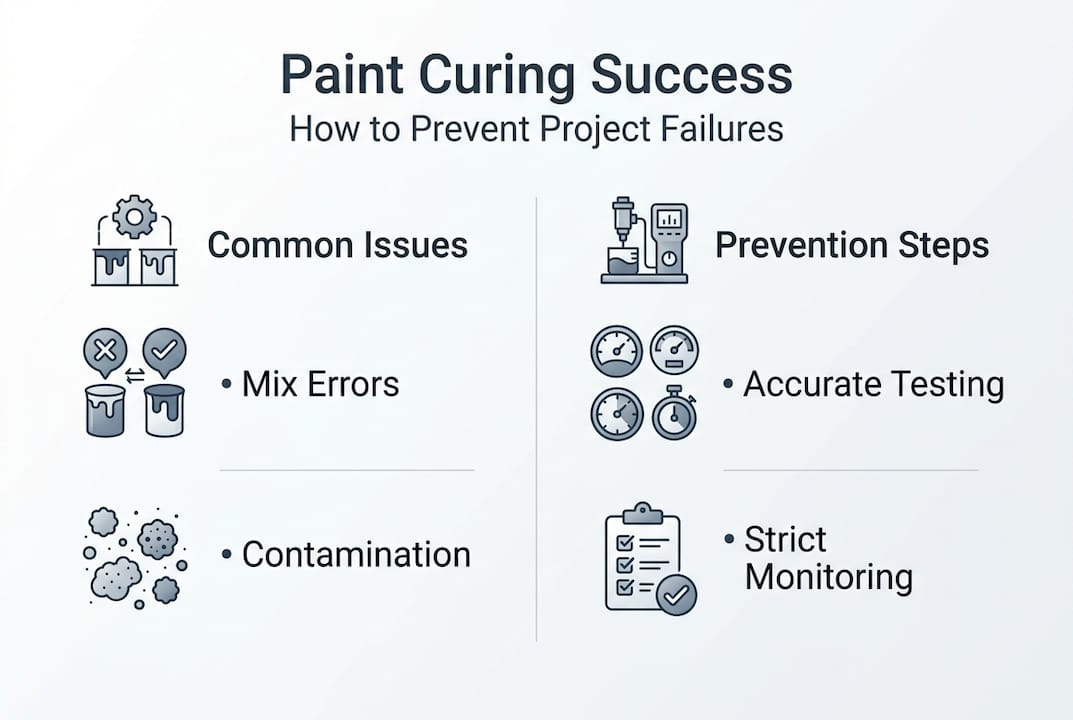
Common curing failures and how to prevent them
After understanding the curing process, it’s crucial to recognize where things most often go wrong, and what you can do to prevent those costly mistakes.
Top causes of incomplete curing
Most curing failures in the field are preventable. They rarely stem from a product defect. They come from process breakdowns. Here are the most frequent causes:
- Inadequate surface preparation: Contamination from oil, rust, moisture, or mill scale prevents proper adhesion and disrupts chemical bonding. Surface prep failures account for the majority of coating failures.
- Wrong mix ratios: Two-component products depend on precise ratios. Even a 10% deviation can prevent full crosslinking.
- Environmental conditions out of spec: Applying coatings when surface temperature is below the dew point, when humidity exceeds 85%, or when temperatures are outside the product’s recommended range all compromise curing.
- Rushing to service: Putting an asset back into operation before the coating reaches full cure is one of the most common and costly mistakes on tight project timelines.
- Contaminated application equipment: Solvent residue, water in spray lines, or dirty rollers can introduce contaminants that disrupt the coating chemistry.
More than 60% of curing failures are due to poor preparation, with mix ratio errors and contamination also major culprits. That statistic should be front of mind for anyone signing off on a coating project.
Prevention strategies that work
Preventing curing failures requires building quality checks into every phase of the project, not just the final inspection. Start with documented surface prep best practices that specify minimum surface profile, cleanliness standards (such as SSPC-SP 10 near-white blast), and moisture checks before any coating is applied.
Require applicators to record environmental conditions at the start and during each shift. If conditions move out of spec, work stops. No exceptions. This may feel like it slows the project, but it is far cheaper than a full removal and recoat. Additionally, all workers handling two-component products should receive specific training on mix ratios, pot life limits, and the consequences of deviation.
Reviewing safety tips for curing is also essential for project teams, since many two-component coatings involve isocyanates or other reactive compounds that require strict PPE protocols.
Every curing failure that reaches the field adds cost at every stage: removal, surface re-preparation, recoating, and extended downtime for the asset. Getting it right the first time is the only strategy that makes financial sense.
How to test and verify paint curing in the field
Now that you know what threatens the curing process, the next step is learning how to actually measure and verify successful curing before accepting a job.
The MEK rub test: your most practical field tool
The methyl ethyl ketone (MEK) rub test, standardized under ASTM D5402, is the industry’s go-to method for checking whether a coating has reached full cure on-site. It requires no special laboratory equipment and can be performed by a trained inspector during or after a project.
Here’s how to conduct it:
- Saturate a clean cloth with MEK solvent. Use a cloth folded to create at least four layers for consistent pressure.
- Rub the coated surface firmly in a back-and-forth motion. Each forward and backward pass counts as one double rub.
- Count to 100 double rubs while maintaining consistent pressure and re-saturating the cloth every 25 rubs.
- Inspect the cloth and the surface. Look for coating transfer onto the cloth or visible softening, marring, or removal from the surface.
- Interpret the result: A MEK rub test per ASTM D5402 with over 100 rubs indicating a full cure is industry standard. If the surface shows damage at 50 rubs, the coating is significantly under-cured.
When and where to test
Test multiple locations across the coated surface, not just one spot. Pay particular attention to areas that may have experienced different environmental conditions during application, such as shaded versus sun-exposed sections, or areas near ventilation openings in enclosed structures.
“Testing cure in one spot and assuming the rest of the job is equivalent is one of the most common inspector shortcuts that leads to premature failures. Sample broadly.”
Perform the test only after the manufacturer’s stated cure time has elapsed under actual field conditions. If temperatures were lower than specified during the cure window, extend your wait time before testing. This matters especially in Central Florida, where evening temperatures can drop enough to slow curing significantly on certain two-component systems.
Pro Tip: Always document your MEK rub test results with photographs showing the test location, the number of rubs achieved, and the condition of the cloth and surface. This documentation protects facility managers during contractor disputes and supports warranty claims.
For ongoing monitoring of maintaining painted surfaces across your asset portfolio, MEK testing should be part of your standard acceptance protocol. Require it in your project specifications, not as an optional step, but as a mandatory sign-off item before any asset returns to service.
Why paint curing failures are more common than you think
After reviewing all the technical processes, here is a perspective from the field that most project guides skip: paint curing failures are not primarily a chemistry problem. They are a communication and culture problem.
In over 20 years of working on infrastructure projects across Central Florida, the pattern is consistent. Failures rarely happen because a contractor used the wrong product. They happen because someone accepted visually “done” work without real verification. A surface looked good, the project was behind schedule, and nobody pushed back hard enough to say “we need to wait.”
Prep shortcuts are the single biggest driver. Even with best intentions, overlooked prep or rushed schedules undermine the curing process. The pressure to restore an asset to service, whether it’s a water tank back online or a runway section reopened, creates a subtle but powerful incentive to call a job “done” before it actually is.
The fix requires a cultural shift, not just better checklists. Facility managers and procurement officers need to write verification requirements into contracts. Contractors need to understand that sign-off on cure quality is as important as sign-off on surface cleanliness. And project schedules need to account for real-world cure windows, not best-case lab conditions. Look at coating failure prevention strategies as a systemic investment, not a one-time fix.
Partner with expert coating professionals for reliable curing
Getting paint curing right on large infrastructure projects demands more than good intentions. It takes verified processes, calibrated equipment, trained applicators, and experienced oversight at every stage.

Southern Sandblasting & Painting LLC brings 20 plus years of industrial coating experience to municipalities, utilities, airports, and industrial facilities across Central Florida. From rigorously controlled surface preparation to documented cure verification, we build quality into every phase. If you’re planning your next coating project, explore our resources on industrial coatings for Florida infrastructure and review our surface preparation guidance to ensure your assets get the protection they deserve, done right the first time.
Frequently asked questions
How long does paint curing typically take for industrial coatings?
Curing time varies widely by method and ambient conditions, ranging from a few hours for fast-cure chemical systems to several days for oxidative or ambient air-cure products under real field conditions.
What’s the difference between paint drying and curing?
Paint can appear dry but not be fully cured; only full curing delivers the ultimate mechanical hardness, adhesion strength, and chemical resistance the coating was designed to provide.
How can facility managers verify that a coating has fully cured?
Use a MEK rub test per ASTM D5402, recognized for confirming full cure in the field; achieving over 100 double rubs without coating failure or transfer indicates the coating has reached full cure.
What are the main consequences of incomplete paint curing?
Improper mix ratios or rushed service cause curing failures resulting in tacky, weak coatings that peel prematurely, shortening asset service life and driving up long-term maintenance and replacement costs.


