
TL;DR:
- A protective coating mockup is a full-scale test applied to an actual substrate to set performance benchmarks before large-scale coating. It reduces risks by verifying substrate compatibility, environmental conditions, and application processes, preventing costly failures. Proper design and implementation of mockups require realistic conditions, standard testing methods, and stakeholder approval to ensure reliable quality control.
A protective coating mockup is defined as a full-scale, controlled test area applied to a real substrate to establish performance benchmarks before large-scale coating begins. The industry standard size is at least 100 square feet, large enough to capture texture, color, dry film thickness, and slip resistance under real project conditions. Engineers and designers working on infrastructure projects use coating mockups to validate every variable before committing to a full application run. Skipping this step is one of the most common and costly mistakes in industrial coating work.
What is a protective coating mockup and what standards govern it?
A protective coating mockup is not a small paint chip or a lab sample. It is a full-scale test section built on the actual substrate, under actual site conditions, using the same materials and equipment planned for production. Sherwin-Williams guidance identifies the mockup’s primary purpose as aligning customer and stakeholder expectations in ways that small samples simply cannot achieve.
Two ISO standards govern how adhesion is measured on these test areas. ISO 16276-1:2025 defines the pull-off test method, which applies perpendicular tensile force to the coating until fracture occurs. The standard requires full curing before testing: a minimum of 10 days at temperatures above 15°C and relative humidity below 80%. ISO 16276-2:2025 covers cross-cut and X-cut methods, where cross-cut applies to coatings up to 250 µm and X-cut carries no thickness limitation, making it the preferred method for thick industrial systems.
Key technical criteria for a valid mockup include:
- Minimum area: 100 sq ft to capture real-world texture and color variation
- Substrate representation: The test area must include complex geometry such as welds, edges, and bolt heads
- Curing conditions: Temperature, humidity, and cure time must match production specifications
- Measurement protocols: Dry film thickness gauges and adhesion testers must be calibrated before use
- Acceptance criteria: Rating scales from ISO 16276-2:2025 define pass/fail thresholds for cross-cut results
Pro Tip: Never compare pull-off test results across different instruments or methods. Each project requires its own baseline, and cross-method comparisons are invalid for acceptance decisions.
How do coating mockups reduce risk in infrastructure projects?
Mockups are the most direct tool for catching coating failures before they happen at scale. Visual and performance validation through a mockup reduces risk and aligns stakeholder expectations before full-scale application begins. On infrastructure assets like water tanks, bridges, and airport structures, a single coating failure can trigger shutdowns, regulatory action, and expensive rework.
The risk reduction process follows a clear sequence:
- Substrate verification. The mockup reveals whether the prepared surface meets the required profile and cleanliness standard. Poor surface profiles are a leading cause of premature coating failures in field applications.
- Compatibility confirmation. Applying the full coating system to the actual substrate confirms that the primer, intermediate coat, and topcoat bond correctly under site conditions.
- Substrate remediation. Mockups expose issues like surface porosity, contamination, or existing coating incompatibility that require patching or additional preparation before production begins.
- Environmental control verification. Temperature, humidity, and dew point readings taken during the mockup confirm that the environmental controls in place are adequate for the coating system specified.
- Equipment calibration. Spray tips, pressure settings, and application rates are dialed in during the mockup phase, not during the production run.
- Stakeholder sign-off. The completed mockup becomes the physical reference standard that all parties, including owners, inspectors, and contractors, agree to before work proceeds.
Experienced project managers treat the mockup phase as a calibration window. Testing equipment and spray techniques during the mockup prevents the most expensive category of coating problems: those discovered after full application. For projects involving asset protection coatings on critical infrastructure, this phase is not optional.
How to design and implement a coating mockup in the field
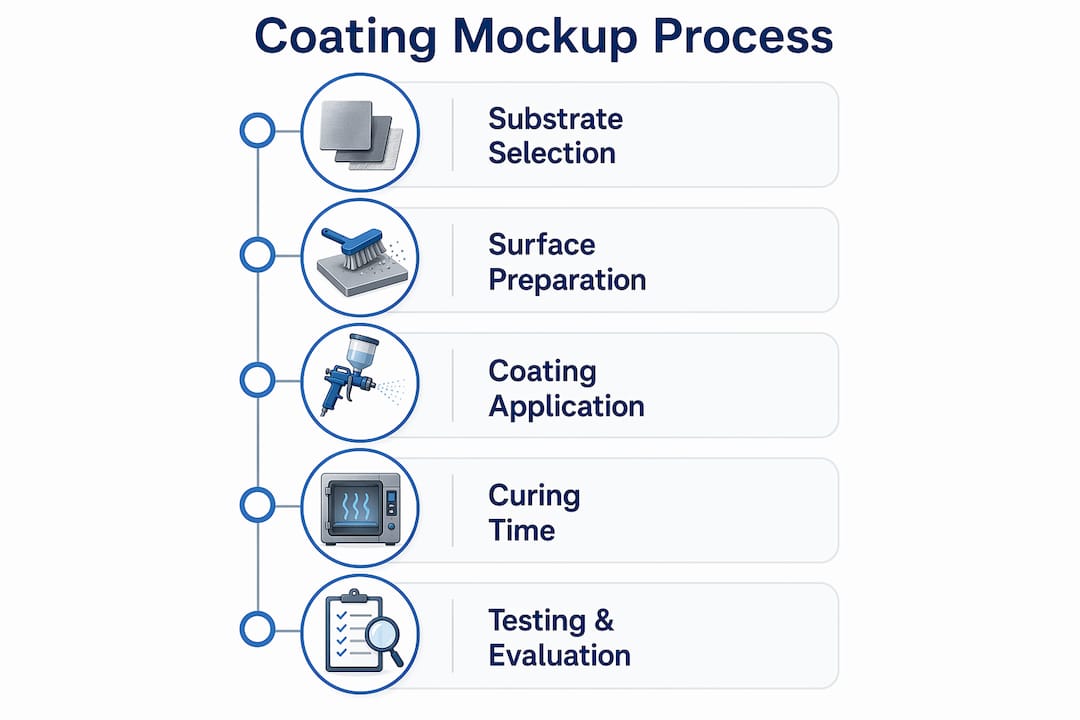
Effective mockup design starts with substrate selection. The test area must represent the most challenging conditions on the project, not the easiest. That means selecting a section that includes welds, edges, and bolt heads, where coating uniformity is hardest to achieve and where early failures most often occur.
The implementation process covers these core steps:
- Site selection: Choose a 100 sq ft minimum area that reflects the full range of substrate conditions present on the project.
- Surface preparation: Complete the same substrate preparation steps planned for production, including abrasive blasting, cleaning, and profile verification.
- Environmental monitoring: Record temperature, humidity, and dew point before, during, and after application. Conditions outside specification invalidate the mockup.
- Application: Apply each coat using the same equipment, techniques, and personnel planned for production. Deviations during the mockup produce results that do not transfer to the production run.
- Curing period: Allow full cure before any testing. Rushing this step produces false adhesion readings.
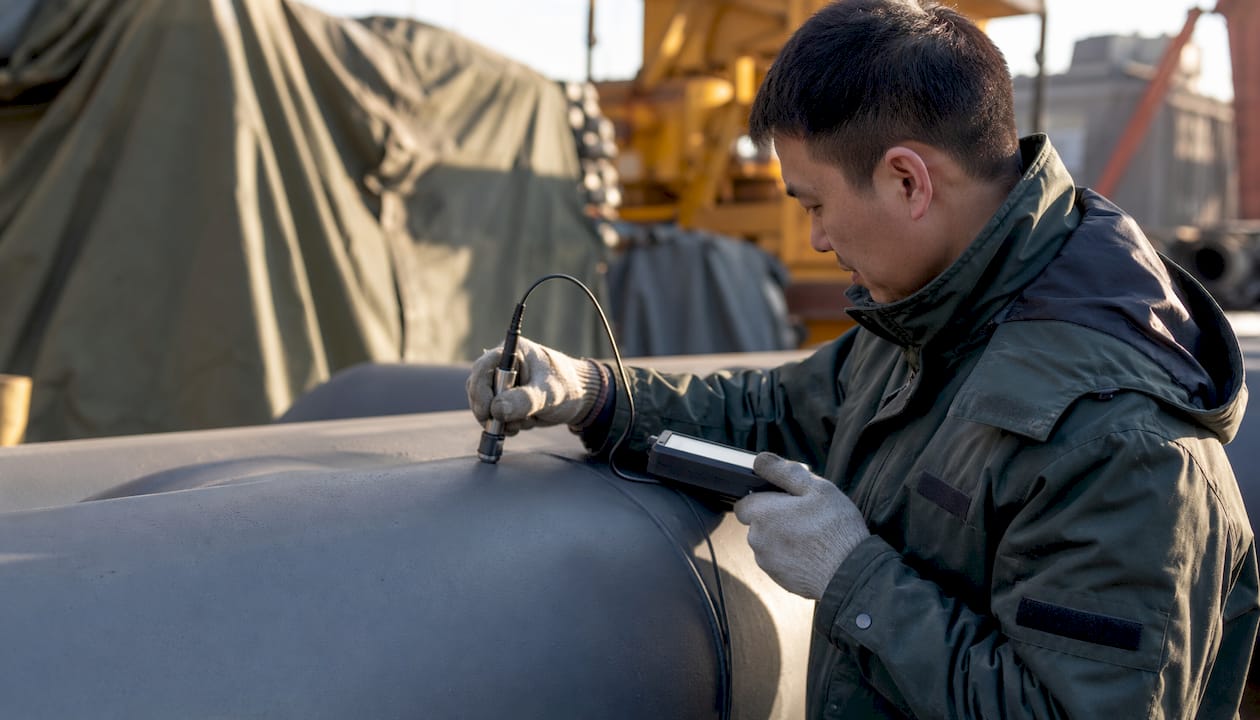
- Non-destructive testing: Measure dry film thickness across the full mockup area using calibrated gauges. Document all readings.
- Destructive testing: Perform pull-off or cross-cut adhesion tests on off-structure test panels created under the same conditions, not on the infrastructure itself.
- Documentation and approval: Compile all test results, environmental logs, and photographs into a formal record. Distribute to all stakeholders for written approval before production begins.
| Mockup phase | Key action | Output |
|---|---|---|
| Substrate selection | Identify representative, complex geometry | Defined test area |
| Surface preparation | Abrasive blast and clean to specification | Verified surface profile |
| Application | Apply full system under monitored conditions | Coated test section |
| Testing | Non-destructive and off-structure destructive tests | Adhesion and DFT data |
| Documentation | Compile results and obtain stakeholder sign-off | Approved reference standard |
Pro Tip: Build two or three off-structure test panels alongside the main mockup. These panels absorb all destructive testing, leaving the infrastructure surface coating intact and undamaged.
Common misconceptions engineers should know about coating mockups
The most damaging misconception is that a mockup is purely an aesthetic sample. Engineers who treat it as a color-approval exercise miss its primary function as a quality control and process validation tool. A coating mockup that passes visual inspection but fails adhesion testing under ISO 16276-1:2025 is a failed mockup, regardless of how good it looks.
A second misconception is that one mockup covers the entire project. Conditions change. If the project spans multiple months, environmental shifts, new material batches, or crew changes can all invalidate the original mockup’s findings. Treating the mockup as an ongoing calibration tool, rather than a one-time event, produces more reliable outcomes.
Practitioners caution that comparing pull-off testing results across different instruments and methods is invalid. Mockups establish project-specific performance baselines, and those baselines cannot be borrowed from other projects or previous work on the same asset.
Additional nuances that matter in practice:
- Dry film thickness variation: DFT readings across complex geometry will vary. The mockup establishes the acceptable range, not a single target number.
- Off-structure panels for destructive tests: Destructive testing on off-structure panels protects the asset while still producing valid quality data.
- Environmental fluctuations: A mockup performed in mild spring conditions may not predict coating behavior during peak summer humidity in Florida. Seasonal re-validation is worth considering on long projects.
- Mockup as insurance: Industry specialists confirm that mockups, though time and budget intensive, are the best protection against costly rework in volatile environments.
Understanding these nuances separates engineers who get consistent coating performance from those who manage recurring failures.
Key Takeaways
A protective coating mockup is the single most effective tool for preventing coating failure at scale, because it validates substrate compatibility, application process, and stakeholder expectations before production begins.
| Point | Details |
|---|---|
| Standard mockup size | A minimum of 100 sq ft is required to establish valid texture, film thickness, and adhesion benchmarks. |
| Governing test standards | ISO 16276-1:2025 (pull-off) and ISO 16276-2:2025 (cross-cut/X-cut) define acceptance criteria for adhesion testing. |
| Risk mitigation function | Mockups catch substrate defects, compatibility failures, and equipment issues before full-scale application. |
| Off-structure test panels | Destructive adhesion tests belong on separate panels, not on the infrastructure itself. |
| Ongoing calibration | Treat mockups as a recurring process tool, not a one-time approval step, especially on long projects. |
Why mockups deserve more budget than they typically receive
After 20-plus years of working on industrial coating projects across water tanks, pipelines, and airport infrastructure in Central Florida, the pattern is consistent. Teams that under-resource the mockup phase pay for it twice: once during rework and again in schedule delays. The mockup is not overhead. It is the cheapest form of quality assurance available on a coating project.
The teams that get this right treat the mockup as a production rehearsal, not a paperwork requirement. They bring the actual crew, the actual equipment, and the actual environmental conditions into the test. When the mockup passes, they have real confidence in the production run. When it fails, they have found the problem at 100 sq ft instead of 10,000 sq ft.
The 2025 and 2026 updates to ISO 16276-1 and ISO 16276-2 tighten the requirements around calibration and sampling plans. Projects that have not updated their mockup protocols to reflect these standards are operating on outdated baselines. That gap is where failures originate.
My advice: budget the mockup phase as a fixed line item, assign your best applicator to it, and document everything. The approval record from a well-executed mockup is also your best defense if a coating dispute arises later.
— Results
Southernsandblastingandpainting: surface prep and coating services for industrial projects
Proper surface preparation is what makes a protective coating mockup meaningful. Without a correctly blasted and cleaned substrate, even the best-designed mockup produces unreliable data.

Southern Sandblasting and Painting brings 20-plus years of industrial surface preparation and coating experience to commercial, municipal, and government projects across Central Florida. From water tanks to airport structures, the team handles abrasive blasting, profile verification, and industrial coating application to the standards your project requires. For engineers planning a coating mockup, the sandblasting equipment guide covers the preparation methods that set the foundation for valid, repeatable test results.
FAQ
What is a protective coating mockup?
A protective coating mockup is a full-scale test area, typically at least 100 sq ft, applied to the actual project substrate to establish benchmarks for texture, color, film thickness, and adhesion before production-scale coating begins.
How is adhesion tested on a coating mockup?
Adhesion is measured using pull-off testing per ISO 16276-1:2025 or cross-cut testing per ISO 16276-2:2025. Destructive tests are performed on off-structure panels to avoid damaging the asset.
Why can’t a small paint sample replace a mockup?
Small samples do not capture real substrate variation, complex geometry like welds and bolt heads, or actual environmental conditions. A full-scale mockup is the only way to validate the complete coating system under production conditions.
How long must a coating cure before mockup testing?
ISO 16276-1:2025 requires a minimum of 10 days of curing at temperatures above 15°C and relative humidity below 80% before pull-off adhesion testing is valid.
Can mockup results from one project apply to another?
No. Mockups establish project-specific performance baselines. Pull-off test results are not transferable across different instruments, methods, or project conditions, and each project requires its own validated reference standard.


