
Yes, you can paint over galvanizing, but only if you treat it as a two-part system rather than a quick topcoat job. The American Galvanizers Association calls this a duplex system, and it works only when surface prep follows ASTM D6386 and the coating chemistry is compatible with zinc. Smooth new galvanizing resists adhesion until it’s profiled, and any mill-applied passivator left behind will cause the paint to fail regardless of how clean the surface looks.
Three things are non-negotiable before a brush or gun touches the part:
- Strip mill passivators and contaminants, not just visible dirt
- Create a mechanical or chemical profile the coating can grip
- Use acrylic-compatible primers and topcoats, never alkyds
A properly specified duplex system can extend service life by roughly 1.5 to 2.3 times compared to relying on either coating alone.
Key Takeaways
Painting over galvanizing succeeds only when mill passivators are removed, the surface is mechanically profiled, and acrylic-compatible coatings replace alkyds.
| Point | Details |
|---|---|
| Test before you trust visual cleanliness | Run a copper sulfate spot test; clean zinc turns black, a passivator means more prep is needed. |
| Profile within tolerance | Sweep blast at low pressure and glancing angle, keeping zinc loss to roughly 5 to 10 microns. |
| Skip alkyds entirely | Oil-based paints saponify on zinc, so specify acrylic, epoxy, or urethane systems instead. |
| Run a test patch first | Coat a 6 to 12 inch area and monitor it before committing to full-scale application. |
| Hire for complex duplex work | Southernsandblastingandpainting handles sweep blasting, priming, and QA documentation for ASTM and AGA compliant projects. |
Table of Contents
- Fast Decision Checklist: Paint Now, Wait, or Specify Shop Duplexing
- When Should You Paint Galvanized Steel?
- Surface Preparation: Cleaning, Profiling, and Acceptable Limits
- Which Primers and Topcoats Actually Work on Galvanized Steel?
- The Shop and Field Workflow, Step by Step
- Why Paint Fails on Galvanized Steel, and How to Fix It
- When to Hire a Specialist for Duplex Painting
- Sources
Fast Decision Checklist: Paint Now, Wait, or Specify Shop Duplexing
Match the action to the surface’s condition before committing labor or coating budget:
- New galvanizing (days old): Test for passivators first. Do not assume it’s paint-ready.
- Partially weathered (weeks to months): Clean off zinc oxides and hydroxides, then profile before priming.
- Fully weathered (a year or more): Usually needs only cleaning and degreasing, since natural weathering has already dulled the surface.
- Small touch-up areas: Hand or power-tool clean per SSPC-SP2/SP3 and spot-prime.
- Full structural duplex or heavy zinc repair: Bring in a specialist crew with blast equipment and dry film thickness (DFT) gauges.
Pro Tip: If you know a part will be painted, tell the galvanizer before dipping. Coordinating on quench and passivation steps up front saves a full day of rework later, according to AGA’s specification guidance.
When Should You Paint Galvanized Steel?
Timing depends entirely on how long the zinc has been exposed to the atmosphere, and each stage needs a different prep approach.
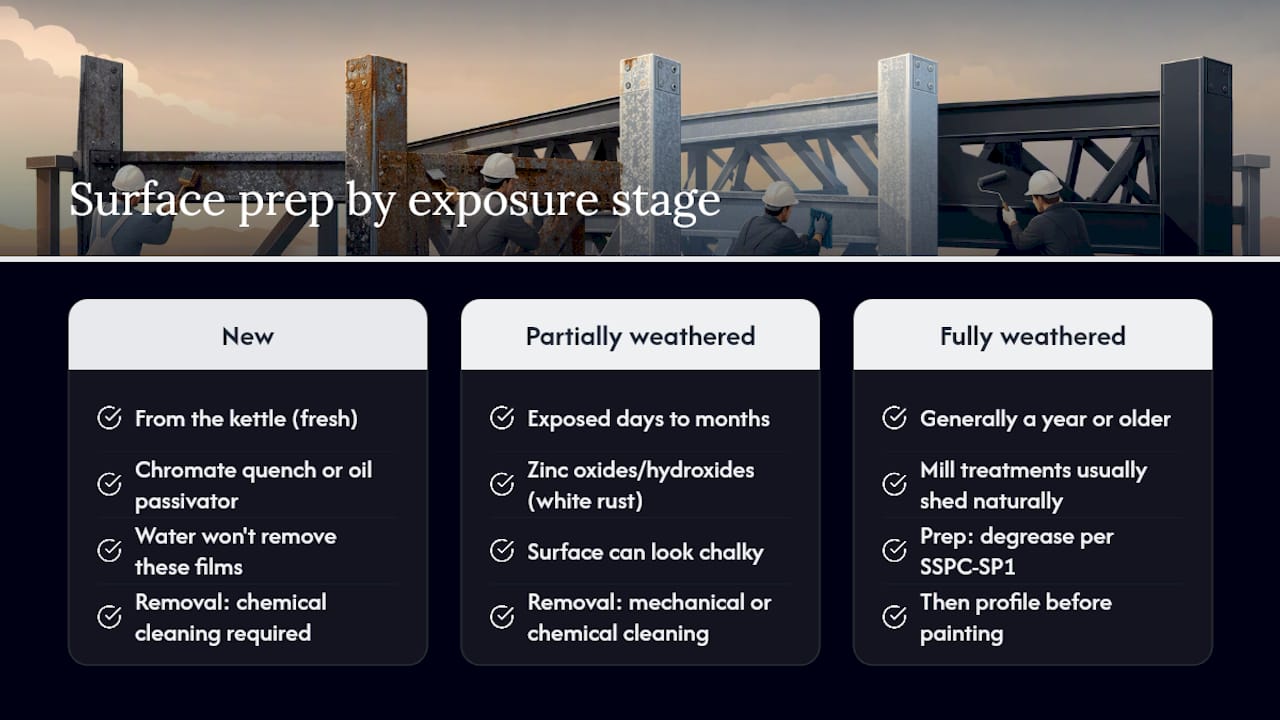
New galvanizing comes straight from the kettle, often with a chromate quench or oil-based passivator still on the surface. It looks clean. It usually isn’t. Water alone won’t remove these films, and painting over them guarantees peeling within months.
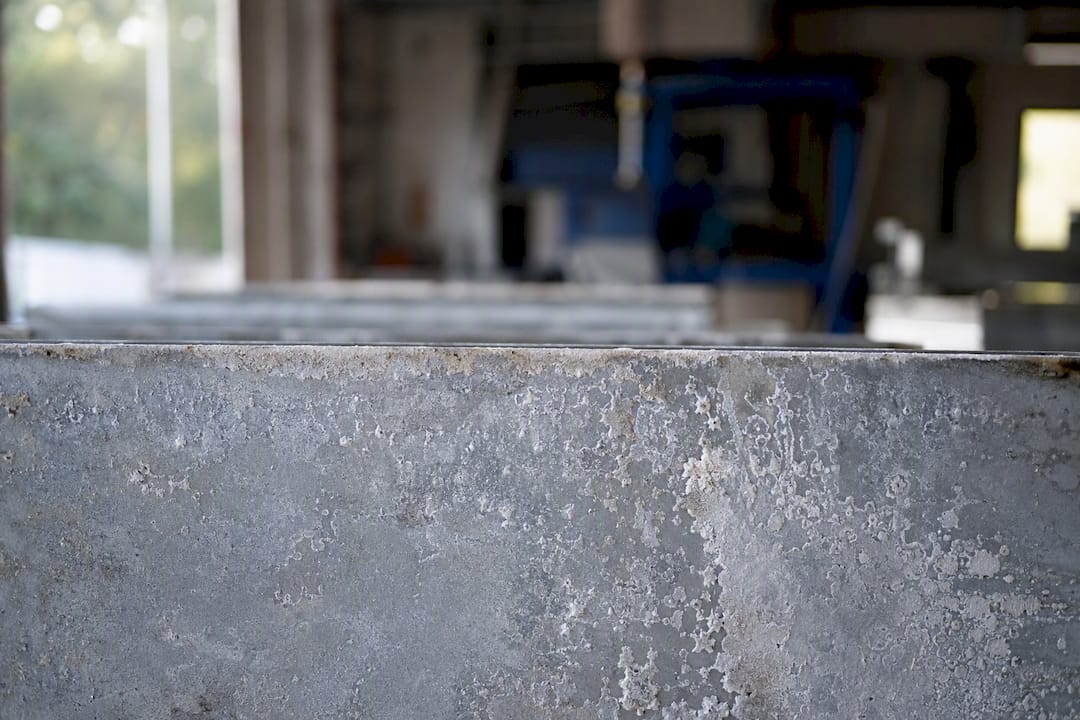
Partially weathered galvanizing, exposed for days to several months, develops zinc oxides and hydroxides, sometimes called white rust, that need mechanical or chemical removal before priming. This stage is deceptive because the surface can look chalky rather than obviously contaminated.
Fully weathered galvanizing, generally a year or older, has usually shed its mill treatments naturally and just needs degreasing per SSPC-SP1 before profiling.
Once cleaning and profiling are done, keep the painting window short. Humid air and cold substrates both slow cure and invite recontamination if you wait too long between prep and primer.
Pro Tip: Call the galvanizer before the parts go in the kettle if duplexing is the plan. That single conversation avoids passivators that complicate every step downstream.
Surface Preparation: Cleaning, Profiling, and Acceptable Limits
Surface prep on galvanizing isn’t a single step, it’s a sequence, and skipping the order causes most field failures.
- Degrease first. Aqueous alkaline cleaning at a pH of 11 to 12 removes oils and light films per SSPC-SP1. Solvent cleaning works too, but mineral spirit residues can undercut adhesion if not rinsed thoroughly.
- Check for mill passivators. A copper sulfate spot test turns clean zinc black almost instantly. If it doesn’t darken, a passivator remains and must come off mechanically per SSPC-SP7.
- Create the profile. Sweep or brush blasting is the standard method, using soft, non-metallic abrasive at roughly 40 psi, particle size 0.2 to 0.5 millimeters, a blast angle of 45 degrees or less, and a nozzle distance of about 350 to 500 millimeters.
- Alternative pretreatments. Wash primers, zinc phosphate conversion coatings, or acrylic passivation can substitute for blasting on delicate or hard-to-access parts.
- Rinse and dry completely before priming; any trapped moisture becomes a defect later.
Even careful blasting removes zinc, and specs should tolerate roughly 5 to 10 microns of loss while requiring gauge checks before and after profiling to confirm minimum coverage remains.
Pro Tip: Sweep blasting is mandatory for two-component epoxies on exterior structures. Adhesion primers are an acceptable fallback only when blasting equipment genuinely can’t reach the part, and even then, Hempel’s own technical guidance flags the increased risk.
Which Primers and Topcoats Actually Work on Galvanized Steel?
Alkyd and oil-based paints react with zinc through a process called saponification, where the paint’s fatty acids form soft, water-soluble soaps right at the metal surface. That’s why alkyd topcoats on galvanized railings peel in sheets within a year or two. Sherwin-Williams’ technical documentation points to this reaction as the leading cause of premature paint failure on zinc.
Acrylic-based systems avoid that chemistry entirely and are the standard recommendation for direct-to-galvanized work once the surface is properly cleaned.
For heavier duty applications, the chemistry shifts:
- Wash primers or acrylic pretreatments suffice for light industrial or architectural exposure.
- Zinc-rich or epoxy adhesion primers are appropriate for shop repairs and marine or C4-C5 environments.
- Epoxy primer with a polyurethane or polyaspartic topcoat handles heavy chemical or UV exposure, provided DFT targets from the manufacturer’s data sheet are met.
A Show Me Epoxy technical breakdown is worth reviewing if you’re deciding between a true epoxy coating and an epoxy-modified paint for a repair job. Whatever system you choose, verify it against the coating layer types your project actually calls for before locking in a spec.
The Shop and Field Workflow, Step by Step
- Inspect the part for mill treatments, damage, and existing zinc thickness using a magnetic gauge.
- Degrease with aqueous alkaline cleaner or approved solvent, then rinse fully.
- Test for passivators with a copper sulfate spot check; remove mechanically if the test fails.
- Profile by sweep blasting at low pressure, or apply a wash primer if blasting isn’t feasible.
- Prime within the manufacturer’s recoat window, checking DFT as you go.
- Topcoat once primer has cured to spec, verifying total system DFT with a gauge.
- Cure and verify with an adhesion test, either pull-off or cross-cut depending on coating type.
Before handover, confirm four things: adhesion test results, final DFT readings, a visual pass on coverage and gloss, and logged temperature and humidity during application. Pressure washers should stay under limits that avoid gouging the zinc, and blast nozzles need the pressure and distance settings covered above. The coating application steps guide walks through equipment choices in more depth if your crew needs a field reference.
Why Paint Fails on Galvanized Steel, and How to Fix It
Most failures trace back to one of four causes, and diagnosing them in order saves time.
- Saponification from alkyd or oil paints shows up as soft, alligator-textured peeling. Strip it, switch to acrylic, and retest.
- White rust or wet-storage stain left uncleaned under a topcoat causes adhesion loss within months. Contamination and moisture are consistently cited as the top two culprits in field failure reports.
- Trapped moisture during powder cure creates pimples and blisters as it outgasses; verify dryness with a dew-point check before coating.
- Insufficient profile leaves paint sitting on a surface it can’t grip, leading to early flaking at edges and fasteners.
Run a mandatory test patch, 6 to 12 inches, before committing to full-scale application. Check contamination first, then adhesion, then moisture history, then chemical compatibility, and monitor the patch for at least 24 hours before scaling up. More detail on prevention lives in our guide to common industrial paint failures.
When to Hire a Specialist for Duplex Painting
Some jobs call for a professional crew rather than an in-house maintenance team, particularly large structures, C4-C5 marine or industrial exposure, heavy zinc repair, or powder-coat prep that demands tight moisture control.
Your scope of work should require:
- Named surface-prep method with a maximum zinc-loss allowance
- Explicit reference to ASTM D6386, AGA guidance, and applicable SSPC specs
- A mandatory test patch before full production
- QA metrics: DFT records, adhesion test results, and environmental logs
- Written warranty terms tied to those measurements
Deliverables to demand at closeout include a pre-work inspection report, zinc thickness readings, DFT measurements, adhesion test data, and a documented cleanup and disposal method for spent abrasive.
A Contractor’s Note From the Field
The biggest mistake we see isn’t bad paint, it’s skipping the passivator test because the metal looks clean. Coordinate timing between the galvanizer, fabricator, and coating crew before the part ever hits the kettle.
How Southern Sandblasting & Painting Handles Duplex Projects
Getting a duplex system right takes equipment and documentation most in-house teams don’t have on hand, which is exactly the gap Southern Sandblasting and Painting fills for facility managers across Central Florida. We run in-house sweep and brush blasting calibrated to the zinc-loss limits covered above, paired with shop-quality priming and topcoating for structural steel, tanks, and infrastructure assets.
Every project ships with QA documentation aligned to ASTM D6386, AGA duplex guidance, and SSPC prep specs, so your files hold up under audit or warranty review. If you’re specifying a duplex job or just need a straight answer on whether an existing structure is paint-ready, request an on-site inspection and we’ll walk the site with you before you sign off on a scope.
Sources
- ASTM D6386 — Preparation of Zinc (Hot-Dip Galvanized) Coated Iron and Steel Products for Painting
- Preparing HDG steel for paint (American Galvanizers Association)
- How to fix peeling paint on galvanized metal (Sherwin-Williams)
- Hot-dip galvanised steel technical guidance (Hempel)


