
TL;DR:
- Address coating failures promptly by securing the area, documenting evidence, and conducting a forensic investigation.
- Run targeted field tests, review records, and identify root causes before recoat efforts to avoid repeating failures.
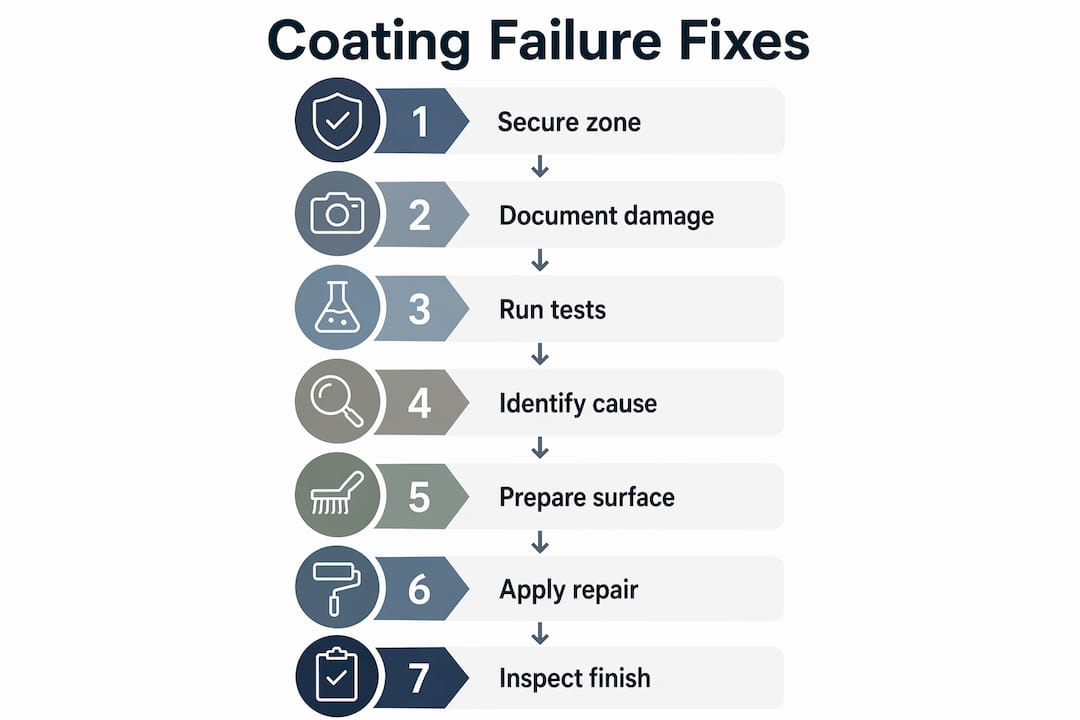
Secure the area, document everything, run targeted field tests, and do not recoat until you know the root cause and have the manufacturer’s TDS in hand. That is the short answer. The longer answer is a sequence, and skipping any step is how a localized blister turns into a full recoat at your expense.
When you discover a coating failure, your first moves set the trajectory for every decision that follows. Stop all touch-up work in the affected zone immediately. Cordon it off, mark it clearly, and treat it as a crime scene until you have a working hypothesis. Then:
- Take systematic photos from multiple angles: close-up of the defect, mid-range showing context, and wide-angle showing location on the structure.
- Timestamp every image and note ambient temperature, relative humidity, and dew point at the time of discovery.
- Preserve a loose sample in a labeled, sealed container if delamination or blistering is present.
- Notify the owner and the manufacturer’s technical representative before any remedial work begins.
- Pull the batch tickets, QC logs, and the TDS that was in effect at the time of application.
Stop all touch-up work the moment you suspect a systemic failure. Grinding and recoating over an undiagnosed problem almost always repeats the failure, and it destroys the evidence you need to find the cause.
Pro Tip: Record a short video walkthrough of the failure zone within the first hour. Video captures texture, sheen variation, and edge conditions that still photos miss, and it timestamps itself automatically.
Table of Contents
- How do you investigate a coating failure on a jobsite?
- What field tests should you run to diagnose a coating failure?
- What are the most common coating failure modes and how do you fix them?
- How do you prepare the surface correctly for a coating repair?
- How do you manage a coating repair as a controlled project?
- What safety and regulatory steps apply during coating remediation?
- What does a real remediation workflow look like?
- Key Takeaways
- Why documented investigations are worth every hour they take
- Southernsandblastingandpainting handles remediation from diagnosis to final acceptance
- Useful standards and references for coating failure investigations
How do you investigate a coating failure on a jobsite?
A contractor-led failure analysis reduces escalation risk and reaches objective conclusions faster than waiting for an external lab. Follow this sequence:
- Pull the records. Retrieve the TDS, product data sheet (PDS), batch tickets, hold-point sign-offs, weather logs, and any QC inspection reports from the application period.
- Interview the crew. Ask the applicator, inspector, and foreman about surface conditions, ambient weather, mixing ratios, pot life, and any deviations from the spec.
- Conduct a visual assessment. Describe the failure using SSPC or ASTM terminology: location, pattern, area affected, and failure mode (adhesion loss, blistering, cracking, etc.).
- Form a working hypothesis. Based on records and visual findings, identify the most probable cause before touching anything.
- Run targeted field tests to confirm or rule out the hypothesis (see the next section).
- Decide whether field data is sufficient or whether lab analysis (FTIR, SEM/EDS, cross-section microscopy) is needed to confirm a hidden cause.
- Log all samples with location, date, time, and the name of the person who collected them.
A structured forensic investigation always starts with records and interviews before touching the substrate. Jumping straight to field tests without reviewing the application history is the single most common mistake that leads to misdiagnosis.
- Keep a chain-of-custody log for every sample collected.
- Use document-sharing tools to keep the owner, manufacturer rep, and QC team on the same version of every record.
- Escalate to laboratory analysis when field tests produce ambiguous results or when litigation is a realistic possibility.
Pro Tip: Date-stamp the specific TDS edition you reviewed. Manufacturers update formulations, and the edition in effect at application may differ from the current one.
What field tests should you run to diagnose a coating failure?
| Test | Standard | When to Use | Key Interpretation |
|---|---|---|---|
| Pull-off adhesion | ASTM D4541 | Any delamination or adhesion failure | Values below TDS minimum indicate bond failure; note failure mode (A, B, Y, Z) |
| Dry film thickness (DFT) | SSPC-PA 2 / ASTM D7091 | All failures | Underbuild starves protection; overbuild traps solvents and causes blistering |
| Soluble salt (conductivity) | SSPC-Guide 15 / ISO 8502-6 | Blistering, undercutting, early rust | Readings above 5–7 µg/cm² (Bresle method) typically indicate contamination-driven failure |
| Surface profile | ASTM D4417 | Post-blast, before recoat | Must match TDS-specified anchor profile range |
| Moisture / dew point | ASTM E337 | Before and during application | Surface temp must be at least 5°F above dew point per most TDS requirements |
| Holiday detection | NACE SP0188 | Immersion or buried service coatings | Any spark or alarm indicates a pinhole or void in the film |
Collect a minimum of five adhesion readings per failure zone, spaced to capture the range of conditions. Label every test location on a sketch or photo overlay so results can be correlated with application records.
Visible defects are often the final symptom of deeper process problems: solvent entrapment, cure gradients, or contamination buried under an apparently intact topcoat. When field tests give you conflicting results, send cross-section samples to a lab for FTIR or SEM/EDS analysis.
- Send samples to a NACE- or A2LA-accredited lab when field data is inconclusive.
- Request FTIR for chemistry confirmation and SEM/EDS for elemental contamination mapping.
- Maintain chain-of-custody documentation for every sample shipped.
What are the most common coating failure modes and how do you fix them?
Corrective actions must match the failure mode — the wrong repair sequence on a contamination-driven delamination will fail again within months.
- Delamination from contamination. Remove coating to sound substrate, abrasive blast or mechanically profile to the TDS-specified cleanliness (typically SSPC-SP 6 minimum, SP 10 for immersion), clean with solvent wipe per SSPC-SP 1, verify salt readings, and reapply per TDS recoat window. Acceptance: adhesion ≥ TDS minimum, DFT within specified range, zero holidays on immersion service.
- Blistering. Determine whether blisters contain liquid (osmotic/moisture-driven) or are dry (solvent entrapment). Osmotic blisters require full removal and salt remediation before recoating. Dry blisters from solvent entrapment often indicate overbuild or inadequate flash-off time. Remove to sound film, verify DFT, and recoat within the TDS recoat window.
- Poor cure / soft film. Check ambient temperature and humidity logs against TDS cure requirements. If the film is uncured, remove it entirely. Do not apply heat to accelerate cure on an already-applied film without manufacturer approval.
- Pinholes. Usually caused by outgassing, excessive film build, or application over a damp surface. Abrade the affected area, verify moisture readings, and apply a thin stripe coat before the full coat.
- Sags and runs. Mechanical abrasion to feather the edge, verify DFT across the sag, and recoat within the specified window. Sags that have fully cured may require grinding to profile before recoating.
Pro Tip: Never grind and recoat without running adhesion and salt tests first. The “fix it now” reflex is the most expensive mistake in coating remediation — if salt or trapped moisture is the root cause, the new coat will fail just as fast.
Refer to industrial coating types when selecting a repair system to confirm chemistry compatibility with the existing coating.
How do you prepare the surface correctly for a coating repair?
Getting the substrate to the condition the TDS requires is the single biggest determinant of whether the repair lasts. Many early failures trace directly to poor surface preparation or contamination control lapses.
- Abrasive blasting is the preferred method for steel when the TDS specifies SSPC-SP 6, SP 10, or SP 5. It removes mill scale, rust, and soluble salts simultaneously and creates the anchor profile the coating needs.
- Mechanical methods (needle guns, angle grinders, wire wheels) are acceptable for localized repairs where blasting is restricted by containment or access limits, but they rarely achieve the cleanliness or profile of abrasive blasting.
- Containment is mandatory for any blasting near occupied areas, waterways, or where lead paint is suspected.
Measure surface profile with a replica tape (Testex Press-O-Film) per ASTM D4417 Method C. Verify soluble salt levels with a Bresle patch kit before applying any coating. Clean with a solvent wipe (SSPC-SP 1) after blasting and before coating.
| Coating Chemistry | Minimum Recoat Window | Maximum Recoat Window | Notes |
|---|---|---|---|
| Epoxy (standard) | — | — | Exceeding max window requires abrasion or full reblast |
| Zinc-rich primer | — | — | Verify zinc dust settlement before topcoating |
| Polyurethane topcoat | 4–— at 77°F | — | Humidity-sensitive; check TDS for RH limits |
| Moisture-cure urethane | 2–4 hours | — | Requires minimum RH; verify with manufacturer |
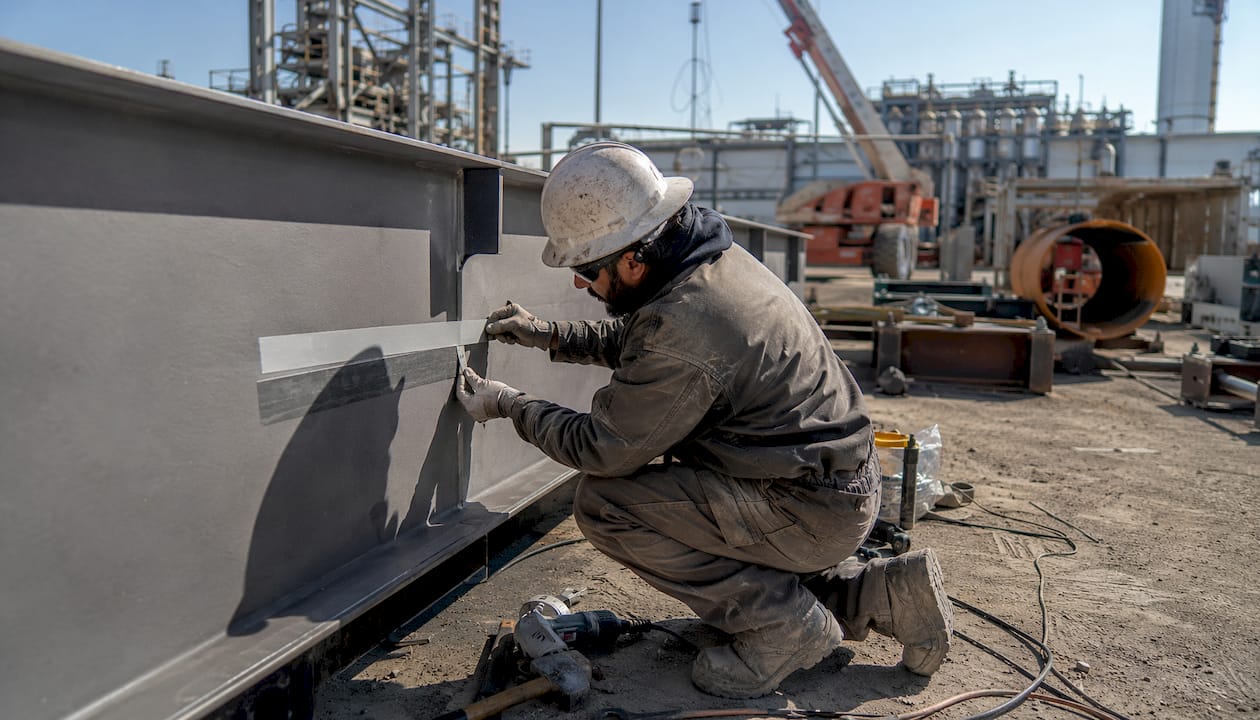
Always feather repair edges at a minimum 4:1 slope ratio and apply a stripe coat to all edges and welds before the full coat. Full surface prep best practices are worth reviewing before any repair begins.
Pro Tip: Plan repairability during initial project scoping. Specify touch-up materials and feathering rules in the original contract so field repairs don’t require a full reblast to meet performance standards.
How do you manage a coating repair as a controlled project?
Running remediation without change orders and hold points is how costs spiral. Treat every repair as a mini-project with its own scope, checkpoints, and acceptance criteria.
- Issue a change order that captures: scope of removal, prep standard, coating system, verification tests required, and responsibility allocation for the failure.
- Set hold points at: surface prep completion (profile and salt readings), primer application (DFT check), and final coat (DFT, adhesion, holiday test where applicable).
- Document every hold point with photos, instrument readings, and the inspector’s signature.
- Notify the owner in writing before any remedial work begins and again at each hold point.
Timeline and cost vary significantly by scope. Localized touch-up on a small zone (under 50 sq ft) typically runs one to two days including prep and cure time. Zone blasting and full recoat on a structural steel section can run one to two weeks depending on access, containment requirements, and cure schedules.
- Involve the manufacturer’s technical representative early. Their written approval of the repair method protects you contractually.
- Use a jobsite communication protocol to keep all stakeholders aligned on test results, hold-point sign-offs, and schedule changes.
- Capture all decisions in writing. Verbal approvals from an owner or manufacturer rep are not defensible if the repair fails.
Without QC dossiers tracking surface prep, DFT, and environmental conditions, investigators are forced into expensive lab analysis that proper hold points would have made unnecessary.
What safety and regulatory steps apply during coating remediation?
Remediation creates hazards that routine application does not. Abrasive blasting generates respirable dust, and coating removal may release lead, PCBs, or chromate pigments depending on the asset’s age and history.
- Respiratory protection: NIOSH-approved supplied-air respirators or P100 half-face respirators for abrasive work; full-face air-purifying respirators for solvent-based coating application.
- Fall protection: Full compliance with OSHA 29 CFR 1926.502 for any work above six feet.
- Hazardous materials: Test for lead per OSHA 29 CFR 1926.62 before any abrasive removal on structures built before 1978. Suspend remediation pending results if lead is suspected.
- Containment and waste: Collect and dispose of blasting media and paint waste per EPA RCRA regulations. Characterize waste before disposal — contaminated blast media may be classified as hazardous.
- Permitting: Check local air quality management district rules for open-air blasting. Some jurisdictions require permits for operations above a threshold area or near sensitive receptors.
Never assume a coating is lead-free on a structure built before 1980. Test first. Proceeding without testing exposes your crew to OSHA enforcement, and it exposes you to cleanup liability that can exceed the original project value.
What does a real remediation workflow look like?
Southernsandblastingandpainting uses a seven-step field workflow on remediation projects that maps directly to the sequence above.
- Secure and cordon the failure zone within the first hour of discovery.
- Document with timestamped photos, video, and environmental readings (temp, RH, dew point).
- Test with pull-off adhesion, DFT, and Bresle salt patch before any removal.
- Isolate the root cause using the forensic investigation sequence: records, interviews, visual, field tests.
- Remove coating to sound substrate using the prep method the TDS specifies (abrasive blast preferred; mechanical where blast is restricted).
- Prep and recoat within the TDS recoat window, with hold-point sign-offs at profile verification, primer DFT, and final coat DFT.
- Verify with post-repair adhesion pull-off, DFT survey, and holiday testing on immersion or buried service.
Timeline example: a 200 sq ft delamination zone on a structural steel column typically runs three to four days from discovery to final acceptance, assuming abrasive blast access and standard epoxy/polyurethane chemistry. Cost drivers are containment complexity, lead paint status, and cure time between coats.
- Capture all test results on a single inspection log tied to the change order.
- Photograph every hold point before and after sign-off.
- Retain the TDS edition, batch tickets, and inspection log in the project file for a minimum of five years.
Pro Tip: Ask the manufacturer’s rep to co-sign the repair method approval. That single document resolves most warranty disputes before they become claims.
Key Takeaways
Coating failure remediation follows a fixed sequence: secure, document, test, identify the root cause, prep correctly, recoat per TDS, and verify with acceptance tests before returning the asset to service.
| Point | Details |
|---|---|
| Secure and document first | Stop all touch-up work, cordon the zone, and capture timestamped photos and environmental readings before anything else. |
| Contractor-led investigation | Pull records and interview the crew before running field tests; a structured sequence reduces litigation risk and reaches conclusions faster. |
| Field tests before any repair | Run pull-off adhesion, DFT, and soluble salt checks to confirm the root cause — never recoat blind. |
| Match the fix to the failure mode | Delamination from contamination requires removal to sound substrate and abrasive blast; grinding and recoating without diagnosis repeats the failure. |
| Southernsandblastingandpainting | Provides onsite failure evaluation, abrasive blasting, surface prep, and full recoat services with documented hold-point QC for Central Florida projects. |
Why documented investigations are worth every hour they take
The pressure to “just fix it and move on” is real on every jobsite. Schedules slip, owners push, and a grinder is faster than a Bresle patch kit. But coatings are a primary durability system, not a finish coat you can redo cheaply. A repair that skips the investigation is a repair you will do again, usually at a larger scale and with a warranty dispute attached.
Contractor-led, documented failure analysis is not about covering yourself legally, though it does that too. It is about reaching the right answer fast enough to actually fix the problem. The forensic sequence in this article takes hours, not weeks. The alternative, a second failure six months later, takes months and costs multiples of the original repair.
Southernsandblastingandpainting handles remediation from diagnosis to final acceptance
When a coating failure surfaces on a Central Florida project, Southern Sandblasting and Painting provides the full remediation sequence: onsite failure evaluation, pull-off adhesion and DFT testing, abrasive blasting and mechanical surface preparation, touch-up and full recoat services, and documented hold-point QC from prep through final acceptance testing.
The team works with municipal, industrial, and commercial clients across the Orlando metro area, including water tanks, pipelines, structural steel, and facility infrastructure. Every repair is documented with inspection logs, batch tickets, and test results so owners have a defensible record if questions arise later.
For a site visit, emergency evaluation, or project estimate, contact Southernsandblastingandpainting directly through the sandblasting and painting services page or review the sandblasting services in Orlando page to scope your remediation project.
Useful standards and references for coating failure investigations
Keep these documents on file and pull them at the start of any investigation.
- SSPC/AMPP surface preparation standards: SP 1 (solvent cleaning), SP 6 (commercial blast), SP 10 (near-white blast), SP 5 (white metal blast), and SSPC-PA 2 for DFT measurement.
- ASTM standards: D4541 (pull-off adhesion), D4417 (surface profile), D7091 (DFT by magnetic gauge), E337 (relative humidity and dew point).
- SSPC-Guide 15 / ISO 8502-6: Soluble salt extraction and conductivity measurement (Bresle method).
- NACE SP0188: Holiday detection for immersion and buried service coatings.
- OSHA 29 CFR 1926.62: Lead in construction standard; mandatory reference before abrasive removal on pre-1978 structures.
- EPA RCRA: Hazardous waste characterization and disposal requirements for blast media and paint waste.
- Manufacturer TDS/PDS: Pull the edition in effect at the time of original application, not the current version. Record the edition date in your investigation log.
- Asset protection coatings guide: A practical reference for coating selection and performance expectations across infrastructure asset types.
Always record the edition date of every TDS and PDS you review during an investigation. Manufacturers revise formulations, and using the wrong edition can lead to incorrect conclusions about whether the application met spec.
This article provides general technical guidance for construction professionals. Confirm current regulatory requirements, applicable standards editions, and product-specific requirements with the relevant authority, manufacturer, or a qualified coating inspector for your specific project.


