
TL;DR:
- Sandblasting before tank recoating is essential because it removes contaminants and creates a surface profile that bonds the coating effectively. Skipping this step can lead to coating delamination within years due to weak boundary layers. Proper surface preparation and verification are critical for long-lasting, reliable tank coatings.
Sandblasting before tank recoating is not optional. The new coating bonds to the steel surface, not to rust, old paint, or mill scale, and without a mechanical anchor profile, even the best epoxy will delaminate within a few years. The short version: abrasive blasting removes every contaminant that would trap moisture under the new film, and it creates the microscopic peaks and valleys the coating needs to grip. Skip it, and you are paying for a coating system that will fail on a schedule measured in months, not decades.
Quick takeaways for facility managers:
- Degrease and solvent-clean per SSPC-SP1 before any blasting starts; blasting over oil drives contaminants deeper.
- Specify cleanliness level (SSPC-SP10 / NACE No. 2 for severe service) and a profile range in mils or microns, not just a cleanliness grade.
- Attach the coating manufacturer’s Technical Data Sheet (TDS) to the contract; the TDS governs acceptable profile range and dry film thickness (DFT).
- Blast and coat the same day where practical to prevent rust-back.
- Require documented deliverables: pre-blast photos, blast log, Testex replica or digital profile readings, and post-coat DFT maps.
Spec-style verdict: Require SSPC-SP10 / NACE No. 2 cleanliness, a surface profile matched to the coating TDS (typically 1.5–3.0 mils / 38–75 microns for industrial tank coatings), verified by Testex replica tape or ASTM D4417 digital gauge, with same-day coating application and full documentation.
Table of Contents
- What does tank sandblasting actually involve?
- Why sandblast before tank recoating: the technical case
- What standards and specs should you reference?
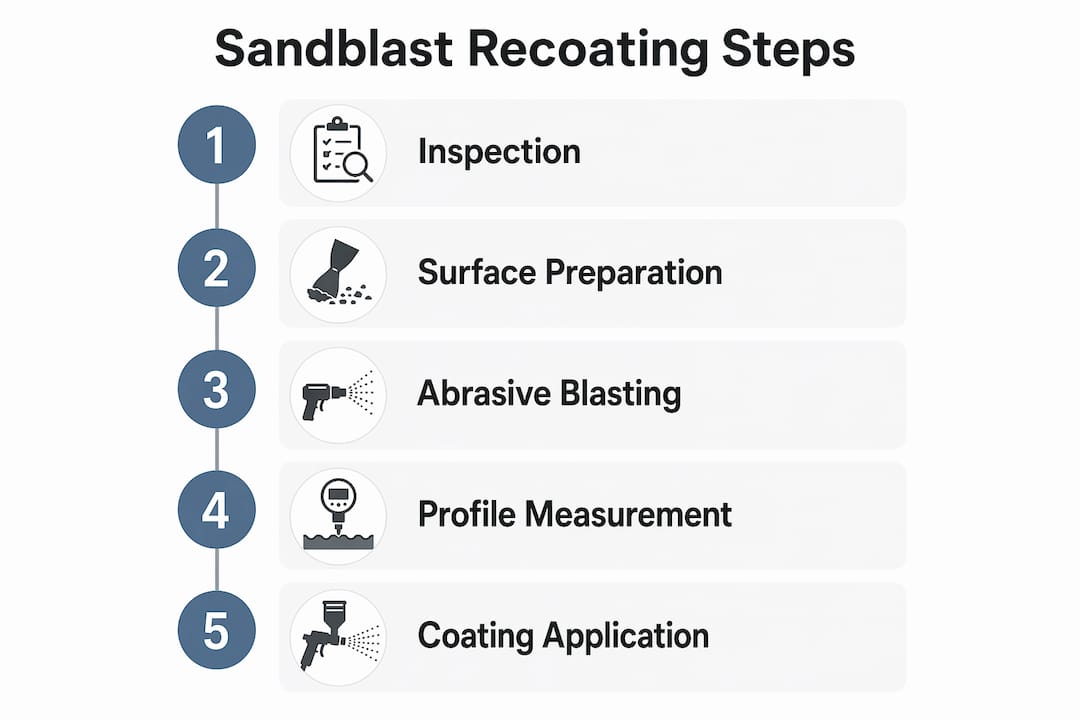
- Pre-blast preparation steps that prevent costly mistakes
- How blast profile and cleanliness affect coating performance
- Sandblasting vs. water blasting vs. chemical stripping: which method fits your tank?
- What inspection and acceptance criteria should your ITP require?
- Safety and environmental controls you must require from contractors
- What drives cost and how long does a tank blasting project take?
- How professionals actually execute a tank recoating project
- Key Takeaways
- Authoritative sources for specifications and inspection
What does tank sandblasting actually involve?
Abrasive blasting, commonly called sandblasting, propels abrasive media at high velocity against a steel surface to strip rust, old coatings, mill scale, and weld spatter while simultaneously cutting a mechanical profile into the metal. Shot blasting uses steel shot or grit in a centrifugal wheel machine, common for shop work and flat surfaces. Open-nozzle blasting uses compressed air and is the standard method for field work on tanks of all sizes. Both create the anchor profile a coating needs; the difference is equipment setup and containment logistics.
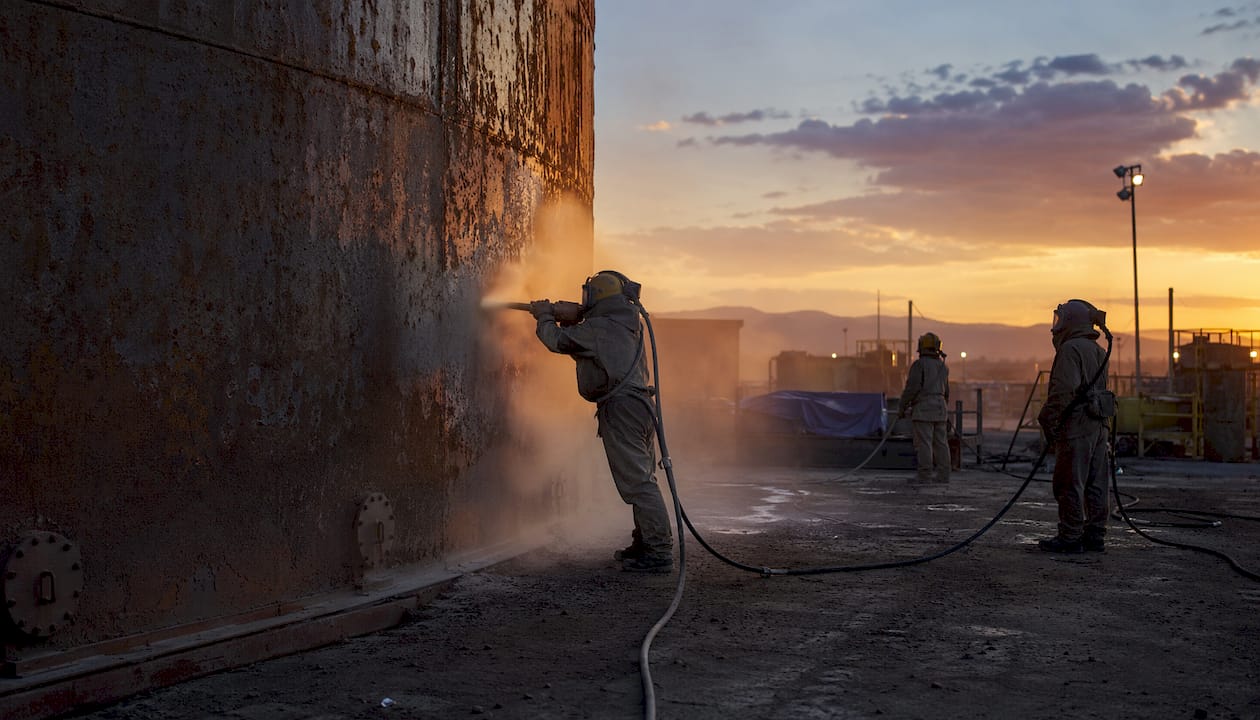
Hydroblasting (water blasting) uses high-pressure water to remove loose material and soluble salts. It cleans well but does not create a new profile on bare steel. Chemical stripping dissolves coatings with solvents or acidic/alkaline agents and is used where abrasive blasting is prohibited or impractical. For a guide to industrial blasting methods and equipment, Southernsandblastingandpainting covers the full range.
Common abrasive media and their effect on profile
| Abrasive | Typical profile range | Best use case |
|---|---|---|
| Garnet | typically creates moderate profile suitable for general tank exteriors with good profile control | |
| Steel grit | usually produces a higher profile for heavy corrosion removal and shop blasting | |
| Crushed glass | generally results in a lower profile preferred for potable water tanks | |
| Aluminum oxide | typically generates a moderate profile suited for hard substrates and precision profile work | |
| Coal slag | tends to create a moderate profile, favored for cost-effective field blasting |
Abrasive type explains most of the variance in post-blast surface roughness. Larger abrasive particles create higher profiles, which can be inappropriate for thin-film coatings. Specify the abrasive type and particle size in the contract when profile control matters.
Why sandblast before tank recoating: the technical case
The steel-to-coating interface is where every tank recoating project succeeds or fails. Rust and old coating are weak boundary layers; a new coating applied over them bonds to those layers, not to steel, and when those layers fail, the new coating peels with them. Abrasive blasting removes the weak layer entirely and exposes clean, reactive steel that the coating can wet and chemically interact with.
Beyond removal, blasting creates a surface profile: a pattern of peaks and valleys measured in mils or microns. That profile increases the true surface area the coating contacts, improves mechanical interlocking, and reduces the risk of undercutting corrosion spreading laterally under the film. The role of sandblasting in tank maintenance is precisely this combination of contamination removal and profile creation working together.
What blasting achieves at the interface:
- Removes rust, failed coating, mill scale, and weld spatter that would act as weak boundary layers.
- Eliminates soluble salts and chlorides that cause osmotic blistering under the new film.
- Creates a mechanical anchor profile that increases coating contact area and adhesion strength.
- Exposes fresh steel that the coating can wet fully, reducing moisture-trapping voids.
One point worth understanding: pull-off adhesion tests do not directly predict corrosion resistance. Adhesion is mechanical; corrosion resistance depends on interface chemistry and how completely the coating wets the surface. A high pull-off number on a poorly blasted surface can look acceptable while moisture-trapping voids quietly undermine the coating from below. Use pull-off testing as one data point, not the sole acceptance criterion.
Over-blasting is a real risk. Excessive roughness creates sharp micro-peaks that the coating cannot fully wet, leaving thin spots at peak tips that rust through first. This is called peak rusting, and it shows up within months on over-blasted surfaces coated with thin-film systems. Specify a maximum profile, not just a minimum.
What standards and specs should you reference?
The two governing bodies are SSPC (Society for Protective Coatings, now part of AMPP) and NACE International (also now AMPP). Their joint standards define cleanliness levels; ISO 8501 is the international equivalent used on many global projects and recognized by most coating manufacturers.
Key standards at a glance:
- SSPC-SP1: Solvent cleaning. Required before any blasting to remove oil, grease, and soluble contaminants.
- SSPC-SP5 / NACE No. 1: White metal blast. All contaminants removed; used for immersion service and the most demanding environments.
- SSPC-SP10 / NACE No. 2: Near-white metal blast. Limits staining to 5% per unit area; the standard for oil and gas tanks, water tanks, and severe exterior service.
- SSPC-SP6 / NACE No. 3: Commercial blast. Allows up to 33% staining; acceptable for moderate service environments where cost is a constraint.
- SSPC-SP7 / NACE No. 4: Brush-off blast. Removes loose material only; used for maintenance overcoating where the existing coating is sound.
- ISO 8501: Visual cleanliness standard with photographic comparators; widely used internationally and referenced by many coating TDSs.
A common spec gap is writing a cleanliness standard without defining the surface profile and verification method. That omission creates contractor-inspector disputes and leaves the owner with no contractual recourse if the profile is wrong. Always specify both.
Pro Tip: Attach the coating manufacturer’s TDS to the contract as a mandatory exhibit. The TDS states the minimum and maximum acceptable profile range, required DFT per coat, and application conditions. If the TDS and the spec conflict, the TDS governs coating performance — and the manufacturer’s warranty depends on it.
Standards are tools for defining acceptable risk, not a ranking where higher always means better. Choose SSPC/NACE levels based on asset consequence and exposure, not on a blanket assumption that SP10 is always worth the extra cost over SP6.
Pre-blast preparation steps that prevent costly mistakes
Blasting over a contaminated surface does not clean it. Oil and grease smear into the profile under abrasive impact, and soluble salts get driven deeper into the steel. Surfaces must be free of oil, grease, and soluble contaminants before abrasive blasting — that is the requirement behind SSPC-SP1, and it is non-negotiable.
Pre-blast steps in order:
- Solvent clean per SSPC-SP1. Use appropriate solvents, emulsifying agents, or steam to remove all visible oil, grease, and cutting compounds from the entire surface.
- Degrease weld areas and joints. Welds trap flux and cutting oil; these spots need focused attention before blasting.
- Remove weld spatter. Grind or chip weld spatter flush; blasting will not remove it reliably and it creates coating holidays.
- Spot-repair structural defects. Pits, cracks, and laminations should be addressed before blasting exposes them mid-project.
- Set up containment. Install shrouding, tarps, or negative-pressure enclosures before blasting begins to capture abrasive and paint waste.
- Mask non-blast areas. Protect flanges, gasket faces, instrumentation, and any surface that should not be blasted.
Inspector checklist before blasting starts:
- Solvent cleaning complete and documented.
- No visible oil or grease on any surface.
- Weld spatter removed and welds ground smooth.
- Abrasive batch verified clean and uncontaminated (dirty or recycled abrasive recontaminates the surface).
- Containment in place and negative pressure confirmed where required.
- Dew point checked: steel temperature must be at least 5°F above dew point to prevent flash rusting.
Surface prep best practices cover these steps in more detail for complex tank geometries.
How blast profile and cleanliness affect coating performance
Profile is not a single number. Two surfaces can have the same average peak height but very different peak densities, and that difference matters for how well a coating performs. A surface with moderate peak height and high peak density gives the coating more contact points per square inch, which tends to outperform a very rough surface with sparse, sharp peaks. Specify both peak height and peak density in your ITP when the service environment is severe.
Mismatching profile to coating is a leading cause of early failure. A thin-film coating applied over a 4-mil profile will have inadequate coverage at the peak tips, creating the conditions for peak rusting within the first service season. Conversely, a thick-film epoxy applied over a 1-mil profile may not develop full mechanical adhesion. The coating TDS governs the acceptable profile range; no spec should override it.
| Profile scenario | Coating impact | Risk |
|---|---|---|
| Profile too shallow (below TDS minimum) | Poor mechanical adhesion, coating lifts at edges | Delamination |
| Profile within TDS range | Full wetting, correct DFT over peaks | Optimal performance |
| Profile too deep (above TDS maximum) | Thin coverage at peak tips, excessive product use | Peak rusting, early failure |
| Over-blasted with sharp peaks | Coating cannot wet peak tips | Rapid corrosion at peaks |
Abrasive type and particle size explain most of the variance in post-blast roughness, which is why specifying the abrasive in the contract gives you real control over the outcome. Changing abrasive mid-project without re-verifying profile is a common field error. For how industrial coating durability ties back to profile and DFT selection, that relationship is worth reviewing before writing the spec.
Sandblasting vs. water blasting vs. chemical stripping: which method fits your tank?
The right method depends on what you are removing, what substrate you have, and what the new coating requires. Abrasive blasting is the default for steel tanks requiring a new profile and a high cleanliness level. The alternatives have legitimate uses, but they come with real trade-offs.
| Method | Profile creation | Cleanliness level achievable | Waste type | Best use case |
|---|---|---|---|---|
| Abrasive blasting | Yes (controlled) | SP5 through SP10 | Abrasive + paint waste | Steel tanks, severe service, new profile required |
| Hydroblasting | No (existing profile only) | Removes loose material and salts | Water + paint waste | Soft deposits, soluble salt removal, recoat over sound coating |
| Chemical stripping | No | Removes coating only | Chemical waste (regulated) | Where blasting is prohibited; thin-gauge or non-ferrous substrates |
When to consider alternatives:
- Hydroblasting makes sense for potable water tanks where abrasive contamination is a concern, or when you need to remove soluble salts from an existing profile before overcoating. It does not create a new profile, so it cannot substitute for blasting when the coating TDS requires one.
- Chemical stripping is appropriate for aluminum or galvanized tanks where abrasive blasting would damage the substrate, or in confined spaces where containment of abrasive waste is impractical. The resulting surface still needs mechanical preparation before coating.
- Spot blasting (abrasive blasting only the corroded or failed areas) is a cost-management tool for tanks where the majority of the existing coating is sound and adhered. It is not a substitute for full blasting on heavily corroded or fully failed coating systems.
For sandblasting vs. water blasting decisions on water tanks, the choice often comes down to regulatory requirements for potable water contact and the condition of the existing coating.
What inspection and acceptance criteria should your ITP require?
An Inspection and Test Plan (ITP) without measurable acceptance criteria is a liability. Specify what gets measured, who measures it, what the acceptance limit is, and what documentation is required. Disputes almost always trace back to a spec that named a cleanliness standard but said nothing about profile verification.
Inspection sequence:
- Pre-blast inspection. Verify SSPC-SP1 solvent cleaning complete, no visible oil or grease, weld spatter removed, containment in place, dew point acceptable.
- In-process blast inspection. Spot-check cleanliness against SSPC/NACE visual comparators or ISO 8501 photographic standards during blasting.
- Post-blast cleanliness check. Full visual inspection against the specified cleanliness grade (SP10, SP6, etc.) before any coating is applied.
- Profile measurement. Measure using Testex Press-O-Film replica tape or a digital surface profile gauge per ASTM D4417 / NACE RP0287. Record readings at a minimum frequency specified in the ITP.
- Soluble salt testing. Where required by service environment (immersion, coastal, chemical exposure), test per Bresle patch or equivalent method.
- Dew point check. Confirm steel temperature is at least 5°F above dew point immediately before coating application.
- Post-coat DFT measurement. Measure dry film thickness per SSPC-PA2 using a calibrated magnetic gauge.
| Inspection item | Performed by | Acceptance limit | Documentation required |
|---|---|---|---|
| Cleanliness grade | Inspector | Per spec (e.g., SP10) | Visual record, comparator reference |
| Surface profile | Inspector | Per coating TDS (mils/microns) | Testex tape or digital gauge printout |
| Soluble salts | Inspector | Per coating TDS or project spec | Bresle patch test record |
| Dew point | Contractor + Inspector | Steel temp ≥ 5°F above dew point | Psychrometer log |
| DFT per coat | Inspector | Per coating TDS, min/max | SSPC-PA2 gauge readings |
| Pull-off adhesion | Inspector (witness) | Per coating TDS | Test report with substrate condition |
SSPC-SP10 / NACE No. 2 guidance specifically recommends including soluble salt testing, profile measurement method, dew point discipline, and inspection checkpoints in the contract. Pull-off adhesion testing is useful for confirming mechanical bond but should always be paired with profile and cleanliness records, since adhesion test values do not directly predict long-term corrosion resistance.
Safety and environmental controls you must require from contractors
Tank blasting generates hazardous dust, and the hazards are serious enough to shut down a project or trigger regulatory action if controls are inadequate. Three hazards dominate: respirable crystalline silica, lead dust from old coatings, and flammable residues inside fuel or chemical tanks.
Contractor safety requirements:
- Silica controls. Silica-containing abrasives (traditional sand) are largely replaced by garnet, steel grit, and slag in professional work, but any abrasive blasting generates fine dust. Require respiratory protection at minimum N95/P100 half-face respirators; supplied-air respirators (SARs) for enclosed spaces.
- Lead paint assessment. Any tank coated before 1978 should be tested for lead paint before blasting. If lead is present, require a written lead abatement plan, HEPA-filtered containment, and disposal per EPA and OSHA 29 CFR 1926.62 requirements.
- Confined space entry. Internal tank blasting is confined space work. Require a written confined space entry permit, atmospheric monitoring, and a trained attendant outside the tank at all times.
- Containment and waste capture. Negative-pressure containment with HEPA filtration prevents abrasive and paint waste from leaving the work zone. Abrasive waste from lead-painted surfaces is typically classified as hazardous waste under RCRA and requires licensed disposal.
- Flammable residue purging. Fuel and chemical tanks must be cleaned, purged, and gas-tested to below 10% of the lower explosive limit before any blasting or hot work begins.
Environmental controls checklist for facility managers:
- Written containment plan submitted before mobilization.
- Waste characterization and disposal plan for abrasive and paint waste.
- Stormwater controls to prevent runoff of abrasive waste.
- Environmental risk mitigation plan addressing contamination control and waste management on site.
- Permits confirmed: local air quality, stormwater, and any facility-specific operating permits.
For projects subject to EPA oversight, aboveground storage tank regulations and spill prevention requirements apply and should be confirmed before work begins.
What drives cost and how long does a tank blasting project take?
Cost and schedule vary widely based on tank size, access, and the condition of the existing coating. A small above-ground storage tank with accessible exterior surfaces is a one-to-two day blast-and-coat job. A large water tower with internal and external work, scaffolding, and full containment can run weeks. Understanding the drivers helps you budget and schedule realistically.
Primary cost drivers:
- Tank size and surface area (square footage is the base unit for most contractor pricing).
- Internal vs. external work (internal blasting requires confined space protocols, ventilation, and more labor).
- Access and scaffolding (elevated tanks, tanks inside buildings, or tanks with limited clearance add significant cost).
- Containment complexity (full negative-pressure enclosures cost more than open-air blasting with tarps).
- Condition of existing coating (heavily corroded surfaces with multiple failed coating layers take longer to blast).
- Abrasive type and volume (steel grit costs more than coal slag but may be required for profile control).
- Required DFT and number of coats (more coats mean more cure time and more inspection hold points).
- Soluble salt testing and documentation requirements (adds time and cost but protects the owner).
Typical project timeline milestones:
- Mobilization and pre-blast inspection (half day to one day).
- SSPC-SP1 solvent cleaning and surface prep (one day, may overlap with mobilization).
- Containment setup (half day to two days depending on complexity).
- Abrasive blasting (one to several days depending on surface area and condition).
- Post-blast inspection and profile measurement (two to four hours; re-blast if areas fail).
- First coat application and cure (one day application, one to two days cure per coat depending on product).
- Subsequent coats with inspection hold points between each coat.
- Final DFT inspection, pull-off adhesion test, and documentation package assembly.
- Demobilization and site cleanup.
To minimize downtime, consider phasing work (blast and coat one section at a time), using mobile containment that can be repositioned, and scheduling blasting and coating application on the same day to avoid rust-back. Rust-back can occur quickly after blasting if soluble salts or moisture are present, so dew point discipline and same-day coating are worth building into the schedule explicitly.
How professionals actually execute a tank recoating project
A well-run tank blasting and recoating project follows a documented sequence. Every step has a hold point, a measurement, and a record. Here is the contractor workflow that experienced crews use on spec-driven jobs.
Contractor workflow:
- Mobilization. Deliver equipment, abrasive, and coating materials. Confirm TDS, spec, and ITP are on site. Brief crew on safety plan and confined space procedures if applicable.
- Pre-blast cleaning. SSPC-SP1 solvent clean entire surface. Inspector verifies and signs off before blasting begins.
- Containment setup. Install shrouding, negative-pressure system, HEPA filtration, and ground protection. Confirm negative pressure before blasting.
- Blast sequence. Work systematically from top to bottom on exteriors; from far end to exit on interiors. Monitor nozzle pressure, standoff distance, and angle to maintain consistent profile.
- In-process inspection. Spot-check cleanliness and profile during blasting. Adjust abrasive type, pressure, or technique if readings fall outside spec.
- Post-blast inspection. Full cleanliness check against visual comparators. Profile measured with Testex replica tape or digital gauge at required frequency. Soluble salt test if specified. Dew point confirmed.
- Repair and patching. Address any pits, holidays, or areas that failed inspection. Re-blast as needed.
- Coating application. Apply first coat within the window specified in the TDS (often the same day). Measure and record wet film thickness during application.
- DFT checks per coat. Measure dry film thickness after each coat cures. Record per SSPC-PA2.
- Final inspection and documentation. Pull-off adhesion test (witnessed by inspector). Assemble full documentation package.
Documentation package every facility manager should require:
- Pre-blast photographs (full coverage, close-ups of problem areas).
- Blast log: abrasive batch/type, nozzle size, pressure, operator, date/time.
- Testex replica tape results or digital profile gauge screenshots with location map.
- Soluble salt test readings (where required).
- Dew point and temperature log for each coat application.
- Coating TDS attached to the project file.
- Post-coat DFT maps per SSPC-PA2.
- Pull-off adhesion test report.
Pro Tip: Require the documentation package as a contractual deliverable before final payment is released. A contractor who cannot produce blast logs and profile readings after the fact is a contractor who did not measure during the work. That documentation is your only evidence if the coating fails early and a warranty claim is needed.
For a detailed look at pre-painting preparation documentation and what a complete deliverable package looks like, Southernsandblastingandpainting’s workflow guide covers the full sequence.
Key Takeaways
Proper tank recoating requires SSPC-SP10 / NACE No. 2 cleanliness, a surface profile matched to the coating TDS, verified by Testex tape or ASTM D4417 gauge, with same-day coating application and a complete documentation package as a contractual deliverable.
| Point | Details |
|---|---|
| Cleanliness standard matters | Specify SSPC-SP10 / NACE No. 2 for severe service; SP6 for moderate environments. |
| Profile must match the TDS | Require the coating manufacturer’s TDS in the contract; it governs acceptable profile range and DFT. |
| Pre-blast cleaning is mandatory | SSPC-SP1 solvent cleaning before blasting prevents oil and salts from being driven into the profile. |
| Verify with instruments, not just eyes | Require Testex replica tape or ASTM D4417 digital gauge readings; visual inspection alone is insufficient. |
| Southernsandblastingandpainting delivers spec-driven work | Southernsandblastingandpainting provides full documentation packages including blast logs, profile readings, and DFT maps for tank recoating projects. |
The real cost of skipping the blast
Owners push back on blasting costs more than almost any other line item. The argument is always the same: the tank looks okay, the old coating is mostly intact, and blasting adds time and money. The pressure to spot-prime and overcoat is real, and it is understandable from a budget perspective.
The problem is that “mostly intact” coatings almost always have adhesion failures at the edges of corroded areas, and those edges are exactly where moisture infiltrates under the new film. Overcoating a marginally adhered system does not fix the weak boundary layer; it buries it. When the failure propagates, it takes the new coating with it, and the rework cost is always higher than the original blast would have been.
The more defensible conversation is about options, not about skipping preparation entirely. Spot blasting corroded areas to SP10 while overcoating sound sections to SP7 is a legitimate cost-management approach when the existing coating passes adhesion and pull-off testing. That is a value-based decision grounded in inspection data. What is not defensible is skipping profile verification and documentation, because without those records, there is no baseline for a warranty claim and no way to know whether the failure was a preparation problem or a coating application problem.
The contractors who refuse to skip blasting are not being rigid. They are protecting their warranty and their reputation, and they are protecting the owner from a failure that will cost two to three times as much to fix the second time around.
Southernsandblastingandpainting: spec-driven tank recoating in Central Florida

Southern Sandblasting and Painting brings 20+ years of industrial surface preparation and protective coating experience to tank recoating projects across Central Florida, including water tanks, storage tanks, and municipal infrastructure. Every project is executed to a written ITP, with cleanliness and profile verified against the coating manufacturer’s TDS and full documentation delivered before final payment.
For facility managers and contractors who need a contractor that shows up with the right abrasive, the right instruments, and the paperwork to back it up, Southernsandblastingandpainting is the straightforward choice. Request a site survey and spec review, and get a proposal that includes the surface prep best practices and documentation package your project requires. Contact Southernsandblastingandpainting through the sandblasting services page to schedule an initial consultation.
Authoritative sources for specifications and inspection
These standards and references belong in your spec package and on your inspector’s desk.
- SSPC-SP10 / NACE No. 2 Joint Standard — Defines near-white metal blast cleanliness, allowable staining limits, and guidance on specifying profile measurement and ITP items. The primary reference for severe-service tank work.
- SSPC-SP6 / NACE No. 3 — Commercial blast standard; covers pre- and post-blast cleaning requirements and acceptable staining levels for moderate service.
- Surface Preparation Standards Overview (AMPP/SSPC) — Plain-language breakdown of all SSPC/NACE cleanliness grades from SP1 through SP16, including SP11 power tool to bare metal and SP14 industrial blast.
- NACE Coating Standards Explained — Practical guide to selecting cleanliness grades based on service severity and cost trade-offs.
- Surface Roughness Profile and Coating Adhesion Review (ResearchGate) — Peer-reviewed research on how abrasive type, profile parameters, and surface chemistry interact to affect adhesion and corrosion resistance.
- Airblast: Achieving the Perfect Surface Profile — Practical guidance on profile control, over-blasting risks, and matching profile to coating TDS.
- EPA Aboveground Storage Tanks — Federal regulatory reference for AST owners on spill prevention, containment, and inspection requirements.
- Sandblasting vs. Water Blasting for Water Tanks — Practical comparison of methods for potable water tank applications.
- Construction Tender Safety Requirements Guide — Covers safety requirements and preparation language recommended for construction tenders, including surface prep contracts.
Callout: Attach the coating manufacturer’s TDS to every contract as a mandatory exhibit. The TDS is the governing document for profile range, DFT, application conditions, and recoat windows. No spec, ITP, or inspector decision should override it without written manufacturer approval.


