
TL;DR:
- Proper industrial floor coating preparation ensures long-lasting adhesion and performance. It involves detailed inspection, cleaning, mechanical profiling, moisture testing, crack repair, and priming to prevent coating failure. Accurate execution of each step is essential for coating durability and success.
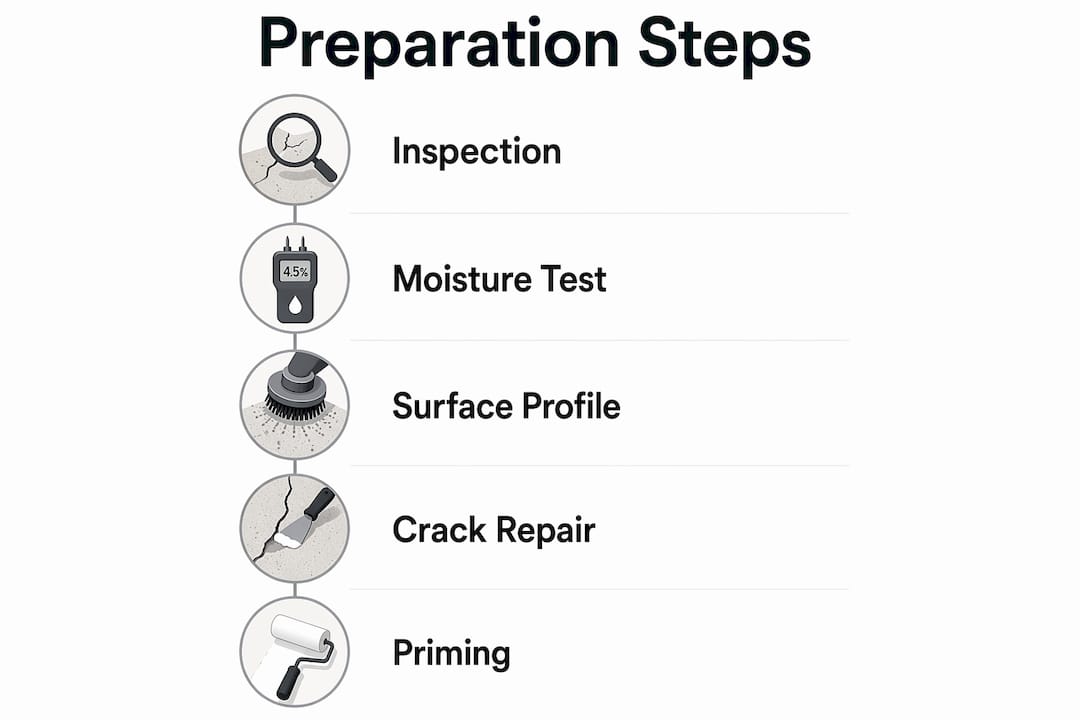
Industrial floor coating preparation is defined as a sequential, multi-step process that governs whether a coating bonds, lasts, or fails under industrial load. The process covers inspection, cleaning, mechanical profiling, moisture testing, crack repair, and priming. Facility managers and contractors who skip or rush any of these industrial floor coating preparation steps pay for it in delamination, bubbling, and premature failure. Standards like the ICRI Concrete Surface Profile (CSP) scale and ASTM moisture testing protocols exist precisely because the floor condition at application time determines everything. Get the prep right, and the coating performs for years. Get it wrong, and no product choice saves you.
What are the preliminary inspection and site assessment steps?
Every floor coating project starts with a thorough site assessment before any equipment rolls in. Visual inspection identifies the obvious: cracks, spalls, joint damage, previous coatings, and surface discoloration. A quick water drop test reveals whether a sealer or curing compound is still active. If water beads, the surface is sealed and requires mechanical removal before any coating will bond.
Contaminant identification is the most underestimated part of this stage. Oils, grease, hydraulic fluid, and cleaning chemical residues are often invisible to the eye but catastrophic to adhesion. Look for dark staining, surface sheen, or areas where concrete appears slightly darker than surrounding zones. Previous paint or epoxy coatings must be mapped and tested for adhesion before deciding whether to overcoat or remove them entirely.
Moisture signs require specific attention. Efflorescence (white mineral deposits on the surface), damp patches, or a musty odor all indicate active moisture movement through the slab. These conditions demand moisture testing before any prep work continues. Documenting every finding with photos and notes creates the planning baseline for repair sequences and method selection.
- Perform a visual sweep of the entire floor under strong lighting to catch low spots, cracks, and surface variations.
- Run the water drop test in multiple zones, including corners and areas near drains or exterior walls.
- Mark all contaminated zones, cracks, and spalls with chalk or tape for systematic treatment.
- Record slab age, construction type, and any known history of chemical exposure or heavy traffic.
- Note ambient temperature and humidity, since both affect cleaning product performance and drying times.
Pro Tip: Bring a flashlight held at a low angle to the floor surface. Raking light reveals surface texture, low spots, and previous repair patches that overhead lighting completely hides.
How to clean and degrease industrial concrete floors effectively before coating?
Cleaning is not optional and it is not a single pass. Multiple cleaning passes are required until no oily sheen or discoloration remains on the concrete surface. A floor that looks clean to the eye can still carry enough residual oil to prevent adhesion entirely.
- Dry sweep and vacuum. Remove all loose grit, dust, and debris with an industrial vacuum. Never use a broom alone, as it redistributes fine particles rather than removing them. Vacuuming before wet cleaning prevents grit from being ground into the surface during scrubbing.
- Apply a concrete degreaser. Use an alkaline degreaser rated for industrial concrete. Apply it undiluted to heavily contaminated zones and at the manufacturer’s dilution rate for general cleaning. Allow dwell time as specified, typically 10–20 minutes, so the degreaser can break down oil bonds.
- Mechanical scrubbing. Use a floor scrubber with stiff nylon or polypropylene brushes. Hand scrubbing with a deck brush is acceptable for small areas but inadequate for large industrial floors. Mechanical scrubbing forces the degreaser into surface pores where contamination hides.
- Rinse and extract. Rinse thoroughly with clean water and extract immediately with a wet vacuum or floor squeegee system. Standing rinse water redeposits dissolved contaminants if left to dry. Repeat the rinse until the extracted water runs clear.
- Inspect under raking light. After drying, inspect the surface again under low-angle lighting. Any remaining sheen, dark patches, or discoloration means the cleaning cycle must repeat. Only a uniformly matte, consistent surface color confirms the floor is ready for mechanical profiling.
What mechanical surface preparation methods create the right concrete profile?
Mechanical profiling is the step that physically creates the surface texture a coating needs to grip. The ICRI CSP scale from 1 to 9 is the universal standard for specifying concrete surface roughness. Most industrial epoxy systems require CSP 3 to 5 for adequate mechanical interlock. Thin coatings need lower CSP values; high-build systems and broadcast floors need higher ones.
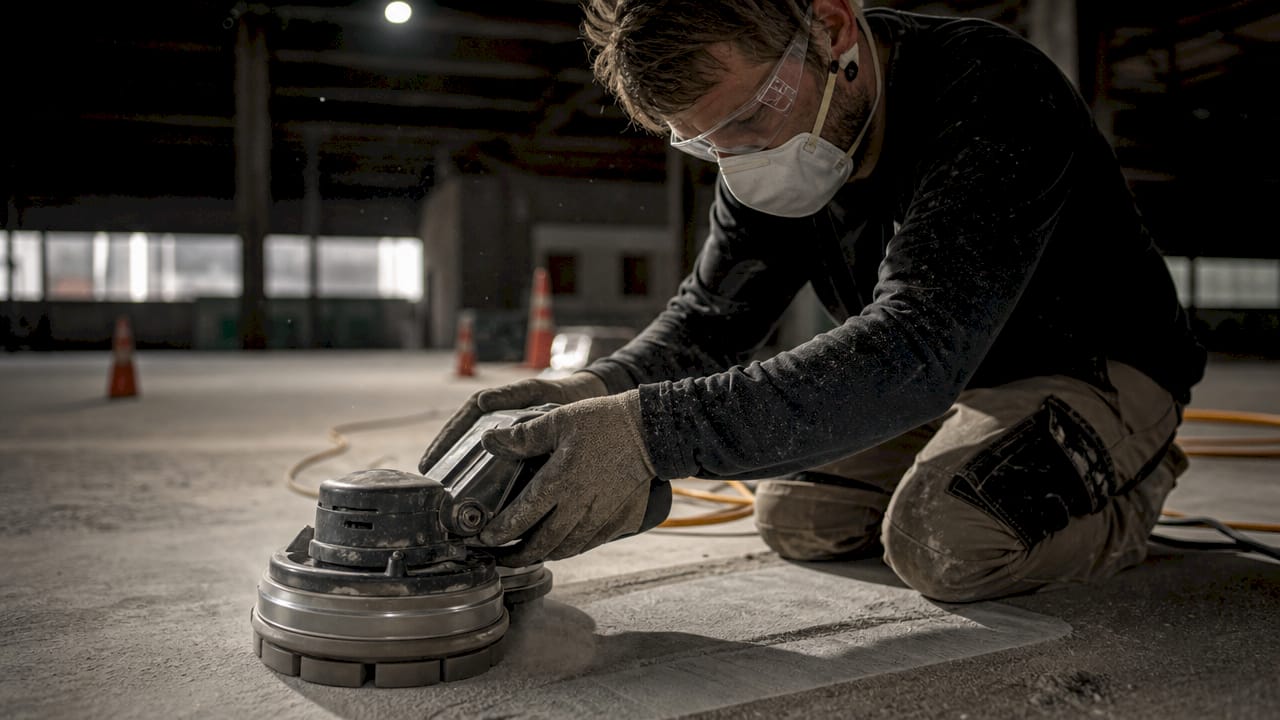
Diamond grinding
Diamond grinding uses rotating diamond-segmented heads to abrade the concrete surface to a controlled depth. It produces a consistent, flat profile well suited to thin-coat epoxies and urethanes. Grinding works on slabs with minor laitance, light contamination, or previous thin coatings. It generates fine dust, so industrial vacuums with HEPA filtration must run simultaneously. Grinding is the preferred method for interior spaces where containment matters.
Shot blasting
Shot blasting propels steel shot at high velocity across the floor surface, fracturing the top layer and creating a uniform anchor profile. It is the best choice for large open areas, high-build coatings, and floors that will carry heavy forklift or vehicle traffic. Shot blasting is self-contained: the machine recycles shot and vacuums debris simultaneously, making it efficient and relatively clean. The profile depth is controlled by shot size, machine speed, and number of passes.
| Method | Best application | Profile range | Key limitation |
|---|---|---|---|
| Diamond grinding | Thin coatings, interior floors | CSP 1–4 | Slower on large areas |
| Shot blasting | High-build coatings, large floors | CSP 3–6 | Requires specialized equipment |
| Acid etching | Not recommended for industrial use | Inconsistent | Poor profile control, residue risk |
Acid etching produces inconsistent profiles and leaves chemical residues that impair adhesion. Professional industrial surface treatment projects use mechanical methods as standard practice. Acid etching remains a liability in industrial contexts and should not appear in any serious floor coating process specification.
Pro Tip: After shot blasting or grinding, run your hand across the surface. It should feel like medium-grit sandpaper. If it feels smooth or powdery, the profile is insufficient and another pass is needed.
How to test for moisture and repair cracks or surface defects before coating?
Moisture vapor transmission through concrete slabs is a leading cause of coating failure. Moisture testing is not optional. Two ASTM protocols govern this step in professional industrial floor prep.
- ASTM F1869 (calcium chloride test): Measures moisture vapor emission rate (MVER) from the slab surface. Dishes containing calcium chloride are sealed to the floor for 60–72 hours, then weighed. Results above the coating manufacturer’s threshold require a moisture-blocking primer or mitigation system before proceeding.
- ASTM F2170 (in-situ relative humidity test): Measures relative humidity within the slab at 40% of its depth. This method captures moisture deeper in the slab and is considered more accurate for thick slabs. Results above 75–80% RH typically require mitigation.
- Interpretation: Both tests must be read against the specific coating system’s published tolerances. A result acceptable for one product may disqualify another. Always check the coating manufacturer’s technical data sheet for the threshold values.
| Test method | Measures | Typical threshold | Time required |
|---|---|---|---|
| ASTM F1869 | Surface vapor emission | Per manufacturer spec | 60–72 hours |
| ASTM F2170 | Internal slab RH | 75–80% RH | 24–72 hours |
Crack repair follows moisture testing. Structural cracks require engineering assessment before any filler is applied, since filling an active structural crack without addressing the cause leads to re-cracking through the new coating. Non-structural cracks and spalls can be filled with a rigid epoxy filler or polyurethane compound, then feathered flush with the surrounding surface after cure. All repairs must reach full cure before mechanical profiling or priming continues. Rushing this step causes the filler to shrink, leaving a depression that telegraphs through the finished coating.
Why is priming and final inspection critical before applying industrial coatings?
Primers are not optional on industrial concrete floors. Skipping primer on porous slabs is a documented cause of outgassing bubbles and adhesion failures. A penetrating epoxy primer fills micro-porosity in the concrete, displaces trapped air, and creates a chemical bond between the slab and the topcoat system.
- Select the correct primer. Match the primer to the topcoat system and the slab’s moisture condition. Moisture-tolerant epoxy primers work on slabs with borderline moisture readings. Standard penetrating primers suit dry slabs with confirmed acceptable moisture levels.
- Apply at the correct spread rate. Over-applying primer creates a film that does not penetrate. Under-applying leaves micro-pores unsealed. Follow the manufacturer’s coverage rate exactly, typically measured in square feet per gallon.
- Allow full cure before topcoat. Primer must reach the manufacturer’s specified recoat window. Applying topcoat too early traps solvents. Applying it too late means the primer surface has cured past its chemical bonding window and must be lightly abraded.
- Run the dust test. Wipe a clean microfiber cloth firmly across the primed or prepped surface. If dust transfers to the cloth, further vacuuming and cleaning are required before coating. Dust between the concrete and coating causes adhesion failure even when the surface looks clean.
- Verify environmental conditions. Confirm ambient temperature, dew point, and relative humidity are within the coating system’s application window. Concrete surface temperature must be at least 5°F above the dew point to prevent moisture condensation on the surface during application.
Pro Tip: Check the concrete surface temperature with an infrared thermometer, not just the ambient air temperature. Slab temperature and air temperature often differ by 10°F or more, especially in Florida’s climate, and the slab temperature is what matters for adhesion.
Key Takeaways
Proper industrial floor coating preparation governs long-term coating performance more than product selection or application technique, making each sequential step non-negotiable.
| Point | Details |
|---|---|
| Inspection comes first | Document all contaminants, cracks, and moisture signs before any prep work begins. |
| CSP matching is mandatory | Match the ICRI CSP level to the specific coating system, typically CSP 3–5 for industrial epoxies. |
| Moisture testing prevents failure | Run ASTM F1869 or ASTM F2170 tests and compare results to the coating manufacturer’s published thresholds. |
| Mechanical prep beats etching | Diamond grinding and shot blasting produce consistent, verifiable profiles that acid etching cannot match. |
| Primer seals the system | Apply the correct primer at the specified spread rate and verify cure before topcoat application. |
What I’ve learned after years of watching coatings fail
Approximately 80% of premature coating failures trace back to inadequate surface preparation. That number has not changed in decades, and the reason is always the same: teams treat prep as a cost to minimize rather than a result to achieve.
The most persistent misconception I encounter is that a visually clean floor is a prepared floor. Visual cleanliness does not guarantee the correct CSP or the removal of contaminants that impair adhesion. A floor can look spotless and still carry enough residual oil or sealer to cause complete delamination within six months.
The second mistake is treating mechanical prep method selection as a budget decision rather than a technical one. Method selection must consider slab condition, contaminant type, and the specific coating system’s requirements. No single method fits every project. A facility manager who specifies shot blasting on a thin slab with active cracks will create more problems than they solve.
My consistent advice: document everything. Photograph the floor before and after each prep stage. Record moisture test results, CSP measurements, and repair materials used. That documentation protects you if a coating fails and gives the next contractor a real starting point. The surface preparation workflow is not paperwork. It is the technical record that proves the job was done right.
— Results
Southernsandblastingandpainting’s approach to industrial floor prep
Southernsandblastingandpainting brings over 20 years of industrial surface treatment experience to floor coating projects across Central Florida. The team executes every step of the floor coating process to measurable standards, from initial site assessment through mechanical profiling, moisture testing, crack repair, and primer application.
Whether your facility needs shot blasting equipment to achieve a specific CSP level or a full industrial coating application from prep through topcoat, Southern Sandblasting and Painting delivers work that meets ASTM and ICRI standards on every project. Municipal facilities, warehouses, airports, and industrial plants across the Orlando region trust this team with floors that cannot afford to fail. Contact Southernsandblastingandpainting for a site assessment and project quote.
FAQ
What CSP level do most industrial epoxy floors require?
Most industrial epoxy systems require CSP 3 to 5 on the ICRI scale for adequate mechanical interlock. Higher-build coatings and broadcast systems typically need CSP 4 or above.
How long does moisture testing take before floor coating?
ASTM F1869 calcium chloride testing requires 60–72 hours on site. ASTM F2170 in-situ relative humidity testing takes 24–72 hours depending on slab depth and probe equilibration time.
Can you coat over an existing epoxy floor without grinding?
Coating over an existing epoxy without mechanical preparation is not recommended. The existing coating must be tested for adhesion, and the surface must be abraded to the correct CSP to allow the new system to bond chemically and mechanically.
Why is acid etching not used on industrial floors?
Acid etching produces inconsistent surface profiles and leaves chemical residues that impair adhesion. Diamond grinding and shot blasting are the standard methods for professional industrial floor prep because they deliver verifiable, uniform results.
What happens if you skip the primer on a concrete floor?
Skipping primer on porous concrete allows air trapped in micro-pores to outgas through the topcoat, creating bubbles and adhesion failures. Primer seals the slab and creates the chemical bond the topcoat system needs to perform.
Recommended
- Industrial Coating Application Steps for Lasting Protection
- 7 Steps to Mastering an Industrial Coating Selection Guide
- Coating Application Step by Step for Lasting Protection
- Surface Prep Best Practices for Long-Lasting Coatings
- Sandblasting Contractor Baldwin Park FL
- Sandblasting Services Oviedo FL


