
TL;DR:
- Pipeline surface preparation involves cleaning, profiling, and verifying steel surfaces to ensure proper coating adhesion and long-term corrosion protection.
- Following strict SSPC and NACE standards is essential, and skipping steps can lead to coating failure.
- Verifying each stage with tests for cleanliness, anchor profile, dust, and soluble salts is crucial before applying the coating.
Pipeline surface preparation is defined as the sequential process of cleaning, profiling, and verifying steel pipe surfaces to achieve proper coating adhesion and long-term corrosion protection. The steps for pipeline surface prep follow a strict order governed by SSPC and NACE standards, from SSPC-SP1 solvent cleaning through abrasive blasting, anchor profile measurement, soluble salt testing, and timely coating application. Skipping or reordering any stage creates contamination points that cause premature coating failure. This guide covers every stage of surface prep for pipelines, the verification tests required at each hold point, and the field joint techniques that protect weld zones.
1. What are the primary steps for pipeline surface prep?
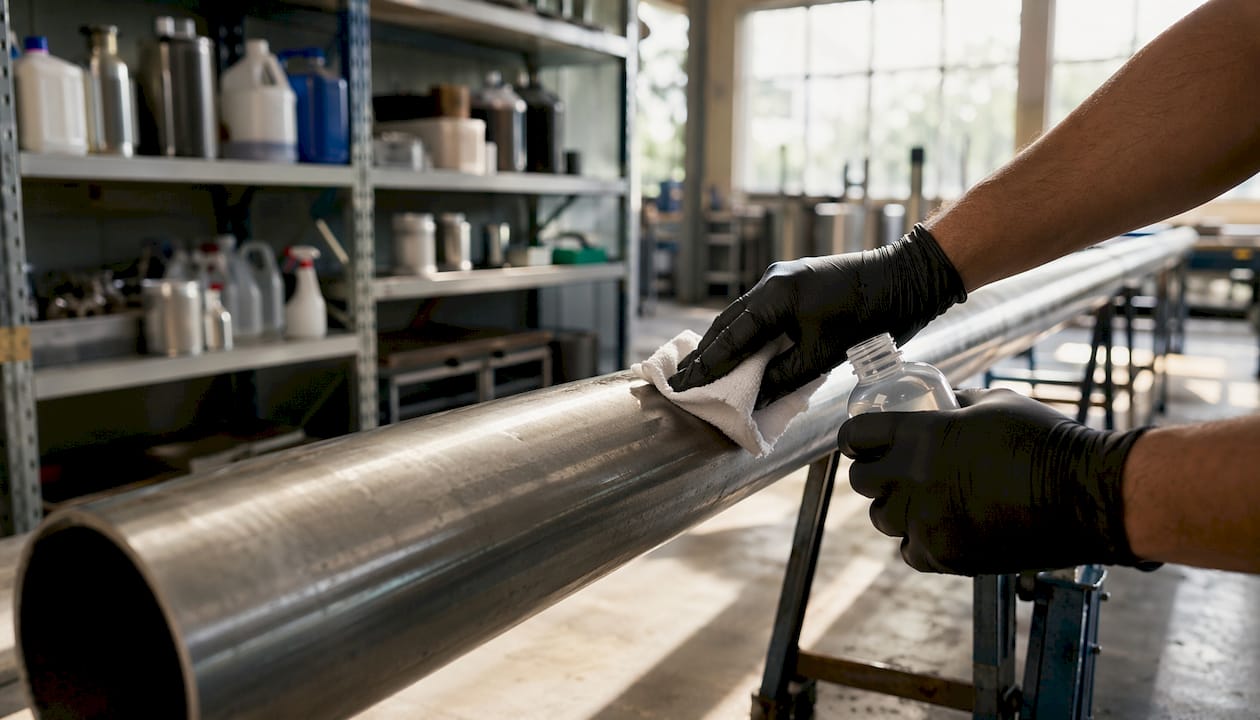
The standard pipeline preparation sequence has four phases: solvent cleaning, mechanical cleaning, surface verification, and coating application. Each phase builds on the last. Reversing the order or skipping a phase creates compounding defects that no coating system can overcome.
The phases are:
- Solvent cleaning (SSPC-SP1) to remove oil, grease, and soluble salts
- Mechanical cleaning via abrasive blasting or power tool cleaning to remove rust, mill scale, and old coatings
- Verification of cleanliness level, anchor profile, dust, and soluble salt residue
- Coating application within the manufacturer-specified open time to prevent flash rust
Surface preparation standards are dictated by the coating manufacturer’s technical data sheet and the project’s environmental conditions. Defaulting to a generic cleanliness level without checking the TDS is one of the most common and costly mistakes on pipeline projects.
Pro Tip: Always read the coating TDS before selecting your blast standard. An epoxy system and a polyethylene sleeve require different anchor profiles and cleanliness levels.
2. Solvent cleaning: the step most crews skip
Solvent cleaning must precede abrasive blasting or power tool cleaning on every pipeline project. SSPC-SP1 covers this phase. It requires removing all oil, grease, drawing compounds, and soluble salt deposits using solvents, emulsifiers, or detergent washes before any mechanical work begins.
The reason this step is non-negotiable: abrasive blasting drives surface oils into open steel pores. Once embedded, those contaminants cannot be removed by further blasting. The coating bonds to contaminated steel and fails from beneath, often within months. Solvent cleaning costs minutes. Recoating a failed pipeline costs weeks.
3. Mechanical cleaning to the correct cleanliness level
Near-White Blast Cleaning (SSPC-SP 10 / NACE No. 2) is the standard for external pipeline coatings. It requires at least 95% of the surface to be free of visible residues. SSPC-SP 5 / NACE 1 (White Metal) applies to critical immersion service. SSPC-SP 6 / NACE 3 covers moderate service environments.
Abrasive blasting is the primary method for achieving SP10 on new construction. It removes rust, mill scale, and old coatings while simultaneously creating the anchor profile the coating needs to grip. Power tool cleaning to SSPC-SP 11 is the fallback for confined areas or maintenance repairs where blasting is not practical.
4. Creating the correct anchor profile
Anchor profile for pipeline coatings is typically 50–85 µm Rz for epoxy systems and 65–100 µm Rz for polyethylene sleeves. The profile is the microscopic roughness that gives the coating mechanical grip on the steel surface. Too shallow and the coating peels. Too deep and the peaks puncture through thin film coatings, creating holidays.
Profile depth is controlled by abrasive type, size, and blast pressure. Steel grit produces angular profiles. Steel shot produces rounded profiles. Most pipeline coating systems specify angular profiles because they provide greater surface area for adhesion. Match the abrasive to the coating TDS, not to what is already loaded in the blast pot.
5. How to verify pipeline surface prep quality
Verification requires four distinct tests before coating application begins. Each test addresses a different failure mode.
- Visual cleanliness: Compare the blasted surface to SSPC-VIS 1 photographic standards for the specified cleanliness grade (e.g., SP10/NACE 2). Visual alone is not sufficient for quality control.
- Anchor profile measurement: Use Testex Press-O-Film replica tape per ASTM D4417 Method C. Subtract the tape substrate thickness (50 µm) from the raw dial gauge reading to get the true steel roughness value.
- Dust level: Test per ISO 8502-3 using a tape lift. Dust levels above Class 2 contaminate the coating interface.
- Soluble salt testing: Test per ISO 8502-6 (Bresle patch) and ISO 8502-9 (conductivity). Residual chlorides cause osmotic blistering even when the surface looks visually clean.
Document every test result in the Inspection and Test Plan (ITP) before releasing the surface for coating. Hold points exist for a reason. Releasing a surface without documented verification removes your only proof of compliance if a coating failure occurs later.
Pro Tip: Run soluble salt tests on every pipeline project, not just marine or offshore work. Chloride contamination from groundwater, irrigation runoff, and road salts appears on inland pipelines more often than most crews expect.
6. Environmental monitoring during prep and coating
Steel surface temperature must stay at least 3°C above the dew point during both surface preparation and coating application. Ignoring this condition allows invisible condensation to form on the blasted steel, which compromises coating adhesion just as effectively as visible contamination.
Monitor four environmental parameters at each hold point: air temperature, steel surface temperature, relative humidity, and dew point. Record all four in the ITP. If conditions fall outside the coating TDS limits, stop work. Applying coating to a surface that is too cold or too humid creates defects that cannot be corrected after the fact.
7. Best practices and common pitfalls in pipeline surface preparation
The most costly mistakes in pipeline surface prep are predictable and preventable. The surface preparation workflow for industrial projects consistently shows the same failure points across different job sites.
Avoid these errors:
- Skipping SP1 before blasting. Oils embed into steel pores and cause adhesion failure beneath the coating.
- Wrong anchor profile for the coating system. Always verify the profile range in the coating TDS before blasting.
- Sharp weld edges. Weld zones require minimum 2mm radius edges and full removal of spatter and flux residues. Sharp edges cause coating holidays at the weld toe.
- Delayed coating application. Flash rust forms on blasted steel within hours in humid conditions. Apply coating within the manufacturer’s specified open time.
- No soluble salt testing. Soluble salt testing is mandatory in aggressive environments to prevent osmotic blistering and premature failure.
Pro Tip: Round all weld cap edges with a grinding disc before blasting. A sharp weld toe will punch through thin film coatings and create a corrosion initiation point regardless of how well the rest of the surface was prepared.
8. Field joint and weld zone preparation sequence
Field joints and weld zones require a specialized sequence because they combine fresh weld metal, heat-affected zones, and cutback edges from the factory coating. The surface prep best practices for these areas differ from mainline pipe preparation.
The sequence for field joint preparation:
- Inspect and document the weld condition, spatter, and cutback edge profile before any cleaning begins.
- Remove heavy rust, weld spatter, and heat-affected zone scale using a Tercoo disc or equivalent angle grinder attachment.
- Achieve SP10 cleanliness and anchor profile using a Bristle Blaster. The Bristle Blaster achieves 65–85 µm Rz in a single pass without abrasive media, making it practical for confined field conditions.
- Verify the surface with visual comparison, Testex tape profile measurement, and a soluble salt test.
- Apply field joint coating within the open time specified by the manufacturer, typically within 2–4 hours of completing surface prep.
| Step | Tool / Method | Standard |
|---|---|---|
| Heavy scale removal | Tercoo disc / angle grinder | SSPC-SP 11 minimum |
| Final profile and cleanliness | Bristle Blaster | SSPC-SP 10 / NACE 2 |
| Profile verification | Testex replica tape | ASTM D4417 Method C |
| Soluble salt check | Bresle patch | ISO 8502-6/9 |
| Coating application | Per TDS | Within 2–4 hours |
The Bristle Blaster is particularly effective on weld caps, toes, and adjacent areas because it profiles complex geometries uniformly without requiring containment for abrasive media. That matters on live pipeline corridors where blast containment is expensive and time-consuming.
Key takeaways
Effective pipeline surface preparation requires a non-negotiable sequence of solvent cleaning, mechanical blasting to SSPC-SP10, verified anchor profile, soluble salt testing, and coating application within the manufacturer’s open time.
| Point | Details |
|---|---|
| Solvent cleaning is first | SSPC-SP1 must precede all mechanical cleaning to prevent oil contamination in steel pores. |
| SP10 is the pipeline standard | Near-White Blast Cleaning requires 95% of the surface free of visible residues for external coatings. |
| Profile must match the coating | Epoxy systems need 50–85 µm Rz; polyethylene sleeves need 65–100 µm Rz per the coating TDS. |
| Four verification tests required | Visual, anchor profile (ASTM D4417), dust (ISO 8502-3), and soluble salts (ISO 8502-6/9) before coating. |
| Environmental control is a hold point | Steel temperature must stay at least 3°C above dew point during prep and coating application. |
What 20 years of pipeline prep taught me
The single biggest misconception I see on pipeline projects is that surface preparation is a cleaning task. It is not. It is a manufacturing process with defined inputs, measurable outputs, and failure modes that show up months or years after the coating is applied.
The crews that get this right treat every hold point as a quality gate, not a formality. They document anchor profile readings, soluble salt results, and environmental conditions in real time. When a coating failure investigation happens two years later, that documentation is the difference between a warranty claim and a full liability dispute.
The other thing I have learned: environmental control is where most field failures originate. A blasted surface left overnight in Florida humidity will flash rust before the morning shift arrives. The fix is not to blast faster. The fix is to coordinate blast and coat operations so the open time is never exceeded. That requires scheduling discipline, not just technical knowledge.
Evolving standards also matter. SSPC and NACE have merged into AMPP, and the updated standards reflect tighter tolerances on soluble salt limits and anchor profile verification. Professionals who are still working from 2015-era specs are operating outside current requirements without knowing it. Training your inspection team on current AMPP standards is not optional on any project that carries a performance guarantee.
— Results
Southernsandblastingandpainting: pipeline surface prep expertise in Orlando
Southernsandblastingandpainting has delivered industrial surface preparation and protective coating services across Central Florida for over 20 years, including pipeline projects for municipal, commercial, and government clients.
The team at Southern Sandblasting and Painting applies SSPC and NACE-compliant procedures on every pipeline project, from initial solvent cleaning through final coating inspection. If you are specifying or managing a pipeline coating project in the Orlando area, the sandblasting services in Orlando page details the equipment and methods used for pipeline surface preparation. For a deeper look at equipment selection and its impact on coating performance, the sandblasting equipment guide covers the full range of options for pipeline and infrastructure projects. Southernsandblastingandpainting also provides protective coating options for pipelines matched to specific service environments and project specifications.
FAQ
What is the first step in pipeline surface preparation?
The first step is solvent cleaning per SSPC-SP1 to remove oil, grease, and soluble salts before any mechanical cleaning begins. Skipping this step causes contaminants to embed into steel pores during blasting, leading to premature coating failure.
What cleanliness level is required for external pipeline coatings?
Near-White Blast Cleaning (SSPC-SP 10 / NACE No. 2) is the standard for external pipeline coatings, requiring at least 95% of the surface to be free of visible residues.
How do you measure anchor profile on a blasted pipeline surface?
Anchor profile is measured using Testex Press-O-Film replica tape per ASTM D4417 Method C. Subtract the tape substrate thickness of 50 µm from the dial gauge reading to get the true steel roughness value.
Why is soluble salt testing required before coating application?
Residual chlorides cause osmotic blistering beneath the coating even when the surface appears visually clean. Soluble salt testing per ISO 8502-6 and ISO 8502-9 confirms the surface is free of ionic contamination before coating is applied.
How soon after blasting must pipeline coating be applied?
Coating must be applied within the time window specified in the coating manufacturer’s technical data sheet, typically within 2–4 hours for field joint work. Steel surface temperature must remain at least 3°C above the dew point throughout this window to prevent flash rust.
Recommended
- Surface Preparation Workflow for Industrial Projects
- Industrial Surface inspection steps: Florida guide 2026
- 7 Essential Surface Preparation Tips 2025 for Infrastructure
- Surface Preparation Standards 2025: Raising Compliance in Florida
- Sandblasting Contractor Baldwin Park FL
- Sandblasting Services Oviedo FL


