

A project safety procedures guide must make site hazards predictable, assign clear authority, and document controls so every worker knows exactly what to do before the first tool swings. Start today by naming a competent person and walking the site.
BLS data show construction recorded a significant number of fatal work injuries in 2024, with a notably high fatal injury rate per 100,000 full-time equivalent workers. That number is not background context. It is the reason your safety management procedures need to be written, distributed, and used before mobilization, not assembled reactively after the first near-miss.
Three things to produce this week:
- Designate a competent person. Under 29 CFR 1926.20(b), that person must be capable of identifying hazards and authorized to stop work. Naming someone without granting stop-work authority fails the standard.
- Run a site walkthrough and document your top three hazards for the first seven days. Falls, excavation, and electrical exposure are the most frequently cited serious violations in OSHA’s FY2025 construction data. Start there.
- Produce three deliverables: a site-specific Job Safety Analysis (JSA) for the first critical task, an emergency action plan tied to foreseeable scenarios, and a daily toolbox-talk script your foreman can run in five minutes.
Pro Tip: Keep the first JSA to one page. A single-page document workers actually read and sign will outperform a 40-page binder that never leaves the site office.
Key Takeaways
A project safety procedures guide works only when it is written at the task level, assigned to a named competent person with stop-work authority, and delivered daily through toolbox talks before work begins.
| Point | Details |
|---|---|
| Name a competent person first | Designate someone with hazard-ID skills and documented stop-work authority before mobilization. |
| Write task-level JSAs | One-page JSAs signed before each high-risk task outperform program-level policy documents. |
| Deliver the plan daily | Use morning toolbox talks to read one JSA step aloud and verify worker understanding. |
| Inspect and close findings | Assign every inspection finding an owner and due date; review open items weekly. |
| Update at phase transitions | Revise procedures when scope changes, new subcontractors arrive, or an incident occurs. |
Table of Contents
- How to build your project safety procedures guide step by step
- What every procedure must contain
- How do you make written procedures work in the field?
- How should you run inspections and track continuous improvement?
- Ready-to-use templates and checklists
- Common failures in safety procedure implementation and how to fix them
- A field note on real-world application
- Sources
How to build your project safety procedures guide step by step
Follow this nine-step sequence from pre-mobilization through project close. Each step produces a tangible output.
-
Collect project information and contract safety requirements. Pull the contract’s Division 01 specifications, owner safety requirements, and any permit conditions. Note written-plan triggers: confined space, fall protection, excavation, hazard communication, and lockout/tagout (LOTO) each require a documented program under specific OSHA standards.
-
Assign roles and competencies. Identify your competent person, supervisors, and subcontractor safety leads by name. Confirm each has the training and authority their role requires. OSHA’s construction quick-start guidance walks through how to match roles to applicable requirements.
-
Conduct site-specific hazard identification. Walk the site with your competent person before mobilization. Map the top hazards by location and task. OSHA’s leading construction hazards — falls, scaffolding, excavation, electrical, and silica — are the right starting categories.
-
Prioritize risks and select controls using the hierarchy of controls. Work top-down: elimination first, then engineering controls (guarding, ventilation, containment), then administrative controls (procedures, scheduling, signage), and PPE last as the residual layer. For abrasive blasting and coating work specifically, containment and ventilation must be documented before PPE is specified. Document every control decision.
-
Write task-level procedures and permits. A JSA or Job Hazard Analysis (JHA) for each critical task is the core deliverable. Add permit-required procedures for hot work, confined space entry, excavation, and LOTO. Each procedure needs clear steps, required PPE, and explicit triggers to stop work.
-
Prepare emergency action and rescue plans. Tie each scenario (fall, chemical release, confined space rescue, fire) to a named responder, an assembly point, and a contact list. Vague plans fail when seconds count.
-
Train workers and schedule toolbox talks. Initial training before task assignment, task-level briefings before high-risk work, and daily toolbox talks that reference that day’s JSA. Procore’s site-specific safety plan guidance recommends making the morning briefing the plan’s daily delivery mechanism.
-
Set inspection cadence, incident reporting, and corrective action processes. Daily pre-shift checks, weekly site-wide inspections, and post-incident audits. Every finding gets a corrective action, an owner, and a due date.
-
Review and update at phase transitions and after incidents. When scope changes, a new subcontractor arrives, or an incident occurs, the plan updates. Version-control every revision with a date and the name of the person who approved it.
Pro Tip: At phase transitions, run a 30-minute tabletop review with your competent person and subcontractor leads. Ask one question: “What hazards exist in the next phase that the current plan does not address?” Document the answer and update the JSAs before work restarts.
OSHA’s Recommended Practices for Safety and Health Programs in Construction frames this entire sequence as a proactive “find and fix” program, with hazard identification, prevention and control, training, inspections, and periodic evaluation as its core elements.
What every procedure must contain
Each written procedure in your safety plan needs the same set of fields. Inspectors look for them. Workers rely on them. Missing fields are the most common reason a plan fails an audit.
Required fields for every procedure:
- Purpose and scope: one sentence on what the procedure covers and who it applies to
- Regulatory references: cite the applicable OSHA standard (e.g., 29 CFR 1926.502 for fall protection)
- Competent person: named individual with contact information and stop-work authority
- Responsibilities: what supervisors do, what workers do, what the safety coordinator verifies
- Hazard description: specific hazards for this task, not generic language
- Controls by hierarchy: elimination, engineering, administrative, PPE — each layer documented
- Step-by-step safe work method: numbered steps a worker can follow in sequence
- Permits and triggers: which permits are required and what conditions stop work
- Emergency response: immediate actions, contacts, and assembly point for this task
- Training requirements: who must be trained, what training, and how it is verified
- Records to keep: sign-in sheets, inspection logs, permit copies, training records
- Review frequency: when the procedure is next reviewed (phase change, incident, or scheduled date)
OSHA citation map for common procedure types:
OSHA’s sample programs library provides customizable written-plan templates for fall protection, confined space, hazard communication, and LOTO. Use them as starting points, then add your site-specific hazard detail. They are guidance documents, not regulatory replacements.
For surface preparation and industrial coating projects, the painting safety compliance practices and industrial painting safety protocols pages from Southernsandblastingandpainting cover task-level PPE and inspection expectations specific to coating work.
A practical construction safety plan template consolidates these required written plans into one project document with sections for project info, safety policy, roles, hazard assessment, site-specific rules, emergency response, and training.
How do you make written procedures work in the field?
A plan that lives in a binder on the site office desk is not a safety program. It is a filing exercise. Getting procedures into daily practice takes deliberate communication habits.
Daily toolbox talk integration:
- The foreman opens every morning with a five-minute briefing tied to that day’s work tasks.
- Read one step from the relevant JSA aloud. Ask two workers to explain it back.
- Record attendance on a sign-in sheet. File it with the project safety records.
- Rotate topics so workers hear each critical procedure at least once per week.
Visibility on site:
- Keep the full plan in a labeled binder in the site office, accessible to all workers.
- Post laminated copies of critical procedures (fall protection, confined space, emergency contacts) at site access points and near the relevant work areas.
- Supervisors carry digital copies on their phones or tablets for quick reference.
Training delivery and recordkeeping:
- Initial orientation before any worker accesses the site.
- Task-level briefing before high-risk work begins (confined space, excavation, hot work).
- Refresher training after incidents, near-misses, or procedure updates.
- Keep a training log with worker name, date, topic, trainer, and signature.
Stop-work authority:
Every worker and subcontractor on site must know they have the right to stop work when a condition is unsafe. That authority needs to be stated explicitly in the plan, communicated at orientation, and reinforced in toolbox talks. A competent person who hesitates to stop work because of schedule pressure is not functioning in the role the standard requires.
Pro Tip: Print the stop-work authority statement on the back of every worker’s site badge or hard-hat sticker. When it is physically present, workers are more likely to use it.
How should you run inspections and track continuous improvement?
Inspections are where the plan meets reality. Run them on a defined schedule and document every finding.
Inspection types and frequencies:
- Daily pre-shift checks by the foreman or competent person before work begins
- Weekly site-wide inspections by the safety coordinator or project manager
- Critical-task inspections immediately before and during high-risk work (excavation, confined space, hot work)
- Post-incident audits within 24 hours of any incident or near-miss
Inspection log minimum fields:
| Field | What to record |
|---|---|
| Date and time | When the inspection occurred |
| Inspector name | Who conducted it |
| Location/area | Specific area or task inspected |
| Hazard found | Description of the unsafe condition |
| Corrective action | What was done or assigned |
| Completion date | When the fix was verified complete |
| Verifier | Who confirmed the corrective action closed |
Incident and near-miss investigation steps:
- Immediate containment: secure the area, provide first aid, and preserve the scene.
- Root-cause analysis: identify the direct cause, contributing factors, and system failures.
- Corrective action: assign specific fixes with owners and due dates.
- Communication: brief the crew on what happened and what changed.
- Follow-up verification: confirm corrective actions are in place before resuming work.
Metrics to track:
Use both leading indicators (inspections completed per week, toolbox talks held, JSAs signed before task start) and lagging indicators (recordable incidents, days away from work, near-misses reported). Leading indicators tell you whether the program is running. Lagging indicators tell you whether it is working.

OSHA’s 2024 SIR annual report tracks severe injury trends reported to federal OSHA since 2015, which helps you benchmark your priority hazards against industry patterns and justify your control selections to owners and inspectors.
Every inspection finding and corrective action feeds back into the plan. When a hazard appears repeatedly in inspection logs, that is a signal the procedure needs revision, not just another corrective action ticket.
Ready-to-use templates and checklists
These templates are designed to be copied directly into your project document set. Adapt the field entries to your specific project scope.
Template library overview:
- JSA/JHA template: task-level safe work procedure with hazard, control, and PPE fields; lives in the project safety plan and is signed before each high-risk task
- Daily pre-shift checklist: foreman-led, five-minute morning check covering PPE, access, housekeeping, and equipment condition
- Site-access checklist for visitors: orientation confirmation, PPE verification, emergency contact acknowledgment
- Emergency action checklist: assembly point, emergency contacts, first-aid kit location, nearest hospital, and scenario-specific response steps
- Toolbox-talk script template: date, topic, JSA reference, key points, questions asked, attendance sign-in
- Inspection log: the fields from the table in the inspections section above, formatted as a one-page form
- Incident/near-miss report: immediate containment, root-cause fields, corrective action, and follow-up verification
Short JSA template (copy-ready):
| Field | Entry |
|---|---|
| Task name | [Describe the specific task] |
| Date | [Date of briefing] |
| Location | [Work area or zone] |
| Competent person | [Name, contact] |
| Step number | [List each task step in sequence] |
| Hazard for this step | [Specific hazard at this step] |
| Control measure | [Elimination / engineering / admin / PPE] |
| Required PPE | [Hard hat, gloves, respirator, etc.] |
| Stop-work trigger | [Condition that halts work] |
| Emergency response | [Immediate action, contact, assembly point] |
| Worker signatures | [Names and dates] |
For sandblasting safety essentials and abrasive blasting tasks, the JSA’s control column must document containment and ventilation before listing respiratory PPE. That sequencing reflects the hierarchy of controls and is what OSHA inspectors verify first.
Organize all templates into a project safety binder with tabbed sections: (1) Project Info and Roles, (2) Hazard Assessment, (3) Task Procedures and JSAs, (4) Permits, (5) Emergency Response, (6) Training Records, (7) Inspection Logs. A digital folder with the same structure works for supervisors who manage the plan on a tablet.
OSHA’s sample programs provide written-plan templates for the permit-required programs (confined space, LOTO, fall protection) that slot directly into Tab 4.
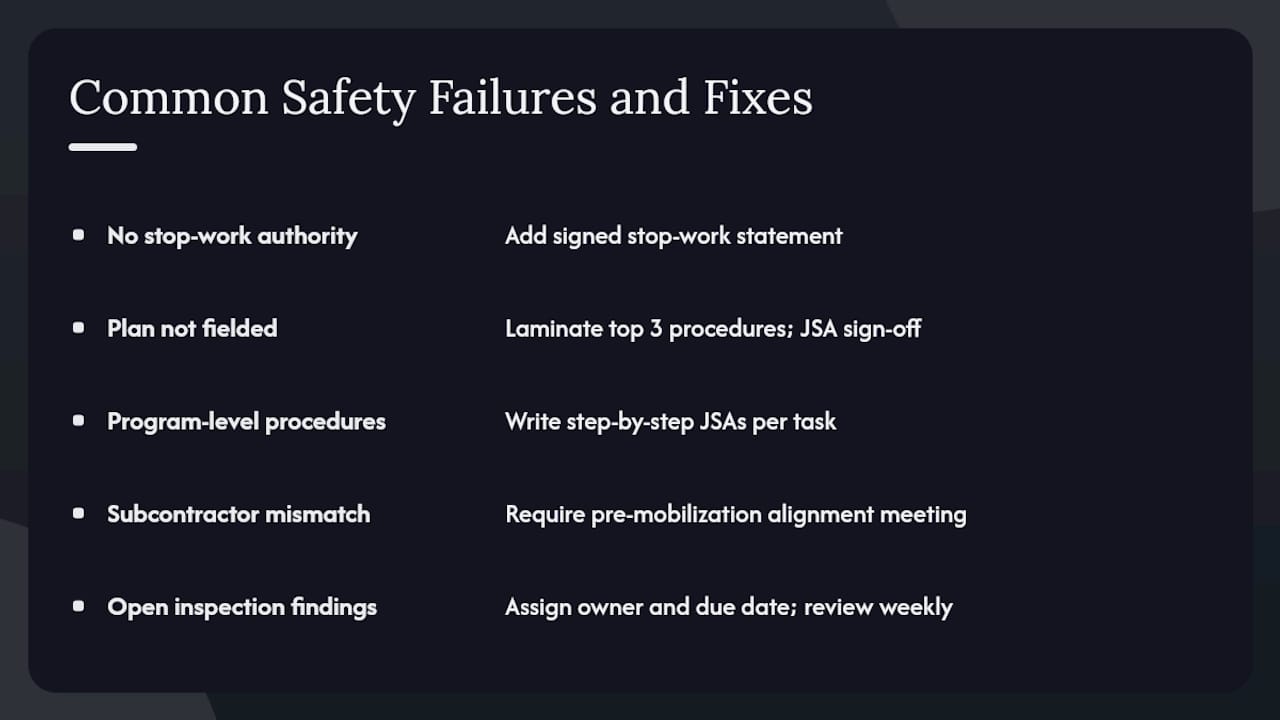
Common failures in safety procedure implementation and how to fix them
Most project safety plans fail in the same five ways. Recognizing the pattern early saves time and prevents incidents.
Failure 1: The competent person is named but not empowered.
A foreman listed on a form without documented stop-work authority does not meet the standard. The fix: add a one-paragraph stop-work authorization statement to the plan, signed by the project manager, and reference it at orientation.
Failure 2: The plan never leaves the office.
Procedures written for inspectors rather than workers stay in binders. The fix: laminate the top three task procedures and post them at the work area. Require field sign-off on JSAs before each high-risk task, not just at project start.
Failure 3: Procedures are written at the program level, not the task level.
A fall protection program that says “workers will use fall protection when working at heights” is not a procedure. The fix: write a step-by-step JSA for each specific task (roofing, steel erection, scaffold erection) with the exact equipment, anchor points, and inspection steps.
Failure 4: Subcontractor alignment is assumed, not verified.
Subcontractors arrive with their own safety plans, which may conflict with yours. The fix: require a pre-mobilization alignment meeting where subcontractor safety leads review your site-specific rules, sign the site access checklist, and confirm their JSAs match your hazard controls.
Failure 5: Inspections happen but findings are not closed.
An inspection log full of open corrective actions signals a broken process. The fix: assign every finding an owner and a due date at the time of inspection. Review open items at each weekly site meeting.
Pro Tip: Simplicity beats completeness in field documents. A one-page JSA with clear steps and a signature line will be used. A ten-page procedure with regulatory citations will be filed and forgotten. Write for the worker who reads it at 6:30 AM, not the auditor who reviews it at 2:00 PM.
For surface preparation and industrial coating projects, Southernsandblastingandpainting’s approach to industrial safety best practices reinforces this principle: worker involvement in writing JSAs produces procedures that reflect actual field conditions, not theoretical ones.
A brief note on subcontractor coordination: pre-mobilization site hygiene, including pest prevention and site-condition checks, is part of a complete pre-task checklist. Pest prevention in new commercial builds is one example of a site-services consideration that belongs in the pre-mobilization phase of your safety checklist.
A field note on real-world application
The gap between a well-written safety plan and a safe project is almost always a communication problem, not a documentation problem. Projects that run safely tend to have one thing in common: the competent person treats the JSA as a conversation starter, not a compliance form.
The procedures that hold up under pressure are the short ones. When a crew is moving fast and conditions change, a worker will not flip through a binder. They will remember what the foreman said at the morning briefing, and they will act on what they signed that morning. That is why the toolbox talk is the most important delivery mechanism in any project safety procedures guide, and why why following safety standards matters goes beyond regulatory compliance. It is about building a site culture where stopping unsafe work is normal, not exceptional.
Southernsandblastingandpainting applies these same principles across its industrial sandblasting, surface preparation, and protective coating projects. The procedures scale from a single-structure coating job to a multi-phase municipal infrastructure contract. The template structure stays consistent. The site-specific hazard detail changes every time.
For projects involving abrasive blasting, containment, or industrial coating work where you need a contractor who already operates within a documented safety framework, Southernsandblastingandpainting’s sandblasting and painting services are built around exactly the kind of procedure-first approach this guide describes.

If your project involves high-risk surface preparation or coating work and you want a contractor whose safety procedures are already written, verified, and field-tested, contact Southernsandblastingandpainting for a project consultation.
Sources
Attach these primary references to your project safety plan and consult them when writing specific procedures or responding to inspector questions.
- Recommended Practices for Safety and Health Programs in Construction
- OSHA eTools: Construction safety and health program
- Site-specific safety plan (Procore library)
- OSHA QuickStarts: Construction
- Number and rate of fatal work injuries, by selected private industries
- Construction Safety Plan Template: Free Guide to Building Your Site Safety Plan


