
Polyaspartic topcoats are fast-curing, UV-stable aliphatic polyurea coatings that return floors to service in hours rather than days, resist yellowing outdoors, and outperform standard epoxy on abrasion. They’re the right call for garage floors, industrial floors on a tight shutdown window, and any exterior slab exposed to sunlight. If your project can’t tolerate multi-day downtime or you need a topcoat that stays clear in direct sun, this is the system to specify.
TL;DR:
- Proper preparation, including mechanical profiling and moisture testing, is critical to ensure a polyaspartic topcoat’s long lifespan and adhesion.
- Polyaspartic coatings cure much faster than epoxies, enabling floors to be back in service within hours, but require precise batching due to short pot life.
- Their UV stability and abrasion resistance outperform standard epoxies, making them ideal for outdoor, high-traffic, or fast-turnaround projects.
- The higher upfront cost of polyaspartic systems is often offset by lower downtime expenses and longer service life compared to epoxy floors.
- Failure risks relate mainly to poor substrate prep, moisture issues, or contamination, which can be prevented through thorough inspection and proper application techniques.
Table of Contents
- What Polyaspartic Topcoats Are and Why They Perform the Way They Do
- Polyaspartic vs. Epoxy: What Actually Changes the Math
- Where Polyaspartic Topcoats Earn Their Keep, and Where They Don’t
- How to Prep and Apply a Polyaspartic Topcoat Correctly
- Why Polyaspartic Jobs Fail, and How to Stop It Before It Starts
- Reading a Polyaspartic PDS Before You Sign a Bid
- How Long a Polyaspartic Floor Actually Lasts
- Field Perspective: What Southern Sandblasting & Painting Requires on Every Bid
- Where to Verify the Numbers Yourself
- The Take: Prep Wins More Jobs Than Product Choice Does
- Sources
What Polyaspartic Topcoats Are and Why They Perform the Way They Do
A polyaspartic topcoat is a two-component, high-solids aliphatic polyurea. That’s a mouthful, but the chemistry explains everything you’ll read on a product data sheet (PDS). “Aliphatic” refers to the resin backbone. Unlike the aromatic resins in most epoxies, aliphatic molecules don’t break down as readily under ultraviolet light. That’s why properly formulated polyaspartic systems hold their color and gloss outdoors instead of yellowing or chalking after a summer of sun exposure, a trait technical guidance on exterior coating chemistry confirms depends heavily on formulation and substrate condition, not just the resin family.
The “polyaspartic” part refers to the specific amine used to control reaction speed. Standard polyurea reacts almost instantly. Blending in aspartic ester amines slows the reaction down just enough to make it workable with rollers and squeegees instead of requiring plural-component spray rigs on every job.
A typical PDS for a polyaspartic topcoat lists several numbers worth memorizing before you talk to any installer or supplier:
- Solids by volume: often around 85%, which matters because higher solids mean less shrinkage and a thicker dry film per coat.
- Pot life: the working window before the mixed material starts gelling in the pail.
- Tack-free time: how long before the surface stops pulling at foot traffic, commonly 1 to 2 hours.
- Full cure: when the floor reaches its rated chemical and abrasion resistance, usually within a few days.
- Recommended dry film thickness (DFT): the target coating depth per pass.
Manufacturer literature backs up those tack-free windows and mechanical prep callouts on a real polyaspartic topcoat technical data sheet, which is the kind of document you should be reading instead of a sales brochure. The trade-off for that speed is pot life. Where an epoxy might give you an hour or more of comfortable working time, a polyaspartic batch can start setting up in 20 to 60 minutes, which changes how you plan the crew and the pour.
Polyaspartic vs. Epoxy: What Actually Changes the Math
The two systems get compared constantly, and the differences aren’t marginal. Cure speed is the headline: polyaspartic coatings can return a floor to foot traffic within a few hours per coat, while standard epoxy needs significantly longer curing times per coat at typical room temperature, according to lifecycle research comparing the two systems. On a commercial floor where every closed day costs revenue, that gap alone can decide the contract.
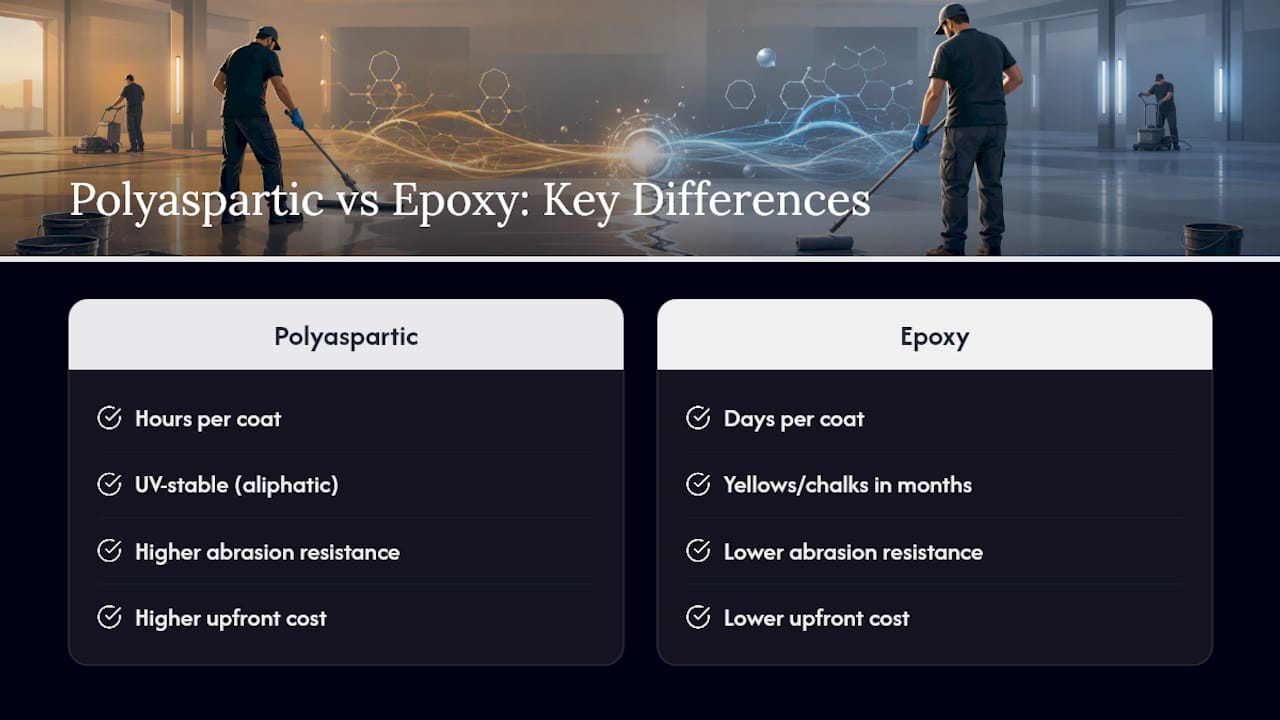
UV stability is the second dividing line. Standard epoxy yellows and chalks under sunlight within months in many outdoor applications. Polyaspartic’s aliphatic chemistry resists that shift, which is why it’s the default choice for exterior topcoats, covered walkways, and any slab that sees direct sun for part of the day.
Abrasion and chemical resistance favor polyaspartic too, though the margin depends on formulation. Manufacturer Taber abrasion testing under ASTM D4060 commonly shows polyaspartic systems losing 20 mg or less per 500 cycles with a CS-17 wheel, a result comparative coatings research cites as meaningfully better wear resistance than standard epoxy under the same test conditions.
The lifecycle math: polyaspartic material and labor typically cost more upfront than a comparable epoxy job. But faster cure means less downtime cost, and longer service life spreads that premium over more years. If a professionally installed epoxy floor lasts 5 to 10 years and a polyaspartic system runs 15 to 30 years in a well-maintained setting, the annualized cost often favors polyaspartic even with the higher sticker price. That comparison only holds when both systems get the same quality of surface prep, which is where a lot of projects actually go wrong.
Where Polyaspartic Topcoats Earn Their Keep, and Where They Don’t
Polyaspartic shines on any project where downtime is expensive or UV exposure is guaranteed. The strongest fits:
- Fast-turnaround industrial and commercial floors, where a facility can’t afford a multi-day shutdown for curing.
- Garage and shop floors, where homeowners and small businesses want a durable finish without living around wet paint for a week.
- Exterior topcoats, patios, walkways, and loading docks exposed to direct sunlight, where non-yellowing performance matters most.
- Quick-turn maintenance and recoat work, where a facility manager needs a section back in service before the next shift.
Caution is warranted in a few specific scenarios. Continuous water immersion, tanks, pits, and similar applications, tends to favor epoxy or specialty polyurea systems designed for that exposure. Aggressive specialty chemical exposure, certain solvents or extreme pH environments, sometimes calls for a formulation review before you commit to a standard polyaspartic system. And very high substrate moisture at the time of installation is a red flag regardless of which coating you choose. Related surface coating examples from real infrastructure projects show how substrate condition, not just coating choice, determines outcome.
A common professional workaround is the hybrid system: an epoxy primer for bond strength and moisture tolerance, topped with a polyaspartic finish coat for UV stability, abrasion resistance, and fast return-to-service. It’s a pragmatic way to get the strengths of both chemistries in one floor.
How to Prep and Apply a Polyaspartic Topcoat Correctly
Surface prep decides whether a polyaspartic topcoat lasts fifteen years or peels within one. Here’s the sequence that actually holds up on real jobs.
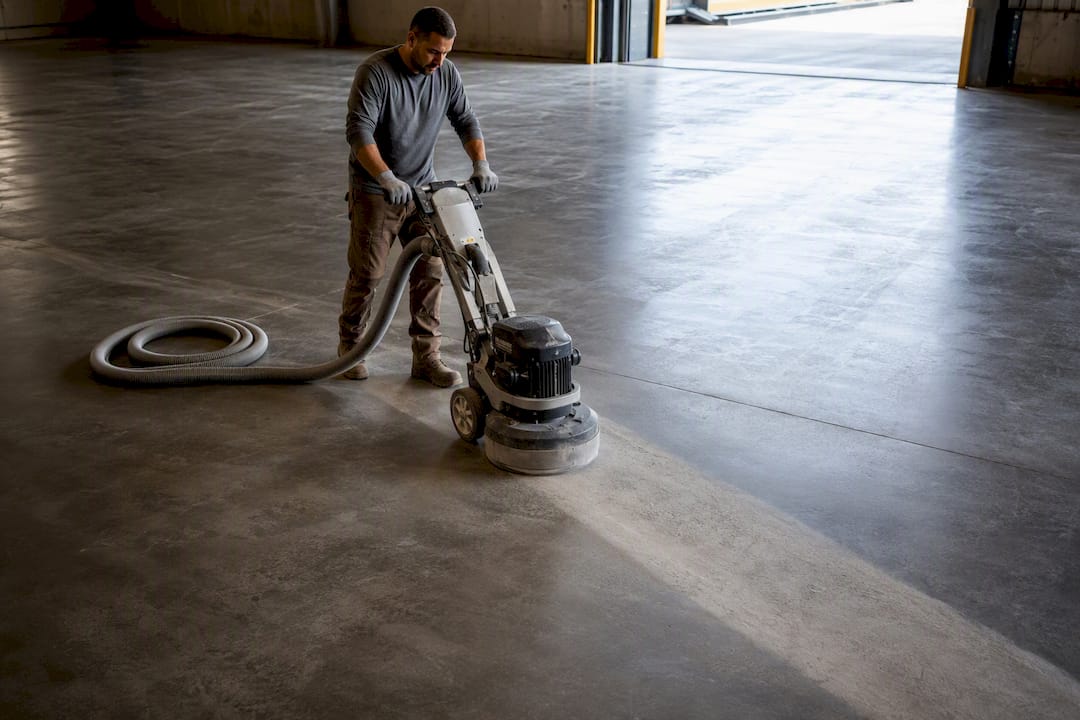
- Mechanically prepare the substrate. Diamond grinding or shot blasting to a Concrete Surface Profile (CSP) of 3 or greater, per ICRI guidance, opens the pores concrete needs for mechanical adhesion. Acid etching is explicitly discouraged on most polyaspartic PDS because it can leave residues that block bonding, a point confirmed on the same polyaspartic technical data sheet that specifies CSP requirements.
- Test moisture before you commit. Calcium chloride or relative humidity probe tests tell you whether the slab is dry enough to coat. If readings run high, delay the job or bring in a moisture-mitigation primer instead of coating over a wet slab and hoping.
- Manage the mix and the clock. Because pot life often runs 20 to 60 minutes, batch sizes need to match how fast your crew can spread material. Larger floors often call for plural-component spray equipment or multiple coordinated crews working roller and squeegee lines to avoid lap marks from material setting up mid-pour.
- Hit the recommended DFT and respect the recoat window. PDS examples call for specific wet film thickness per coat, tack-free in roughly 1 to 2 hours, and full cure within a few days. Recoat too late and you risk poor intercoat adhesion; recoat too early and you can trap solvents or disrupt the film.
- Control the job site environment. Ambient and substrate temperature ranges matter, most polyaspartic systems have a defined application window, and ventilation and dust control keep contamination out of a curing film.
Pro Tip: Do a test pour on a scrap slab or an inconspicuous section before the main event, especially in unfamiliar heat or humidity. Pot life shortens fast as temperature climbs, and finding that out mid-floor on a 5,000-square-foot job is an expensive lesson.
For a broader walkthrough of the mechanical prep stage specifically, the industrial floor coating preparation steps guide covers the grinding and blasting decision in more depth.
Why Polyaspartic Jobs Fail, and How to Stop It Before It Starts
Most polyaspartic failures trace back to one of four causes, and all four are preventable with the right process.
- Moisture vapor and delamination. Coating over a slab with excess moisture traps vapor beneath the film, causing bubbling or full delamination months later. Moisture testing before application is the fix, not a nice extra.
- Lap marks and fish-eyes from pot-life mismanagement. Mixing too much material for the crew size, or working too slowly across a large floor, lets earlier material start gelling before the roller catches up. Smaller batches and faster crew coordination solve this.
- Contamination and adhesion failures. Oil, dust, or old sealer residue left on the substrate blocks bonding no matter how good the coating is. Mechanical profiling followed by a verified clean surface, sometimes checked with an ASTM D4541 pull-off adhesion test on critical jobs, catches this before it becomes a callback.
- Chemical exposure edge cases. A standard formulation exposed to a solvent or acid it wasn’t designed for can soften or discolor over time. Specifying the right chemistry, or adding a sacrificial wax or wear layer in high-exposure zones, prevents the surprise.
When failure does happen, the fix depends on scope. Isolated delamination in a small area can often be cut out and patched. Widespread moisture-driven failure or contamination across the whole floor usually means full removal and a restart, which is exactly why the prep step gets so much attention from anyone who’s paid for a redo.
Reading a Polyaspartic PDS Before You Sign a Bid
Don’t buy on marketing language. Buy on the numbers in the PDS and SDS. Before approving any bid, confirm the sheet includes:
- Solids by volume and recommended wet and dry film thickness per coat.
- Pot life at expected job-site temperature, not just a lab-controlled 70°F number.
- Adhesion data, ideally with ASTM D4541 pull-off results for the specific substrate type.
- Taber abrasion results under ASTM D4060, so you can compare wear resistance across products on an apples-to-apples basis.
- VOC content and safety data from the SDS, which tells you what ventilation and PPE the job site actually needs.
- System stack specification, primer type, topcoat, recoat window tolerance, plus installer references and a written warranty.
A quick reference on the range of coating chemistries available, and where each one fits, is covered in the industrial coating types overview, useful context before you narrow down to polyaspartic specifically.
How Long a Polyaspartic Floor Actually Lasts
Professionally installed polyaspartic systems commonly run for multiple decades in residential settings and have a longer lifespan than standard epoxy systems, which typically last less time in similar conditions, based on comparative lifespan research. Those figures assume proper prep and normal wear. Skip the moisture testing or the mechanical profiling and you can cut that lifespan dramatically regardless of how good the coating itself is.
Routine maintenance is light: periodic cleaning to remove grit that acts like sandpaper under foot and tire traffic, and a visual inspection once or twice a year for surface dulling, chips, or early delamination at seams and edges. A simple lifecycle comparison makes the economics clear. If epoxy costs less upfront but needs replacement twice in the time a single polyaspartic system lasts, the annualized cost often tips toward polyaspartic despite the higher initial bid.
Watch for a few early warning signs that a recoat or repair is due: dulling gloss in high-traffic lanes, hairline cracking at expansion joints, or any soft or tacky spots that suggest chemical attack rather than normal wear.
Field Perspective: What Southern Sandblasting & Painting Requires on Every Bid
A specialized industrial service provider has over 20 years of experience handling surface prep and protective coatings on infrastructure projects including water tanks, pipelines, airports, and city assets in Central Florida. That kind of project mix teaches one lesson fast: coating performance is only as good as the prep underneath it.
Bids involving polyaspartic systems often require documented CSP verification after grinding or blasting, on-site adhesion pull tests on critical floors, logged environmental readings (substrate temperature, humidity) during application, and installer references from relevant projects. Large industrial floors or high-risk assets benefit from professionally managed systems, as pot-life management and moisture testing require specialized equipment and expertise absent in typical DIY approaches.
Where to Verify the Numbers Yourself
Compare the actual PDS numbers, not marketing copy, before choosing a system. Start with a real polyaspartic technical data sheet, then cross-check abrasion and lifespan claims against the coatings guide referenced above.
The Take: Prep Wins More Jobs Than Product Choice Does
The research here supports a conclusion most marketing copy conveniently skips: the coating chemistry matters less than what happens before it goes down. Polyaspartic’s fast cure and UV stability are real advantages, well documented across manufacturer PDS and independent comparisons, but none of that performance shows up on a floor with unresolved moisture or a substrate that wasn’t profiled correctly.
Conventional advice tends to frame this as a product decision, epoxy versus polyaspartic, when it’s really a process decision. A poorly prepped polyaspartic floor fails faster than a well-prepped epoxy one. If you’re specifying or bidding this kind of work, prioritize the CSP verification, the moisture testing, and the adhesion data over the brand name on the pail. Ask for those numbers in writing before you ask for a price.
For facility managers weighing decorative broadcast or slip-resistant additives into a polyaspartic system, aggregate suppliers like Expleco’s glass sand products are worth a look when specifying broadcast media for traction control.
— Results
Sources
- Where polyaspartic coatings work well — and where they do not
- Epoxy vs polyaspartic garage floors: lifecycle 2026
- POLYASPARTIC TOPCOAT (technical data sheet)
- What is Polyaspartic Resin? Ultimate Guide to Advanced Coatings – 2026
- How long does garage floor coating last? Lifespan Comparison Guide


