
Budget roughly a few dollars per square foot for standard interior industrial painting, and significantly more per square foot for heavy blast-and-coat work on tanks and structural steel. The single biggest swing factor is surface preparation and access, not paint itself. Below you’ll find cost breakdowns by project type, two estimating methods, and a worked example you can adapt to your own site.
TL;DR:
- Surface preparation accounts for up to 80% of the total cost, with more intensive prep like blast cleaning significantly increasing the project price.
- Bids that do not specify the surface prep standard, DFT measurements, or include disposal and containment costs often underestimate the true project scope and expenses.
- Lifecycle costs can outweigh initial expenses, as longer-lasting coatings reduce the frequency and cost of recoats over 15 to 20 years.
- Accurate estimation methods involve detailed surface area analysis, material calculations with loss factors, and fully burdened labor costs, including shutdown premiums.
- Facility managers should insist on itemized, scope-matched bids, including prep standards, access methods, and quality control checkpoints, to ensure fair comparisons.
Table of Contents
- What Does Industrial Painting Cost Per Square Foot?
- What Are the Real Cost Components in an Industrial Coating Bid?
- Why Lifecycle Cost Matters More Than the Initial Bid
- How Do You Estimate Industrial Painting Costs Yourself?
- A Worked Example: Pricing a 20,000 Square Foot Warehouse Zone
- What Southern Sandblasting & Painting Has Learned From 20+ Years in the Field
- Permits, Disposal, and the Hidden Fees That Blow Up a Budget
- How Coating Type and Specification Change the Total Price
- What Should You Budget for Maintenance and Recoating?
- Do You Need Insurance, Bonding, or Warranty Coverage?
- The Procurement Mistake Almost Every Facility Manager Makes
- Get an Apples-to-Apples Estimate for Your Facility
- Sources
What Does Industrial Painting Cost Per Square Foot?
Industrial painting pricing splits into two rough tiers, and knowing which one your project falls into changes your budget conversation before a contractor ever walks the site. Interior walls, ceilings, and light steel with minimal corrosion typically cost a few dollars per square foot. Heavy corrosion removal, tank interiors, and structural steel needing full abrasive blasting cost considerably more per square foot, depending on containment requirements and access difficulty.
The gap between those numbers isn’t arbitrary. It tracks almost exactly with how much surface preparation a substrate needs. A lightly soiled warehouse wall needs a wash and maybe light sand. A rusted water tank interior needs abrasive blasting to bare metal, full containment to capture the spent media, and a multi-coat protective system applied within a tight recoat window. That difference in labor hours and equipment, not the paint in the can, is what separates a $3 per square foot job from a $20 per square foot job.
Geography matters too, though less than most facility managers assume. Access difficulty (rooftop tanks, confined spaces, occupied buildings requiring off-hour work) moves the number more than geography does.
Here’s how that plays out across common project sizes:
- Small interior repaint (5,000 ft², light prep): roughly $12,000 to $28,000 total.
- Mid-size warehouse structural steel (20,000 ft², moderate blast and coat): roughly $130,000 to $350,000 total.
- Elevated water tank exterior and interior (full containment, Sa 2½ blast): often $8 to $25+ per ft², with total project costs in the hundreds of thousands depending on tank size and access.
- Concrete floor coatings with epoxy or urethane systems: roughly $3 to $9 per ft² depending on substrate condition and traffic-rated topcoat requirements.
Treat any bid that comes in dramatically below these ranges with suspicion. It usually means the prep standard, access plan, or containment scope has been quietly reduced, not that the contractor found a better deal on primer.
What Are the Real Cost Components in an Industrial Coating Bid?
A complete industrial painting bid has seven cost pillars, and vetting each one separately is how you catch the change orders before they happen instead of after.
- Surface preparation. This is usually the largest line item on heavy industrial jobs. The Society for Protective Coatings reports that inadequate surface preparation accounts for up to 80% of premature coating failures, which is why the prep standard specified in your contract matters more than almost anything else in the document.
- Labor. Includes blasting crews, painters, supervisors, and safety personnel, priced by production hour with full burden (insurance, workers’ comp, benefits) added on top of base wage.
- Materials. Primer, intermediate, and topcoat, plus thinners and additives, calculated by spreading rate and adjusted for loss factors.
- Access and equipment. Scaffolding, swing stages, lifts, and rigging. On tanks and elevated structures, this can rival or exceed material cost.
- Containment and dust control. Required for lead paint abatement, environmental compliance near waterways, or any job near occupied space. Negative-air containment and vacuum blasting systems add real cost but are non-negotiable in regulated settings.
- Inspection and quality control. Dry film thickness (DFT) gauge readings, holiday testing, and photo documentation.
- Indirect costs. Mobilization, permits, insurance, bonding, and a rework contingency.
The difference between an Sa 2 (thorough hand or power tool cleaning) and an Sa 2½ (near-white blast) prep standard isn’t a minor spec detail. It changes blast time, media consumption, containment complexity, and how long the resulting coating actually lasts before recoat. Specifying the wrong standard for the exposure conditions is one of the most expensive mistakes a facility manager can make on paper, because it looks like a savings until the coating fails early.
Pro Tip: Ask every bidder to itemize surface prep as its own line, with the specific SSPC or AMPP standard named. A bid that lumps “prep and paint” into one number is hiding the variable that matters most.
Bids also commonly omit costs that surface later as change orders:
- Containment setup and teardown for lead or hazardous coatings.
- Continuous dust monitoring where regulations require it.
- DFT measurement and documentation as a deliverable, not just a quality checkpoint.
- A rework allowance for areas that fail inspection and need recoating.
- Disposal fees for spent abrasive media and coating waste, discussed in more detail below.
If a bid doesn’t mention these five items, ask directly whether they’re included, excluded, or simply forgotten. The answer tells you a lot about how carefully the bid was built.
Why Lifecycle Cost Matters More Than the Initial Bid
The lowest bid on paper is often the most expensive coating system you’ll ever own, once you run the numbers over 15 or 20 years instead of over one project. SSPC TU 9-2024 recommends comparing coating systems on a cost-per-unit-area-per-year basis rather than by sticker price alone, and that shift in framing changes which bid actually wins.
Here’s the logic with real numbers. Say Coating System A costs $4.50 per square foot installed and lasts 8 years before it needs full recoating. Coating System B costs $7.00 per square foot installed and lasts 15 years. Over a 24-year horizon, System A gets recoated roughly three times, System B twice. Each recoat carries its own mobilization, scaffolding, containment, and shutdown cost, and those repeat costs frequently exceed the material price of the coating itself.
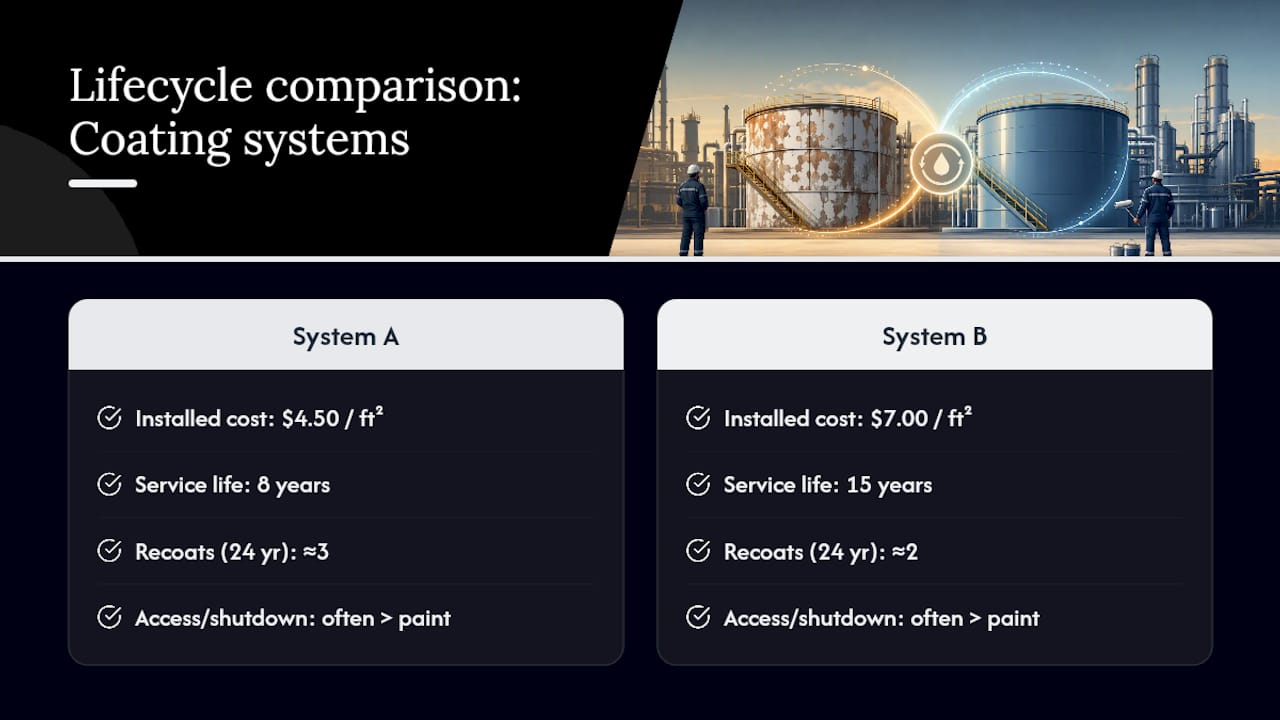
One avoided recoat cycle on a large structural asset can offset years of higher upfront coating cost, because access and shutdown expenses (not the paint) are usually what makes each recoat event expensive. On an elevated tank or a structure requiring scaffolding and production shutdown, a single skipped recoat cycle can save more than the entire price premium of the better system.
This is exactly the reasoning behind SSPC/AMPP TU-9’s lifecycle framework: a present value analysis discounts future recoat costs back to today’s dollars, so you can compare a cheap-now system against an expensive-now system on equal footing. Facility managers who only compare initial quotes are, in effect, comparing two different products as if they were the same one. Ask your contractor to show recoat interval assumptions and, if possible, a simple present value comparison before you sign. It’s a short conversation that can save six figures on a large asset.
How Do You Estimate Industrial Painting Costs Yourself?
Two methods cover almost every situation a facility manager will face, and running either one before a contractor bids gives you a sanity check against inflated or underscoped numbers.
Method 1: Unit-area method. Take a benchmark cost per square foot for a comparable, recently completed project and apply it to your total area, adjusting for prep standard and access difficulty. This is fast and useful for early budgeting, but it’s only as good as the benchmark you’re using, so pull from a genuinely similar asset type.
Method 2: Labor plus materials buildup. This is slower but far more accurate, and it’s the method SSPC TU 9-2024 recommends for anything beyond rough budgeting. Work through it in order:
- Measure and partition surface areas by substrate type and condition. Steel, concrete, and previously coated surfaces all need different prep approaches.
- Select the prep standard and coating system, including target dry film thickness (DFT) and manufacturer spreading rate for each coat.
- Calculate material quantities, adding a loss factor. Overspray and surface texture commonly push actual material use 10% to 50% above the theoretical spreading rate.
- Estimate production hours using realistic crew production rates for the specific prep standard and access method, not generic industry averages.
- Apply full labor burden on top of base wage: payroll taxes, workers’ comp, liability insurance, and benefits.
- Add equipment rental for compressors, blast pots, scaffolding, or lifts, priced by rental duration, not just delivery.
- Layer in indirect costs: mobilization, permits, bonding, and a contingency allowance, typically 5% to 15% depending on project complexity.
A few things trip up first-time estimators every time:
- Forgetting that loss factors apply to every coat, not just the topcoat.
- Using a generic “gallons per 1,000 square feet” number instead of the specific product’s spreading rate at the specified DFT.
- Pricing labor at base wage instead of fully burdened rate, which can undercount labor cost by 25% to 40%.
- Skipping shutdown and overtime premiums when the work has to happen outside normal operating hours.
A Worked Example: Pricing a 20,000 Square Foot Warehouse Zone
Here’s how the math actually runs on a mid-size job, using assumptions typical of a warehouse structural steel repaint with moderate corrosion.
- Materials: roughly $1.10 to $1.60 per square foot for a two-coat epoxy system at spec thickness, after loss factor.
- Labor (prep and application, fully burdened): roughly $2.20 to $3.75 per square foot, driven mostly by the Sa 2 prep time.
- Equipment (blast pots, compressors, minor scaffolding): roughly $0.30 to $0.60 per square foot.
- Indirect costs (mobilization, permits, contingency): roughly 8% to 12% of the subtotal above.
Add it up and this project lands around $4.00 to $6.50 per square foot, or roughly $80,000 to $130,000 total for the full 20,000 square foot zone.
What moves that number: switching to Sa 2½ near-white blast for higher corrosivity exposure typically adds $1.00 to $2.50 per square foot in prep time and media alone. Access above 20 feet, or work near live equipment, adds scaffolding or lift cost that a ground-level project never sees.
What Southern Sandblasting & Painting Has Learned From 20+ Years in the Field
A specialized contractor with extensive experience performs sandblasting, surface preparation, and protective coating work on water tanks, structural steel, pipelines, and municipal infrastructure in Central Florida. That kind of repeated exposure to real bid comparisons and real recoat failures teaches a specific lesson: the projects that go over budget almost always trace back to an underscoped surface prep line, not a materials shortage.
Two internal resources reflect that experience directly. The surface prep best practices guide walks through how prep standard selection affects both cost and coating lifespan, and the application steps guide covers the QC checkpoints that separate a coating system that lasts 15 years from one that fails in five.
When you’re reviewing a bid or a completed job’s site report, check for these:
- A named prep standard (Sa 2, Sa 2½, SP10) rather than vague language like “clean and prep.”
- Documented DFT readings at multiple points, not a single spot check.
- Photos of the substrate immediately before coating application, timestamped.
- A written recoat interval estimate tied to the specific coating system used.
Permits, Disposal, and the Hidden Fees That Blow Up a Budget
Permits and waste disposal rarely show up in a headline bid number, but they’re almost never optional, and skipping them in your budget is one of the fastest ways to blow past an approved spend.
Permit requirements vary by municipality and by the type of work. Abrasive blasting near waterways, work involving lead-based paint removal, or any job requiring containment for environmental compliance typically needs a permit, and permit review timelines can add weeks to a project schedule if they’re not requested early.
Disposal fees cover spent abrasive media, removed coating debris, and any hazardous waste generated during blasting. Lead paint abatement, in particular, triggers specific handling and disposal requirements that add real cost, both in materials (containment, vacuum blasting systems) and in disposal fees charged by licensed waste handlers. Non-hazardous spent media is cheaper to dispose of but still isn’t free, and volume adds up fast on a large blasting job.
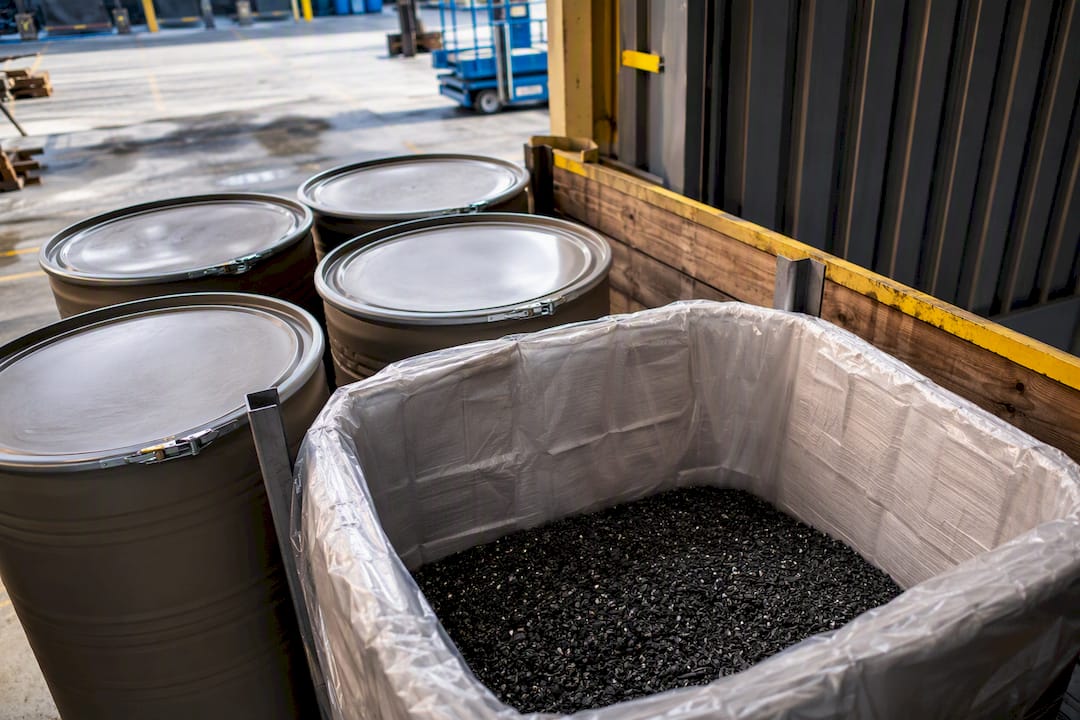
Other line items that catch facility managers off guard include environmental monitoring for air quality near occupied buildings, traffic control if the project affects a public right-of-way, and utility relocation if scaffolding or containment structures interfere with existing infrastructure. None of these are exotic. They’re just easy to leave off a rough estimate and then discover during mobilization.
Ask your contractor directly whether permit costs and disposal fees are included in the quoted price or billed separately as they’re incurred. A bid that’s silent on this question usually means one of those two things is about to become a change order.
How Coating Type and Specification Change the Total Price
The coating system you specify changes total project cost by a wider margin than most facility managers expect, sometimes more than the prep standard itself on projects with light corrosion.
Basic alkyd or acrylic coatings cost the least per gallon and work fine for mild interior exposure with low chemical or moisture contact. Epoxy systems, common for concrete floors and structural steel in moderate exposure, cost more per gallon and typically require more careful surface prep and cure time. Polyurethane topcoats add UV resistance and color retention for exterior exposure, at a further premium. Specialty systems like zinc-rich primers for severe corrosion environments, or fusion-bonded epoxy for buried or submerged steel, cost the most upfront but are chosen specifically because cheaper alternatives fail fast in that exposure.
Specification details matter as much as coating family. A two-coat system at 4 to 6 mils DFT per coat costs meaningfully less in both material and labor than a three-coat system at 8 to 10 mils, but the thicker system usually buys a longer service life in aggressive environments. Specifying more coats or higher DFT than the exposure actually requires wastes money. Specifying less than the exposure requires guarantees an early recoat.
The right move is matching the coating spec to the actual exposure category, not defaulting to whatever system your contractor already has in inventory. That single decision affects your per-square-foot cost, your recoat interval, and your total cost of ownership more than any other line item in the bid.
What Should You Budget for Maintenance and Recoating?
Every industrial coating system has a finite service life, and budgeting for the recoat before you need it is the difference between a planned maintenance cycle and an emergency repair bid at premium pricing.
Basic alkyd systems in mild exposure might need attention within 5 to 8 years. Mid-grade epoxy systems in moderate industrial exposure often run 10 to 15 years before requiring full recoat. High-performance systems (zinc-rich primers with polyurethane topcoats) in severe exposure can push past 15 to 20 years when properly applied and inspected. Those intervals aren’t fixed guarantees. They shift based on exposure severity, UV load, chemical contact, and how well the original surface prep was executed.
Budgeting for this means building a rolling maintenance line into your facility’s capital plan rather than treating each recoat as a surprise expense. A practical approach: schedule a visual and DFT inspection at roughly the midpoint of the coating’s expected service life, then start budgeting for full recoat funding starting a couple of years before the projected end of life. That gives you time to bid the work properly instead of scrambling when a coating starts failing visibly.
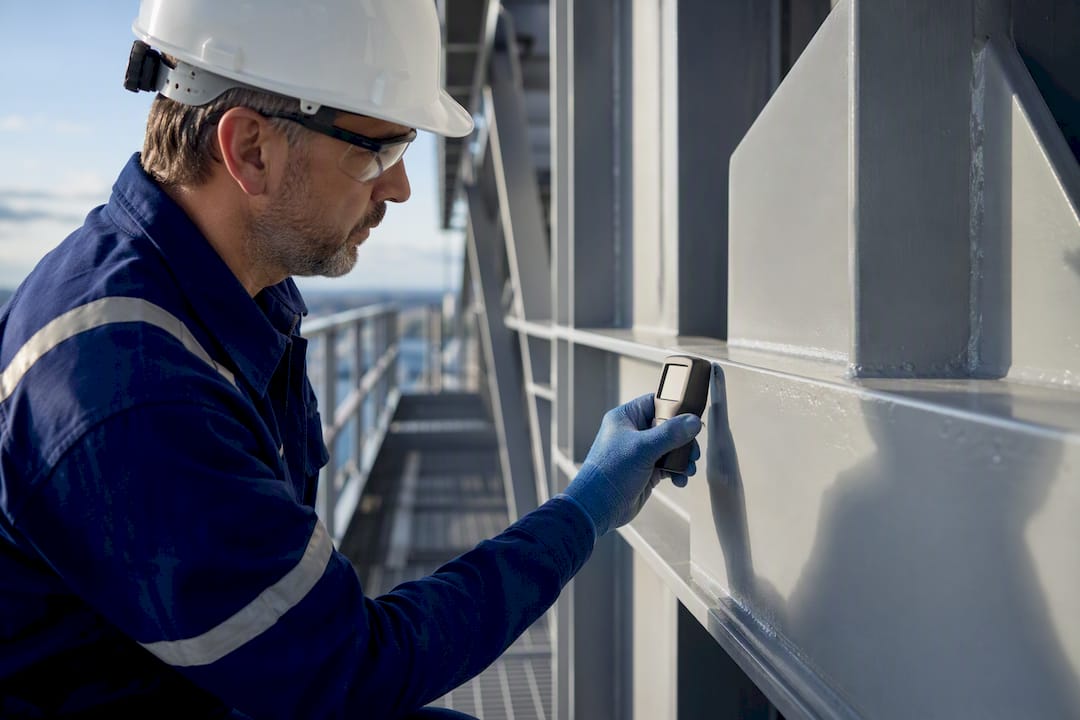
Spot repairs between full recoats (touching up isolated corrosion or coating damage) cost far less than a full recoat and can meaningfully extend the interval before the next major project. Skipping spot maintenance to save a small amount now is one of the more common ways facility managers end up paying for a full premature recoat later.
Do You Need Insurance, Bonding, or Warranty Coverage?
Insurance, bonding, and warranty terms affect your total cost exposure even when they don’t show up as a separate line on the invoice, and skipping this review is a common way facility managers end up covering costs that should have sat with the contractor.
General liability and workers’ compensation insurance should be standard on any industrial painting contractor’s certificate of insurance, and municipal or commercial projects often require specific coverage minimums before work can begin. Confirm coverage before mobilization, not after an incident.
Performance bonds matter most on larger municipal or government contracts, where the bonding requirement protects the owner if the contractor fails to complete the work. Bonding capacity also signals financial stability. A contractor who can’t secure a bond for a project of a given size may not have the working capital to finish it.
Warranty terms vary widely and directly affect your effective cost per year of coating life. A one-year warranty on workmanship is common, but coating manufacturers sometimes offer extended material warranties (5 to 10 years) when the system is applied by a certified applicator following specified prep and DFT requirements. Read what the warranty actually covers. Many exclude failures traced to inadequate surface prep, which is precisely the failure mode most likely to occur.
The Procurement Mistake Almost Every Facility Manager Makes
Most facility managers compare bids the way they’d compare quotes for office supplies: lowest number wins. That approach fails badly on industrial coating work because the biggest cost variable (surface preparation quality) is also the easiest thing for a contractor to quietly underscope on paper.
The conventional advice to “get three bids and pick the middle one” assumes the three bids are actually pricing the same scope. They rarely are. One bidder’s Sa 2 is another’s SP3, and the gap in coating lifespan between those standards can be a factor of two or three. If you take one thing from this guide, make it this: force every bidder to price the identical prep standard, DFT range, and access method before you compare a single dollar figure.
Lifecycle framing matters more than most procurement processes give it credit for. A facility manager who runs even a rough present value comparison, using SSPC TU 9-2024’s methodology, will usually find that the cheapest bid isn’t the cheapest asset over 20 years. That’s not a theoretical exercise. It’s the actual math that determines whether you’re back out for another shutdown in year eight or year eighteen.
— Results
Get an Apples-to-Apples Estimate for Your Facility
A recommended practice is to build bids with the prep standard named explicitly, access method priced separately, and DFT targets documented before coating begins. That’s the difference between a quote you can actually compare against competitors and one you’re guessing about.
Experienced contractors in the region scope each project around the specific exposure conditions and access constraints an asset actually has, not a generic per-square-foot average. Jobs typically include documented QC checkpoints, from prep verification through DFT inspection, to provide a paper trail if warranty questions arise.
If you’re comparing bids right now, request a scope review before you sign anything. Visit the industrial painting services page to see the full range of work and request an estimate built on the same prep standard and access assumptions your other bidders should be using.


