TL;DR:
- A water tank restoration involves inspecting, cleaning, repairing, coating, and testing to extend lifespan. Proper execution of each step ensures compliance and prevents costly failure, with careful documentation supporting long-term maintenance.
A water tank restoration workflow is the structured, sequential process of inspecting, cleaning, repairing, coating, and recommissioning a water tank to extend its service life and maintain regulatory compliance. The industry term for this full process is tank refurbishment, and it covers everything from initial condition assessment through final water quality testing. Facility managers who follow a defined workflow avoid the two most common and costly outcomes: premature tank failure and compliance violations. The core stages are inspection, draining and cleaning, surface preparation via media blasting, structural repairs, protective coating application, and post-restoration quality checks. Standards from bodies like ASTM and NSF govern each stage, and tools ranging from ultrasonic thickness gauges to abrasive blast equipment determine the quality of every step.
What tools and prerequisites does a water tank restoration workflow require?
A successful tank refurbishment starts well before any crew enters the structure. The prerequisite phase determines whether the restoration proceeds safely and whether the results hold long term.
Inspection equipment forms the first category of tools:
- Visual inspection lights and mirrors for internal surface assessment
- Ultrasonic thickness gauges to measure wall and floor metal loss
- Adhesion testers to evaluate existing coating bond strength
- Moisture meters to check substrate conditions before coating
Cleaning and surface preparation equipment forms the second category:
- High-pressure washers rated for industrial tank interiors
- Abrasive blast equipment, including dry sandblasting and wet blasting rigs
- Vacuum recovery systems to contain spent media and debris
- Industrial vacuums and squeegees for sediment removal
Safety and access equipment is non-negotiable for confined space entry:
- Confined space entry kits with gas monitors (oxygen, hydrogen sulfide, LEL)
- Supplied air respirators or SCBAs for enclosed tank interiors
- Harnesses, tripods, and retrieval systems per OSHA confined space standards
- Lockout/tagout hardware to isolate inlet and outlet valves
Documentation prerequisites are just as critical as physical tools. Managers must gather previous inspection reports, coating history, repair logs, and any regulatory correspondence before work begins. Regulatory bodies require cleaning and inspection records to be retained for a minimum of five years to pass audits and insurance checks. Missing records can delay the project or create compliance gaps regardless of how well the physical work is executed.
The tank must be fully drained, isolated from the distribution system, and ventilated before any crew entry. Skipping isolation is the single most common cause of confined space incidents on tank restoration projects.
Pro Tip: Conduct a pre-entry atmospheric test at three levels inside the tank: top, middle, and bottom. Gas stratification inside steel tanks can produce dangerous pockets that a single-point test misses entirely.
| Prerequisite | Why it matters |
|---|---|
| Previous inspection records | Sets baseline for corrosion progression and coating history |
| Ultrasonic thickness data | Confirms structural soundness before committing to refurbishment |
| Confined space entry permit | Required by OSHA; protects crew and facility manager legally |
| Full tank isolation | Prevents accidental refill during work and contamination of the system |
| Regulatory documentation | Satisfies audit requirements and insurance checks |
What are the key stages in the water tank restoration process?
The tank refurbishment process follows a defined sequence. Skipping or compressing any stage creates failure points that surface months or years later, often at far greater cost.
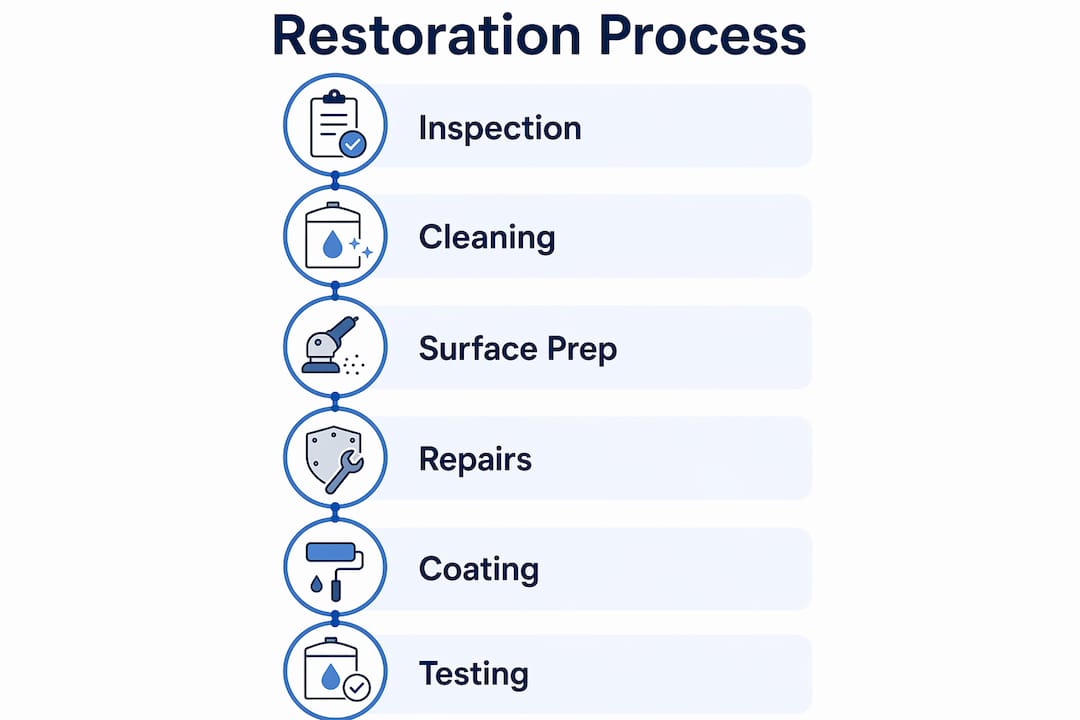
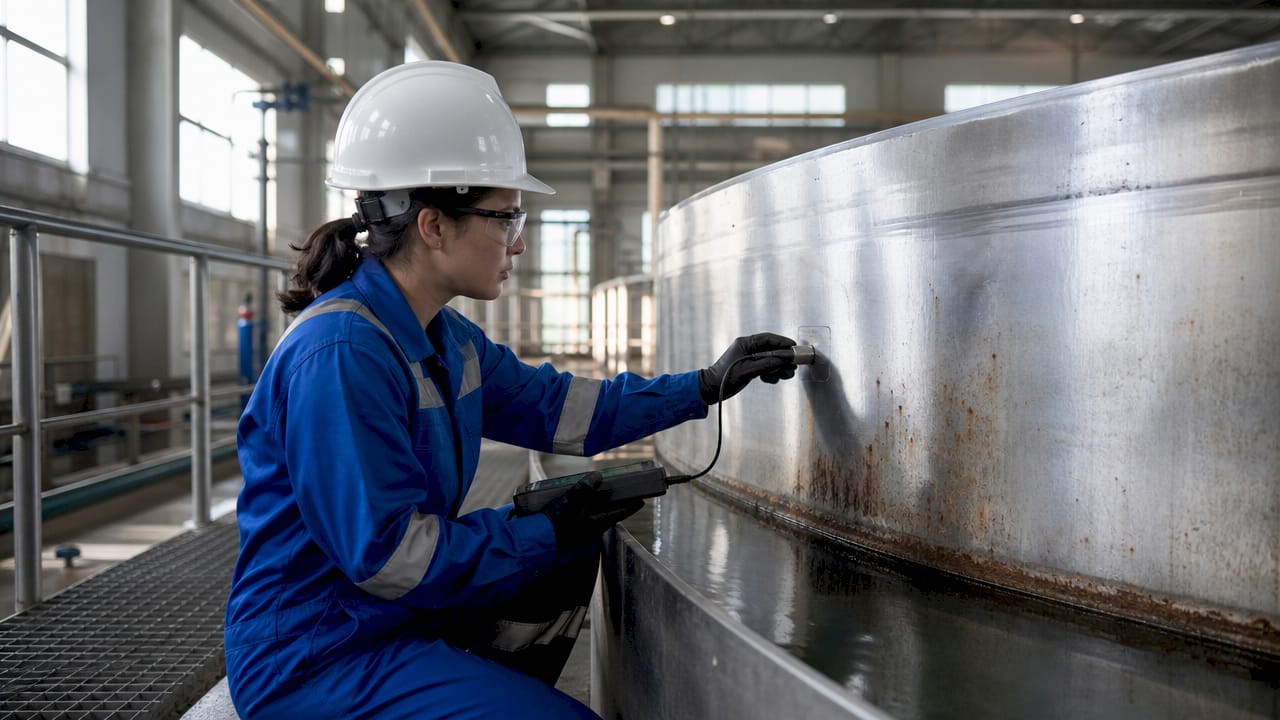
Stage 1: Detailed inspection and condition assessment
The inspection stage sets the entire restoration strategy. A qualified inspector documents all corrosion zones, coating failures, structural cracks, weld defects, and sediment accumulation. Corrosion remediation effectiveness depends heavily on diagnostic inspection quality. A contractor who cannot explain the cause of corrosion is not ready to repair it. Ultrasonic readings at a grid of measurement points across the floor and walls produce a thickness map that guides repair decisions.
Stage 2: Draining, cleaning, and sediment removal
Once the tank is isolated and drained, crews remove all sediment, biological growth, and loose debris. Cleaning and sediment removal is recommended every 1–3 years to prevent buildup that accelerates floor corrosion. High-pressure washing removes scale and biofilm from all internal surfaces. All wash water and debris must be captured and disposed of per local environmental regulations, not discharged to storm drains.
Stage 3: Surface preparation via media blasting
Surface preparation is the single most important technical step in the entire workflow. Inadequate cleaning leads directly to coating failure, regardless of coating quality. Abrasive blasting removes all residual rust, old coatings, mill scale, and contaminants to achieve the surface profile specified by the coating manufacturer, typically SSPC-SP 10 Near-White Metal or SSPC-SP 6 Commercial Blast for less severe conditions. The surface preparation workflow must be completed and inspected before any coating is applied. Humidity and dew point readings must confirm acceptable conditions at the time of blasting and coating.
Pro Tip: Blast and coat in the same shift whenever possible. Freshly blasted steel begins to flash rust within hours in humid Florida conditions. Any visible rust bloom requires re-blasting before coating proceeds.
Stage 4: Structural repairs
Repairs follow surface prep so that the bare metal condition is fully visible. Welders patch pinholes, cracks, and thinned floor sections identified during the thickness survey. Seam sealants address weld joints and penetration points. Any repair that involves welding inside a tank requires hot-work permits and continuous atmospheric monitoring. Repairs must be completed and inspected before coating begins.
Stage 5: Coating and lining application
Coating selection depends on tank service, substrate condition, and regulatory requirements. Potable water tanks require NSF 61-certified coatings. Industrial tanks have more flexibility but still require coatings rated for immersion service. Application follows the manufacturer’s data sheet for wet film thickness, dry film thickness, and recoat windows. Multiple coats are standard. Each coat requires a dry film thickness check before the next coat proceeds.
Stage 6: Testing, reassembly, and final quality checks
The completed tank undergoes a hydrostatic fill test to confirm structural integrity and check for leaks at all repaired areas. Holiday detection testing uses an electrical spark tester to identify pinholes in the coating film. Standard maintenance workflow includes coating condition assessments every five years. The tank is then refilled, and water quality samples confirm no coating contamination before the tank returns to service.
How do coating systems and repair methods compare for different tank conditions?
Coating and repair selection is where managers most often make costly mistakes. The right choice depends on tank material, current condition, service type, and budget.
| Coating/Method | Best for | Key advantage | Key limitation |
|---|---|---|---|
| Epoxy (two-part) | Steel tanks, potable and industrial | High chemical resistance, long service life | Rigid; can crack on flexing substrates |
| Polyurethane topcoat | Exterior surfaces, UV exposure | Excellent UV and abrasion resistance | Not suitable as a standalone immersion coating |
| Flexible liner systems | Aging steel with irregular surfaces | Containment independent of substrate; reduces hot-work risks | Higher material cost; requires careful seam work |
| Patch repair only | Isolated defects, sound surrounding metal | Low cost, minimal downtime | Fails to address systemic corrosion; high repeat rate |
| Full recoating | Tanks with widespread coating breakdown | Resets the protection system entirely | Higher upfront cost and longer downtime |
Flexible lining systems are favored for aging steel tanks with irregular internal surfaces. They provide containment independent of the base substrate and reduce hot-works risks compared to welded repairs. For potable water tanks, NSF 61 certification is a hard regulatory requirement, not a preference. Industrial water tanks used for process or fire suppression have more coating options but still require immersion-rated systems.
Pro Tip: Request the coating manufacturer’s technical data sheet and confirm the NSF 61 listing number before approving any coating for a potable water tank. A verbal assurance from a contractor is not sufficient for regulatory compliance.
Full refurbishment is typically more cost-effective and reliable than repeated isolated repairs for tanks with systemic corrosion. Patch repairs on a tank with widespread coating breakdown are a short-term fix that delays the inevitable while adding cost.
What are the most common mistakes in tank restoration workflows?
Most water tank restoration failures trace back to a small set of recurring errors. Recognizing them before a project starts is the most cost-effective form of quality control.
- Skipping thorough surface preparation. Coating applied over contaminated or inadequately blasted steel will delaminate. No coating system compensates for poor surface prep.
- Patching without diagnosing the root cause. Premature tank failures often occur because surface rust and peeling paint are treated cosmetically rather than structurally. Address the cause, not just the symptom.
- Ignoring confined space protocols. Confined space incidents inside water tanks are fatal. Every entry requires a permit, atmospheric testing, and a trained attendant outside the tank.
- Failing to maintain documentation. Cold water storage tanks must be inspected at least annually, and all records kept for a minimum of five years. Missing logs fail audits even when the physical work is excellent.
- Deferring minor defects. Early intervention on minor defects is cost-effective in the long term. A small floor pit costs far less to repair than a corroded floor section requiring full replacement.
“Failure to maintain documentation can lead to compliance failures regardless of physical work quality.” — Water tank maintenance and Legionella control guidance
Pro Tip: Build your water tank maintenance checklist into your facility’s CMMS (computerized maintenance management system). Scheduled inspection triggers prevent the deferred maintenance cycle that leads to emergency restorations.
What I’ve learned after 20 years of tank restoration projects
The most expensive mistake I see facility managers make is committing to a repair approach before completing a proper diagnostic inspection. A tank that looks like it needs a spot weld and a touch-up coat often reveals widespread floor thinning once the sediment is removed and ultrasonic readings are taken. Skipping that diagnostic step leads to a patch repair that fails within two years, followed by a full refurbishment that should have happened the first time.
The second pattern I see repeatedly is undervaluing record-keeping. Managers who maintain clean inspection logs, coating application records, and repair histories have a significant advantage when regulators, insurers, or procurement teams ask for documentation. Those records also make the next restoration cycle faster and cheaper because the contractor starts with a complete picture of the tank’s history.
My recommendation for aging steel tanks with uneven internal surfaces is to specify a flexible lining system rather than a rigid epoxy. Rigid coatings applied over irregular substrates crack at stress points. Flexible liners accommodate minor substrate movement and reduce the need for hot-work permits inside the tank. The upfront cost is higher, but the service life and compliance record justify it every time.
Integrating the tank restoration process into a broader preventive maintenance plan is the single change that produces the most consistent long-term results. Tanks that receive regular maintenance attention rarely reach the point of emergency restoration.
— Southernsandblastingandpainting
How Southernsandblastingandpainting supports your tank restoration projects
Southernsandblastingandpainting brings over 20 years of experience in surface preparation and industrial coatings to municipal and industrial water tank projects across Central Florida. The team specializes in abrasive blasting, NSF-compliant coating application, and full tank refurbishment workflows that meet OSHA confined space requirements and regulatory documentation standards.

Whether you need a complete sandblasting and coating service for a municipal storage tank or targeted surface preparation for an industrial process tank, Southernsandblastingandpainting delivers work that holds up to inspection. The team’s sandblasting equipment and coating expertise reduce downtime and eliminate the repeat-repair cycle that drains maintenance budgets. Contact Southernsandblastingandpainting to schedule a diagnostic inspection and get a restoration plan built around your tank’s actual condition.
Key takeaways
A complete water tank restoration workflow requires sequential execution of inspection, surface preparation, structural repair, coating, and testing. No single stage can be skipped without compromising the result.
| Point | Details |
|---|---|
| Inspection drives all decisions | Ultrasonic thickness mapping and root-cause diagnosis must precede any repair commitment. |
| Surface prep determines coating life | Abrasive blasting to SSPC-SP 10 or SSPC-SP 6 is the foundation of every durable coating system. |
| Coating selection must match service type | Potable water tanks require NSF 61-certified coatings; flexible liners suit aging steel with irregular surfaces. |
| Documentation is a compliance requirement | Inspection and cleaning records must be retained for a minimum of five years to satisfy audits. |
| Full refurbishment beats repeated patches | Systemic corrosion requires a complete restoration cycle, not isolated repairs that fail within two years. |
FAQ
What is a water tank restoration workflow?
A water tank restoration workflow is the sequential process of inspecting, draining, cleaning, blasting, repairing, coating, and recommissioning a water tank. The goal is to extend service life and maintain compliance with safety and regulatory standards.
How often should water tanks be inspected and cleaned?
Cold water storage tanks require inspection at least annually. Internal cleaning and sediment removal is recommended every 1–3 years, with full coating condition assessments every five years.
What surface preparation standard applies to water tank restoration?
Most water tank coating manufacturers specify SSPC-SP 10 Near-White Metal Blast for immersion service. SSPC-SP 6 Commercial Blast applies to less severe conditions or exterior surfaces.
When should a facility manager choose full refurbishment over patch repairs?
Full refurbishment is the correct choice when a tank shows systemic corrosion, widespread coating breakdown, or recurring patch failures. Isolated patch repairs are only appropriate when surrounding metal is structurally sound and the coating system is otherwise intact.
What records must be kept after a water tank restoration?
Regulatory requirements mandate retaining all inspection reports, cleaning logs, coating application records, and risk assessments for a minimum of five years. Missing documentation creates compliance failures independent of the quality of the physical restoration work.


