
Expect to pay between $500 and $1,000 for a typical parking lot restripe, with most jobs landing around $750. That figure moves fast based on a handful of variables you can spot before a contractor ever shows up.
- Lot size and layout — more stalls and longer lines mean more paint and labor time.
- Paint or material choice — water-based, solvent, epoxy, and thermoplastic all carry different price tags and lifespans.
- Mobilization, ADA stalls, and prep work — these add-ons can push a small job’s per-unit cost well above the average.
Regional labor rates and job-specific prep needs (crack filling, old paint removal) shift the number further. Use the unit rates below to turn your lot’s dimensions into a real estimate before you request bids.
Key Takeaways
The average parking lot restripe costs around $750, but the final price depends on lot size, paint material, mobilization fees, and ADA compliance requirements you should nail down before requesting bids.
| Point | Details |
|---|---|
| Know your baseline number | Budget $500–$1,000 for a typical restripe, averaging near $750, before add-ons. |
| Match material to traffic | Use thermoplastic or epoxy for accessible stalls and high-wear zones; standard paint elsewhere. |
| Get specs in writing | Require APWA/DOT paint standards, 15 wet mils minimum, and a one-year warranty in every bid. |
| Sequence maintenance correctly | Stripe only after sealcoat fully cures to avoid bleed-through and repeat costs. |
| Choose a qualified contractor | Southern Sandblasting & Painting verifies layout, handles ADA compliance, and sequences prep and striping as one coordinated project. |
Table of Contents
- How Much Does Parking Lot Striping Cost Per Stall or Foot?
- Which Paint or Material Should You Choose?
- What Add-Ons and Prep Work Change the Final Price?
- How Often Should You Restripe and How Long Does It Take?
- What Should You Require in a Contractor Quote?
- Is DIY Striping Ever a Good Option?
- Does the Time of Year Affect Striping Prices and Availability?
- A Contractor’s Take on Getting This Right
- How Southern Sandblasting & Painting Handles Commercial Striping Projects
- Where to Verify Specs and Pricing Before You Sign
- Frequently Asked Questions
- Sources
How Much Does Parking Lot Striping Cost Per Stall or Foot?
Contractors price jobs three ways, and knowing all three lets you sanity-check any bid that lands on your desk. Per-stall pricing works best for small lots with simple layouts. Per-linear-foot pricing suits jobs with long runs of single lines, like fire lanes or property boundaries. Per-square-foot pricing tends to show up on large commercial contracts where the whole lot gets treated as one scope of work.
Two quick examples show how this plays out:
- A 25-stall lot with standard single lines might run $500–$900 total once you factor in a mobilization fee, since setup and equipment transport are fixed costs regardless of lot size.
- A 100-stall lot with cross-hatched accessible stalls and directional arrows could land between $1,800 and $3,500, with the per-stall rate actually dropping as the job scales.
That last point catches a lot of people off guard: smaller lots often cost more per square foot because mobilization and setup are fixed regardless of size. A mobilization fee of $150 to $350 barely registers on a 200-stall corporate campus, but it can double the effective rate on a five-stall strip mall lot. Always ask whether mobilization is bundled into the quote or itemized separately.
Which Paint or Material Should You Choose?
Material choice is the single biggest lever on both upfront cost and how often you’ll pay for this again. Water-based acrylic is the cheapest and fastest to apply but wears out quickest. Thermoplastic costs the most upfront but can outlast three or four repaint cycles of standard paint.
| Material | Typical lifespan | Upfront cost | Best use | Visibility | Application complexity |
|---|---|---|---|---|---|
| Water-based acrylic | 12–18 months | Low | Standard lot lines, low-to-moderate traffic | Good when fresh, fades faster | Simple, standard spray equipment |
| Solvent/alkyd | 18–24 months | Low to moderate | General-purpose striping, moderate traffic | Good | Simple to moderate |
| Epoxy | Multi-year in many settings | Moderate to high | High-traffic decks, chemical exposure areas | Very good | Requires mixing, controlled cure time |
| Thermoplastic | 3–10 years | High | Accessible stalls, stop bars, crosswalks | Excellent, high retroreflectivity | Specialized equipment, heat application |
Facility Parking Guide notes that thermoplastic’s 5 to 10 year service life makes it the standard choice for markings that need to stay legible the longest and get the most foot or vehicle traffic. That durability comes at a real cost premium, though, so it rarely makes sense to thermoplastic an entire lot.
- Reserve epoxy or thermoplastic for accessible stalls, stop bars, and crosswalks.
- Use water-based or solvent paint for standard directional lines and low-traffic zones.
- Match material to expected wear, not just to lowest bid price.
Pro Tip: Save thermoplastic and epoxy budgets for the markings that carry compliance or safety weight, and let standard paint handle the rest of the lot.
What Add-Ons and Prep Work Change the Final Price?
The base per-square-foot rate rarely tells the whole story. Add-ons and prep work are where quotes diverge the most, and they’re also where vague contractor scopes hide surprise costs.
Common add-ons and their typical incremental pricing:
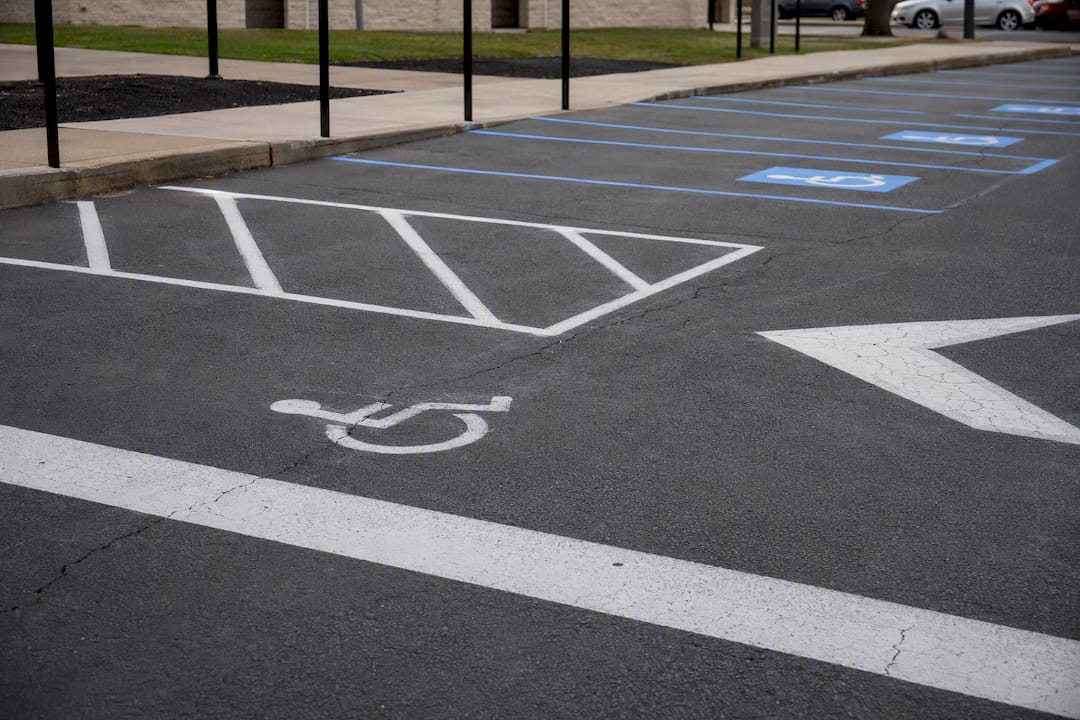
- Accessible (ADA) stall stencils: $25–$50 each
- Curb painting: $1–$4 per linear foot
- Custom stencils or logos: $20–$200 each
- Crosswalk striping: $50–$100
- Fire lane or loading zone painting: $25–$75 each
- Reflective or thermoplastic upgrades: $100–$500 or more
- Wheel stops: $40–$100 each
Prep work carries its own cost logic. Crack filling and patching can add several hundred to several thousand dollars depending on pavement condition, and power washing or old-line removal becomes necessary whenever a layout change means the new stalls won’t line up with the old paint. Skipping this step to save money usually means ghost lines showing through the new markings within a season.
That regional swing is one reason two facility managers comparing notes across state lines often see very different numbers for what looks like the same job.
Pro Tip: Walk the lot with your contractor before any paint goes down to confirm ADA stall counts, stop bar placement, and directional arrows. Corrections after striping cost significantly more than catching a layout error on a pre-work walk-through.
How Often Should You Restripe and How Long Does It Take?
Repaint frequency tracks directly with the material you chose. Budgeting for the right cadence now prevents a scramble later when faded lines start creating liability questions.
- Water-based acrylic: repaint every 12–18 months
- Solvent/alkyd paint: repaint every 18–24 months
- Thermoplastic in high-traffic zones: 3–5+ years before touch-up is needed
A standard restripe takes about one day for a small lot and one to two days for a medium-sized commercial property, factoring in layout marking, application, and cure time before reopening to traffic.
Pro Tip: If you’re sealcoating and striping in the same maintenance window, stripe only after the sealcoat has fully cured per the supplier’s guidance. Striping too early causes bitumen bleed-through that discolors fresh lines.
What Should You Require in a Contractor Quote?
An apples-to-apples comparison depends on every bidder pricing the same scope. Loose or vague quotes are where budgets get blown after the contract is signed.
Require these specs in writing before you approve any bid:
- Paint type and specification meeting APWA or your state DOT traffic paint standards
- Minimum application rate of 15 wet mils
- Exact stall dimensions and total count
- ADA compliance documentation, including van-accessible stall counts and stencil dimensions
- A warranty of at least one year
- Proof of contractor insurance and a portfolio of comparable projects
| Ask the contractor | Why it matters |
|---|---|
| Crew size and working hours | Affects how fast the lot reopens |
| How mobilization is charged | Prevents surprise line-item fees |
| Line-removal method and cost | Old paint removal can add significant labor time |
| Sequencing with sealcoating | Wrong order risks bleed-through and rework |
| Sample photos of past projects | Confirms real experience with similar lot types |
Normalize competing bids by listing every add-on separately, stencils, curb painting, line removal, rather than accepting one bundled number. Confirm the application rate and paint spec are actually written into the scope, not just mentioned in a sales call. And insist on a documented pre-striping site walk.
Red flags worth walking away from: no proof of insurance, a quote with no warranty language, specs that never mention a paint standard, or a mobilization fee that’s suspiciously low with no explanation for how the contractor is cutting corners elsewhere.
Is DIY Striping Ever a Good Option?
DIY makes sense for very small lots, temporary markings, or minor touch-ups between professional restripes. Low-cost tape, aerosol paint, and small stencils handle these jobs fine.
For anything commercial, ADA-regulated, or involving a layout change, hire a professional. The tradeoffs are straightforward:
- DIY saves money upfront but rarely matches the durability or line straightness of professional equipment.
- Compliance risk is real — ADA stencil dimensions and placement have legal requirements a spray can and a steady hand won’t guarantee.
- Professional rigs use guided striping machines and specified paint application rates that consumer equipment can’t replicate.
Pro Tip: If your lot has any accessible stalls, fire lanes, or shared-use areas, treat it as a professional job, not a weekend project.
Does the Time of Year Affect Striping Prices and Availability?
Striping season runs heaviest from late spring through early fall in most of the country, when dry weather and warmer pavement temperatures let paint cure properly and quickly. That demand surge means contractors book up faster and sometimes hold firmer on pricing during peak months.

Scheduling in the shoulder seasons, early spring or late fall, can work in your favor if your climate allows it. Contractors have more open calendar slots, and some offer modest discounts to fill gaps between larger seasonal jobs. The tradeoff is a narrower weather window: paint needs adequate temperature and dry conditions to cure correctly, so a late-fall job pushed too close to winter risks delays or a compromised cure.
Coordinating with sealcoating adds another layer of timing pressure. Many facility managers try to schedule both jobs in the same maintenance window to save on a second mobilization fee, but that only works if the sealcoat cures fully before striping begins. Rushing the sequence to hit a seasonal deadline is how you end up with bleed-through and a redo.
If your property is in a region with a hard winter, plan your restripe for the fall before the ground freezes or the spring as soon as temperatures stabilize. Waiting until midsummer in hot climates can also backfire. Extremely high pavement temperatures can affect how paint sets, and contractors may push back start times to early morning hours only, stretching the timeline for larger lots. Booking six to eight weeks ahead of your target window gives you the best shot at your preferred contractor and a fair price.
A Contractor’s Take on Getting This Right
Verify the layout before the crew arrives, sequence sealcoating first, and confirm the paint spec in writing. Qualified contractors back that work with real warranties.
How Southern Sandblasting & Painting Handles Commercial Striping Projects
If the checklist above feels like a lot to manage on your own, that’s exactly the gap a qualified contractor should close for you. Southern Sandblasting & Painting works with commercial, municipal, and industrial clients across Central Florida on projects where compliance documentation, application specs, and layout verification aren’t optional; they’re the job.
Our crews handle layout verification and ADA-compliant marking before any paint goes down, apply thermoplastic and epoxy where high-traffic durability matters, and sequence striping correctly after sealcoating or surface prep so you’re not paying twice for the same lot. When a restripe requires line removal or deeper surface preparation first, we handle that as part of one coordinated scope instead of leaving you to manage two separate vendors. If you’re planning a restripe for a commercial property, municipal lot, or multi-building facility, request a site visit through our sandblasting and surface prep services page and we’ll walk the property with you before we quote a number.
Where to Verify Specs and Pricing Before You Sign
Confirm these details against primary sources before finalizing any contract:
- Cross-check unit rates and mobilization fees against HomeAdvisor’s pricing data.
- Review paint standards and application rates through Facility Parking Guide’s striping specifications.
- Check your state DOT’s traffic paint specifications and current ADA technical guidance directly, since requirements vary by jurisdiction.
Save the contractor-spec checklist from this guide before you issue an RFP, it makes comparing bids far faster.
Frequently Asked Questions
What is the average cost to stripe a parking lot in 2026?
Most projects fall between $500 and $1,000, averaging around $750, though large lots, ADA requirements, and premium materials like thermoplastic push costs higher.
How much does it cost per parking stall to restripe?
Per-stall pricing ranges from about $4 to $70 depending on lot size, layout complexity, and whether the contractor bundles mobilization into that figure or lists it separately.
How often should a commercial parking lot be restriped?
Water-based paint typically needs a repaint every 12 to 18 months, solvent-based paint lasts 18 to 24 months, and thermoplastic in high-traffic zones can go 3 to 5 years or longer before touch-up.
What are the standard dimensions for a handicap parking stencil?
Van-accessible stall widths and stencil dimensions are governed by ADA technical guidance and often modified by state DOT rules, so confirm exact measurements with your local building code office before the contractor marks the lot.
Should I sealcoat before or after striping?
Sealcoat first, then stripe only after the sealcoat has fully cured according to the supplier’s guidance. Striping too early causes bitumen to bleed through and discolor the new lines.
Is DIY parking lot striping worth it?
DIY works for very small lots, temporary markings, or minor touch-ups using tape or aerosol paint. Commercial lots, ADA-regulated spaces, and any layout changes call for a professional contractor with proper equipment and compliance documentation.
Sources
- Parking Lot Striping: Standards, Specifications, and Maintenance | Facility Parking Guide
- How Much Does Parking Lot Striping Cost in 2026? | HomeAdvisor
- When to restripe a parking lot | Seton


